Welcome back to my Cricut Explore Essentials series!
In this series, I’m showing you how to design your own simple Cricut Explore projects using Cricut Design Space. Along the way you will learn some of the features of the design software. If you missed the first project in the series, don’t worry! You can find that tutorial by clicking on the link below:
Cricut Explore Essentials Part 1: How to Make Gorgeous Banners
This post contains affiliate links. For more information, see my disclosures here.
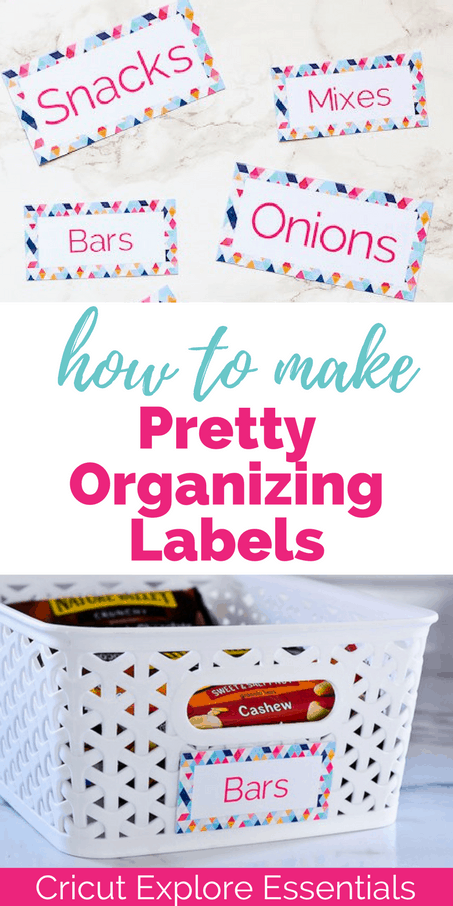
In this second project, I’m going to show you how to make pretty organizing labels using the “print then cut” feature of Cricut Design Space. For this project you don’t have to buy any images from the Cricut image library because I’m going to teach you how to create the design you need for FREE!
In this tutorial we are going to be using the “print then cut” feature, which means our design will be printed on a home printer and then cut out using the Cricut. Before cutting out your project, make sure your machine is properly calibrated for using print then cut. Follow the instructions here to calibrate your machine.
Ok, now let’s get started!
How to Make Pretty Organizing Labels
Materials:
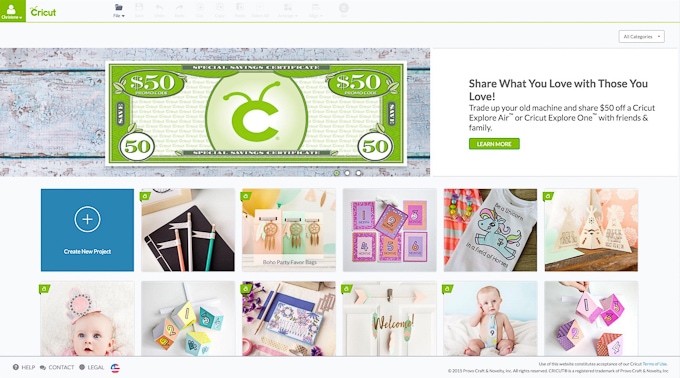
First open the Cricut Design Space by clicking here and selecting “Cricut Design Space” from the top right of the screen. This will open up the Design Space main screen. Click on the first box with the “+” sign that says “Create New Project.” This will open a new blank project for you to work from.
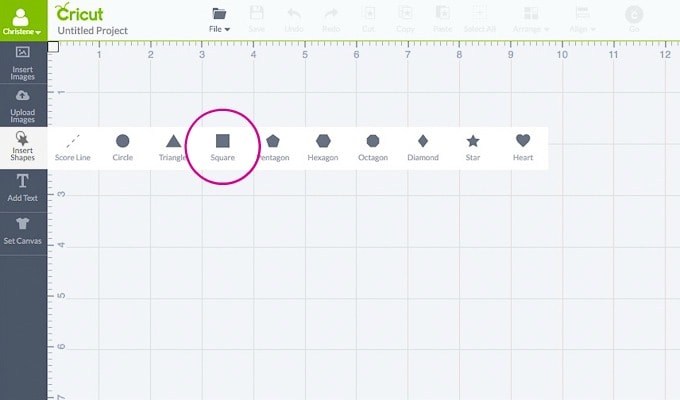
The labels that we want to make are going to be rectangles. First, on the left-hand side of the screen, click on “Insert Shapes” and then select the square.
Rectangles are basically just stretched out squares, so we will need to change the shape. To adjust an image, first we need to unlock it. When an image is selected there are 4 icons shown around the border. One of these icons is shaped like a lock. Click on the lock and it will change to an unlocked lock. Now that the image is unlocked, you can stretch it in any direction and you can resize it to exact dimensions.
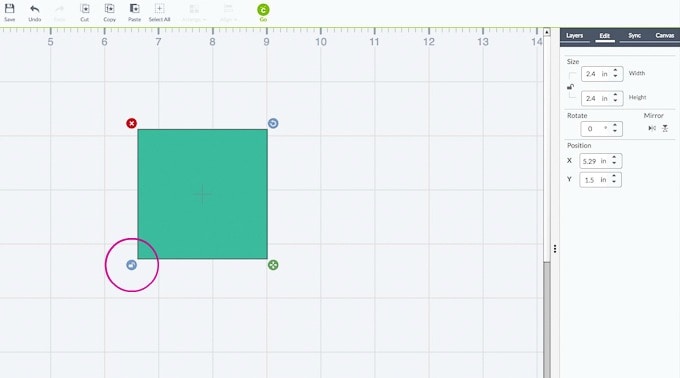
On the right-hand side of the screen under the “Edit” tab, resize the square to a width of 4” and a height of 2”.
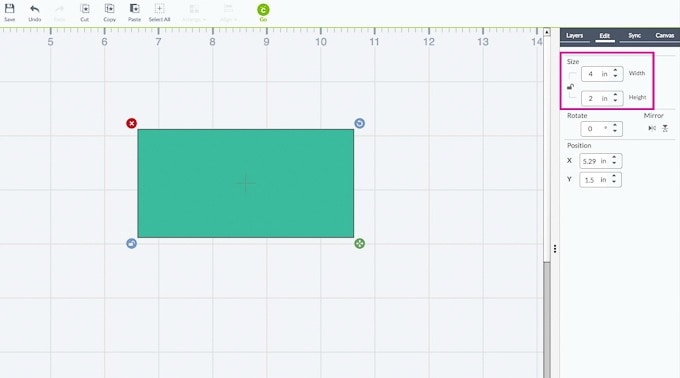
Now we have the basic label shape that we want. For this label design, we are going to create a few layers that will create the look we want. The first layer is the patterned background layer. For this design, we are going to be using a colorful geometric pattern as the background.
Get the Free Geometric Colorful Triangles Pattern
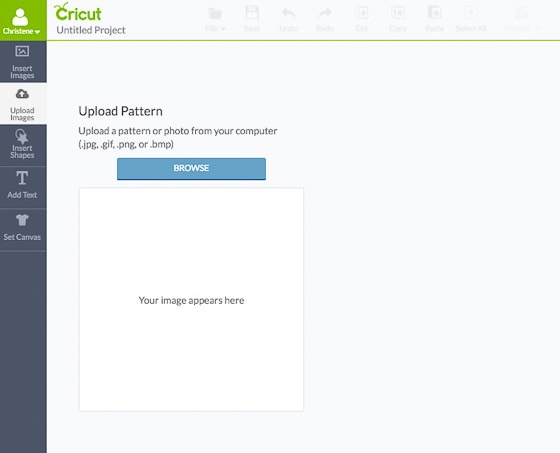
Cricut Design Space has patterns available through the image library for purchase, but I’m going to show you how to upload your own pattern to use in the design. On the left-hand side of the screen select “Upload Images.” This will bring up a menu with two selections – “Image” or “Pattern Fill.” Select the “Upload Pattern” button.

Then select the “Browse” button and navigate in your computer to the pattern file that we will be using.
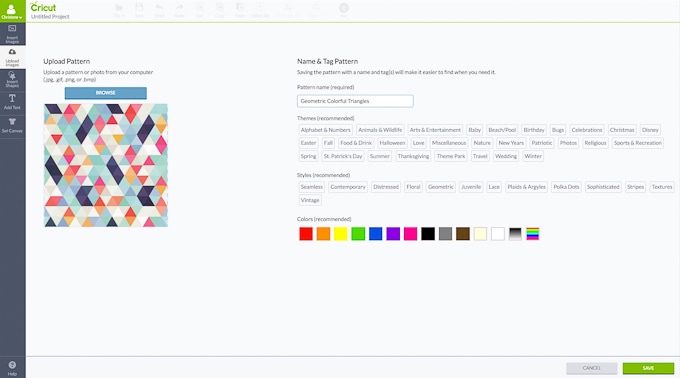
Once the pattern is opened in Design Space, you can give it a title and also customize some of its attributes. I named this pattern “Geometric Colorful Triangles” and then clicked “Save.” After you save your pattern, Design Space will bring you back to the menu for “Upload Images.” Just select “Cancel” to leave this menu and go back your design.
Now we want to apply this new pattern as the background “color” of our label. Currently, the background color of the rectangle is teal. To change the background color select the “Layers” tab. Then, for the image selected (the square) click on the scissors icon. This will bring up the “Layer Attributes” menu.
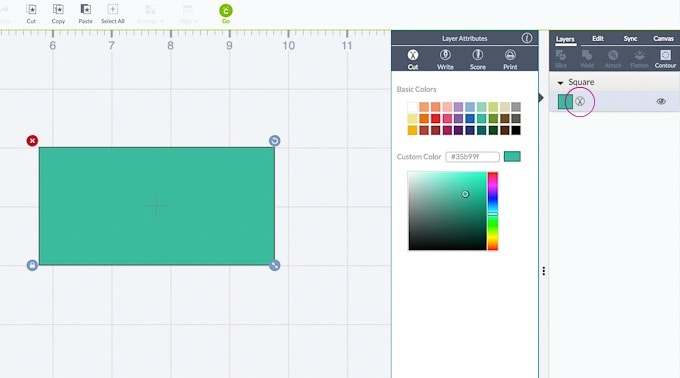
Right now, this image is set in Design Space to be cut, which is indicated by the scissors icon. To change the background to a pattern, an image must be set in Design Space to be printed. That is because if you want your final design to be a customized pattern, the only way for that pattern to show up on your physical design is for it to be printed onto paper by your home printer. Select the “Print” icon to set the layer to be printed. This brings up a sub-menu under the icons with the words “Colors” and “Patterns.” Select “Patterns” to bring up the patterns in Cricut Design Space.
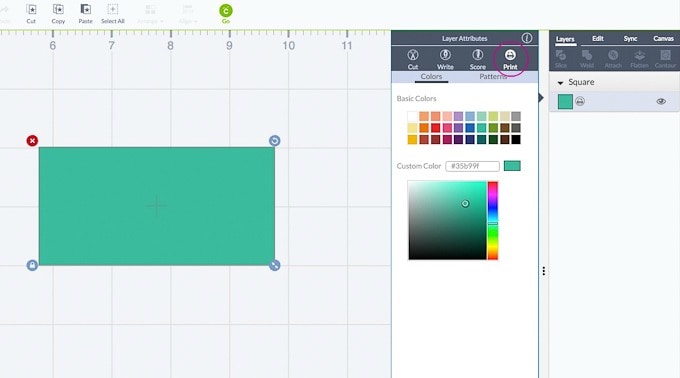
Now in this view, we can see some of the Cricut Design Space patterns but we can’t see our uploaded pattern.
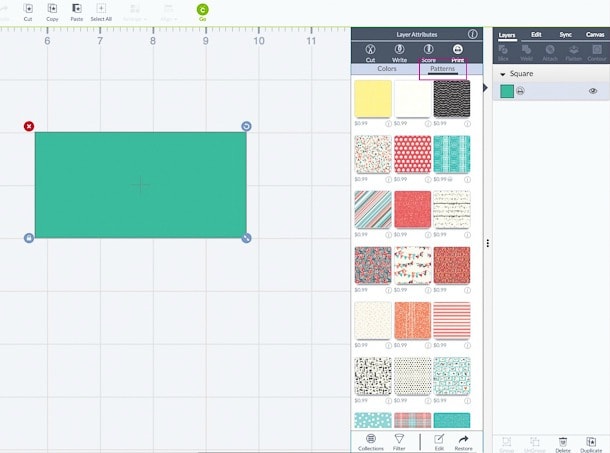
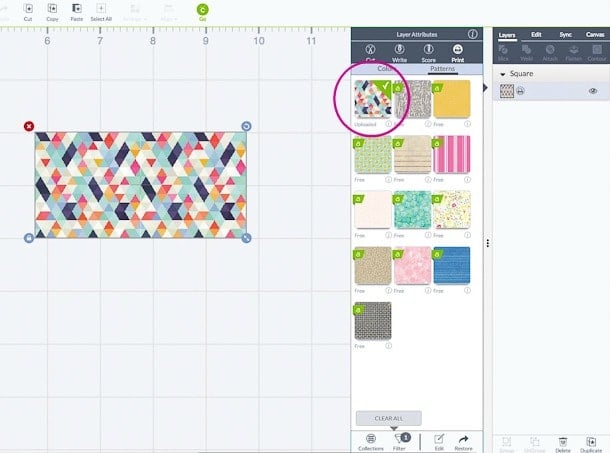
At the bottom of the “Layer Attributes” menu, select the “Filter” button. Then select “My Patterns” from the filter list.
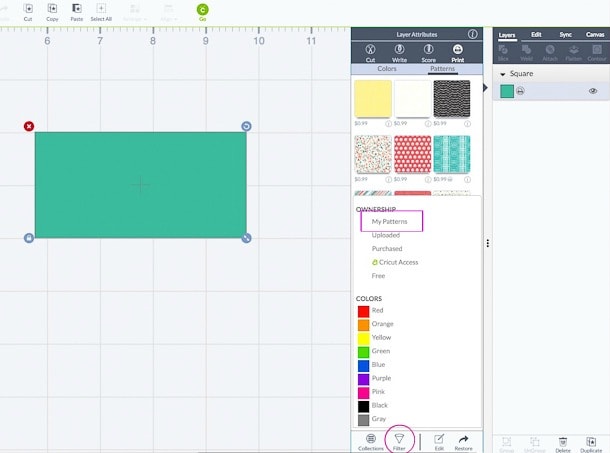
Now you can see the pattern that we uploaded in the top left corner of the “Layer Attributes” menu. Select the pattern and it will be applied to the rectangle shape.
Next, we are going to create the second layer of the design – the white text area of the label. Insert another square shape into your design by selecting “Insert Shapes” and then selecting the square.
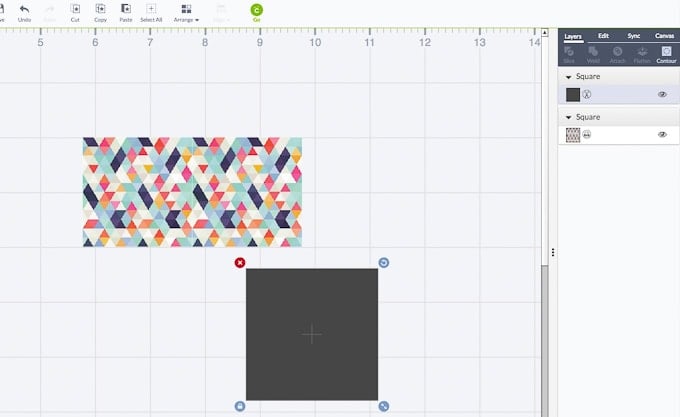
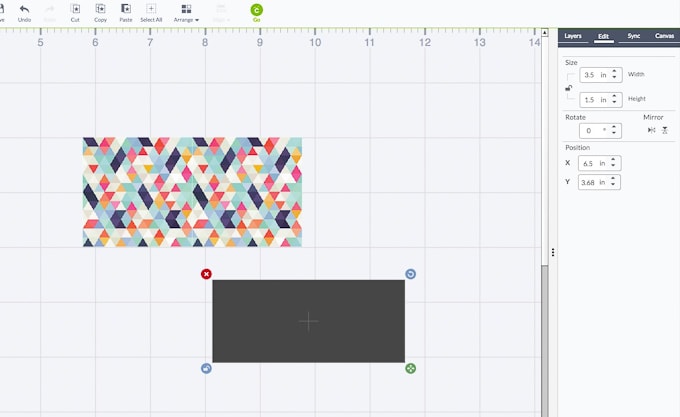
Unlock the image and resize it to be a width of 3.5” and a height of 1.5”.
This layer is going to sit on top of the patterned background, so drag the image onto the larger rectangle.
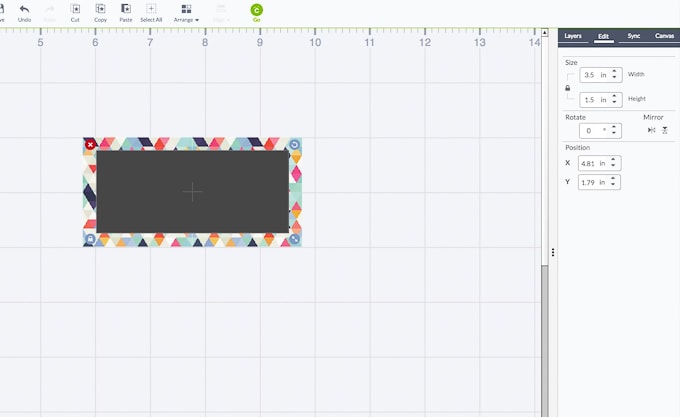
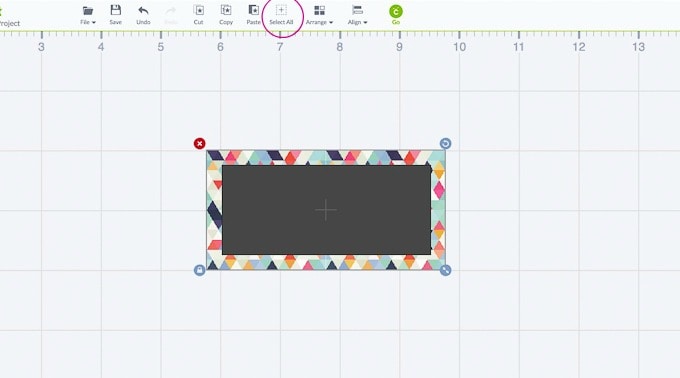
I eyeballed the placement and it looks pretty centered, but we want to make sure the two rectangles are perfectly centered. To do this, click on the “Select All” button from the toolbar at the top of the screen. While both shapes are selected, click on the “Arrange” drop down at the top of the screen.
Then select “Center.” This will center both images on top of each other.
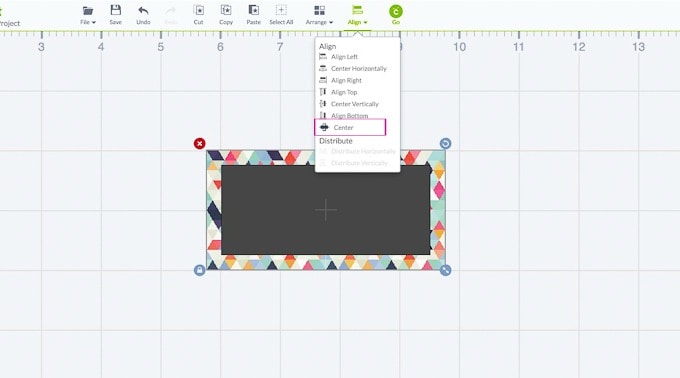
Since we made the second rectangle 0.5” smaller in each dimension, we now have a 0.25” patterned border around the smaller rectangle.
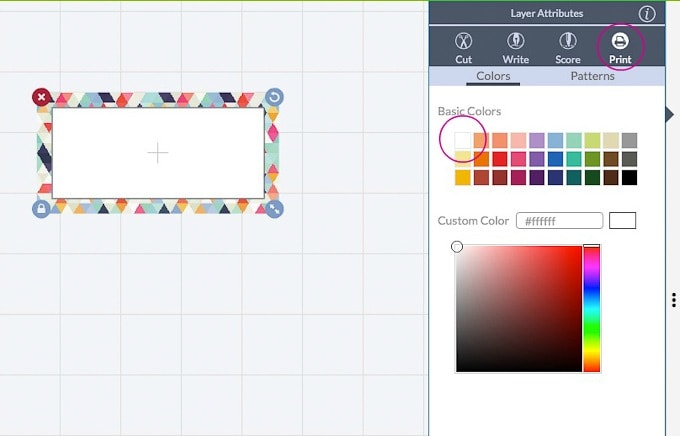
This layer is going to be used as a background for our label text, so we need to change the color to white. To change the color, select the smaller rectangle and select the “Layers” tab. Then click on the scissors icon next to the highlighted image. This will bring up the “Layer Attributes” menu. Under “Basic Colors” select the white box. Since we want this layer to be printed on top of the patterned background, we also need to change this layer to be printed. Select the “Print” icon to set the white rectangle layer to be printed.
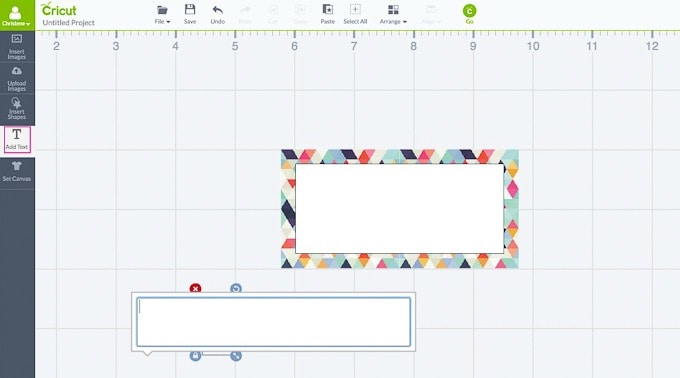
Next we are going to add the third part of the label design – text. On the left-hand side of the screen select “Add Text.” This will insert a new text box into the design. Type in the label text you want – I typed in “Snacks” because the labels I’m making in this project are for pantry containers. Of course, you can customize your label text for whatever organizing project you are working on.
Cricut Design Space always defaults to the font “Cricut Alphabet.” This can be changed by selecting the text box and then, on the right-hand side of the screen, selecting the “Edit” tab. For text “images” the “Edit” tab options change to include text-editing elements.
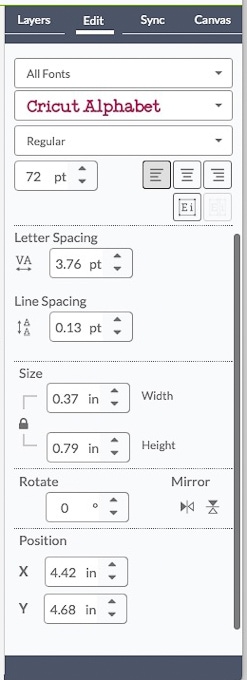
Here you can change the font to any system font that you have installed on your computer. For this project, I used to font “Raleway” for my label text.
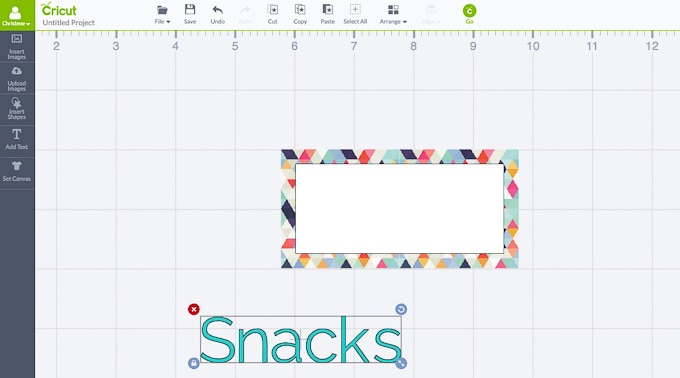
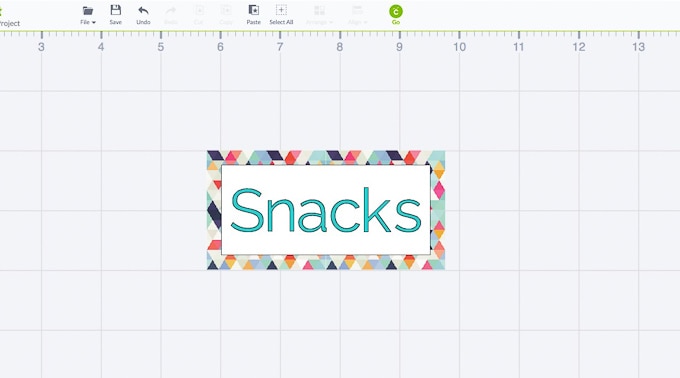
I resized my text to a size that would fit my label by stretching the arrow icon in the corner of the textbox. Then, drag the text onto the white rectangle. Just like with the other layers we want to make sure the text is centered with the two other shapes. Click on the “Select All” button from the toolbar at the top of the screen. With all three images selected, click on the “Arrange” drop down at the top of the screen. Then select “Center.”
Since we want this text to be printed on top of the white layer we need to change this layer to be printed. Select the text and then on the right-hand side of the screen select the “Layers” tab. Then click on the scissors icon next to the highlighted text. This will bring up the “Layer Attributes” menu. Select the “Print” icon to set the text layer to be printed.
The current color of the text is ok, but I really want the text to match my background pattern a little better. In the “Layer Attributes” menu we can change the color of the text. The Basic Colors selection is pretty limited, but underneath we can see a color spectrum to pick from as well as a Custom Color entry.
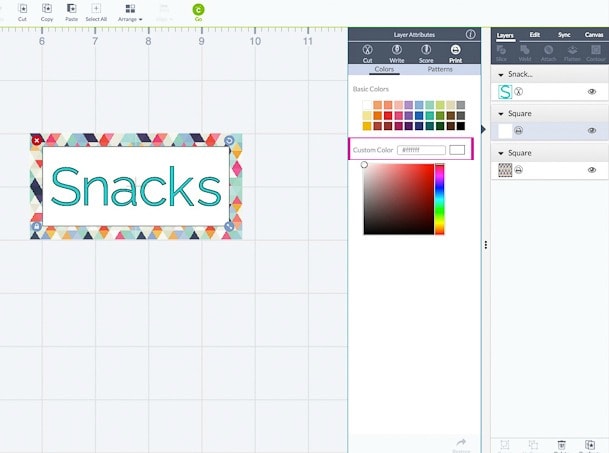
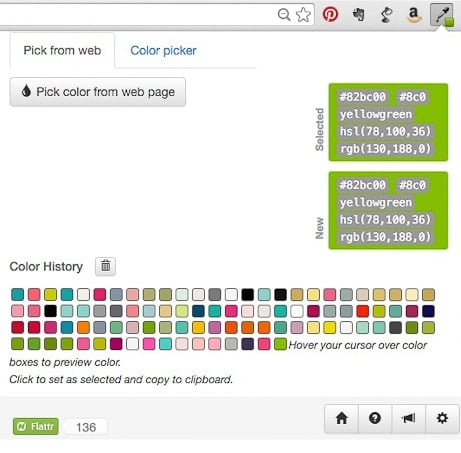
I want this to have be exact match, so I’m going to use a custom color. To use a custom color, we are going to use an extension for Chrome called “Eye Dropper.” This is an application that lets you pick a color from a web page and it will tell you the Color Hex Code. The Color Hex code is a unique code for a color that begins with a “#” sign. The Cricut Design Space Custom Color entry expects a Color Hex Code. To use the Eye Dropper tool, click on the icon and select “Pick color from web page.”
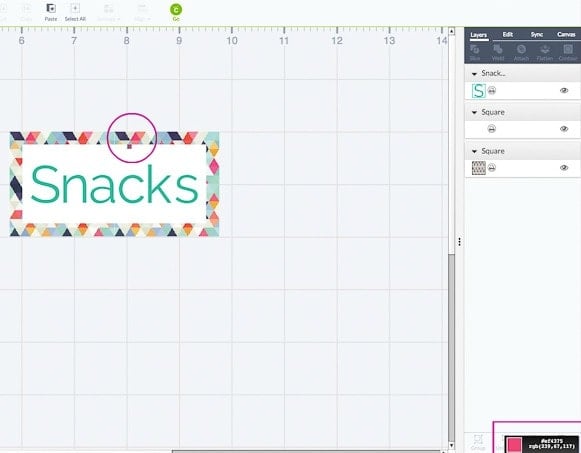
Now hover your cursor above a color on your screen. The unique Color Hex Code will appear in the lower right corner of the screen. When you are hovering over a color you want, click on the screen in that position. You can’t see my cursor in the following picture, but you can see the tiny square in the circled part of the screen. That is the preview of the color I am hovering over, and in the bottom of the screen there is more information about that color.
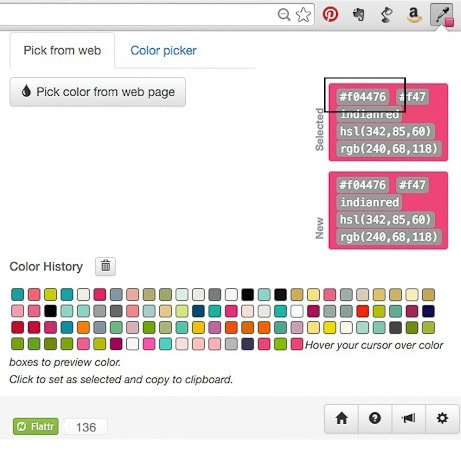
Once you have clicked on the color click on the Eye Dropper icon again to open the extension menu. You will now see the color you have selected in the top right of this window. The Color Hex Code is the 6 character code with the “#” sign at the beginning. Highlight this code and copy the text.
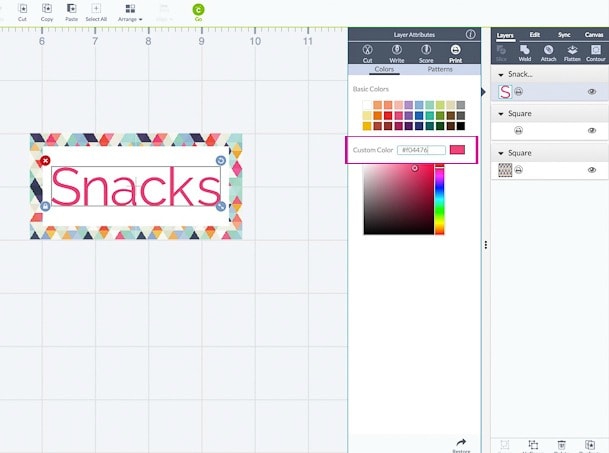
Back in Cricut Design Space, paste the Color Hex Code into the Custom Color entry field. The text will now change to your custom color. This color exactly matches the pink triangles!
Now that we have one label created, it’s easy to create a few more with different text labels. Select all three layers of the design – patterned background + white rectangle + pink text. You can double check that your layers are selected by looking at the image toolbar on the right side of the screen. Under the “Layers” tab you can see that each layer is highlighted gray when selected.
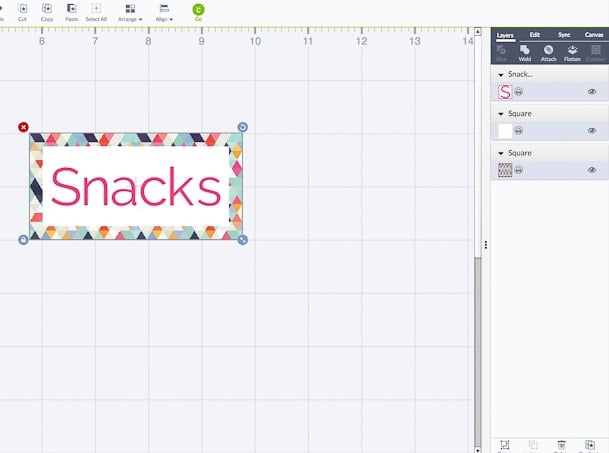
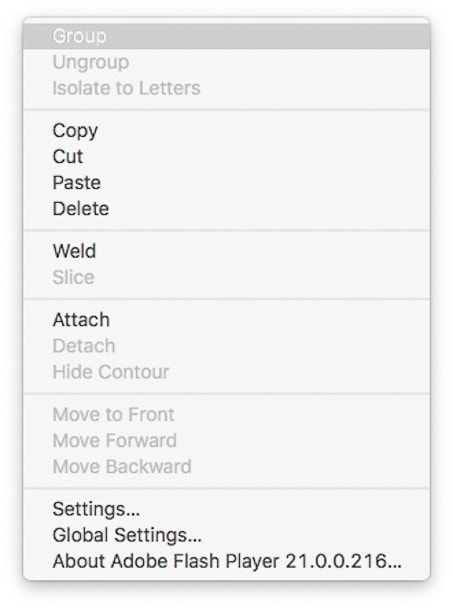
Right click on your images. Then click on “Group” to group the three layers together. I like to group my layers together before copying and creating a new label because it ensures I don’t miss a layer when I copy my design. It’s like putting virtual “glue” on all of my layers to make sure nothing moves.
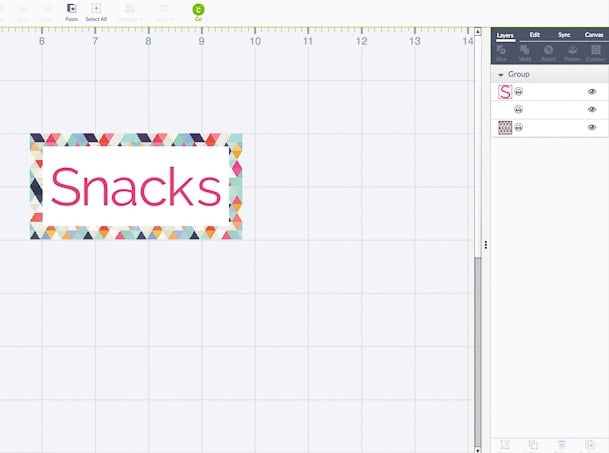
Now looking in the “Layers” tab, you can see that the layers are grouped together.
Copy and Paste the label to create a second label.
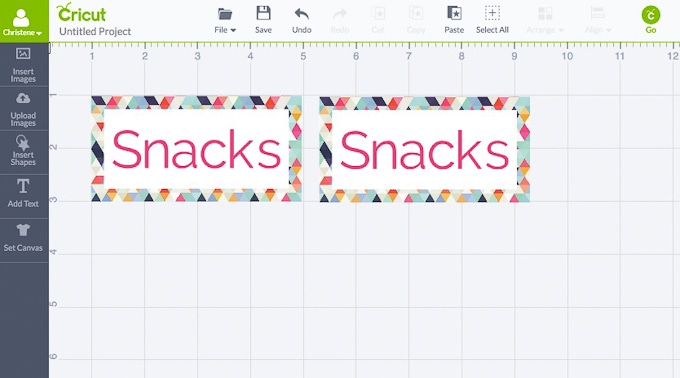
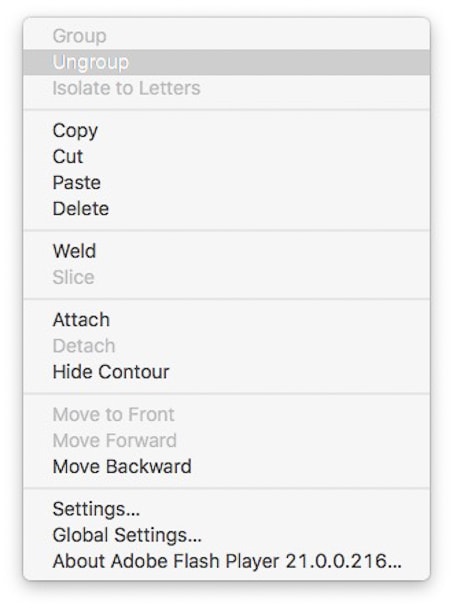
To change the text of the second label, we need to ungroup the layers. Right click on the second label and select “Ungroup.”
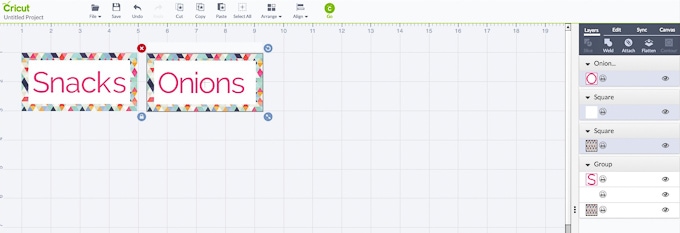
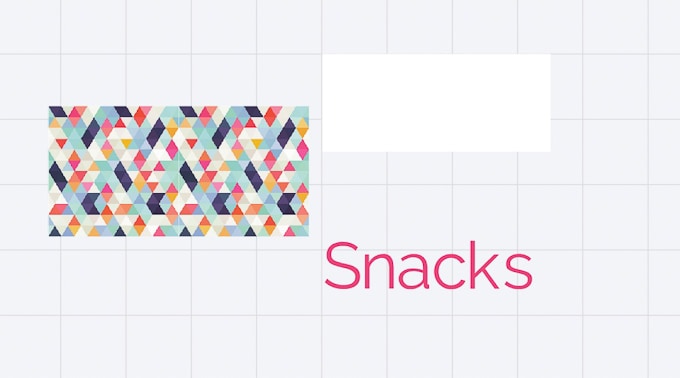
Now each layer is separated and available for editing. You can see in the “Layers” tab that the first label is still a grouped set of layers, but the second label is now three separate layers. Click on the text box layer to change the text.
Copy and Paste the first label as many times as needed to create as many labels as you need. Each time, remember to ungroup the new label. If you want a label that is a different size, you can separate out the three layers and resize as needed.
I made a smaller label by sizing the patterned rectangle to a width of 3” and a height of 1.5”. Then I resized the white rectangle to a width of 2.5” and a height of 1.”
Each time I created a new label I found it helpful to re-group the three layers of the label together. That way I knew which layers belonged with which label. Sometimes all of the shapes and images in the image toolbar can become confusing.
Group is a really helpful feature when copying and pasting or rearranging while designing, but it does nothing once you go to cut or print a design. It will not preserve the layout that you have set. Since we are using the print then cut feature for this project we will need to find another way to hold the position of all of our label layers.
Unlike the Cricut, which can cut out multiple “layers” of a design that are later assembled, your home printer cannot print in “layers.” It can only print a single image. At this point in our design, each of our labels is made of three “layers” that we need to combine into a single image. To do this we are going to use the “Flatten” feature. Starting with the first a label, select the “grouped” set of layers. Then on the image toolbar, select the “Flatten” button.

Now the three layers of the label are a “Flattened Set” as you can see in the image toolbar. Flattening means that all the layers have been turned into one single layer. The “Flatten” tool can also be used to change any layer from a cut layer into a printable layer. Flattening can always be undone by selecting “UnFlatten.” This will allow you to make changes to each layer individually again.
Repeat this process with each label to make each label into a single image.

For a print then cut project, the only size paper you can use is 8.5” X 11” since that is the only size paper a standard home printer will take. On top of that, Cricut has a “printable area” limitation that leaves room for the cut sensor marks that allow to Cricut to determine where your design is on the page. The “printable area” is different based on the internet browser you are using. For Chrome, the “printable area” is 5.5” x 8.” For Firefox, Safari, and Internet Explorer, the “printable area” is 6” x 8.5.”
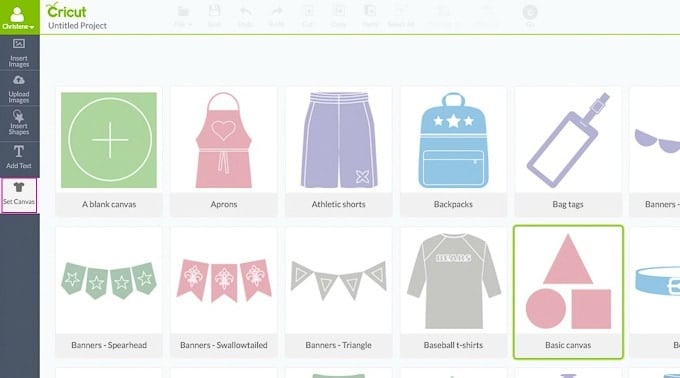
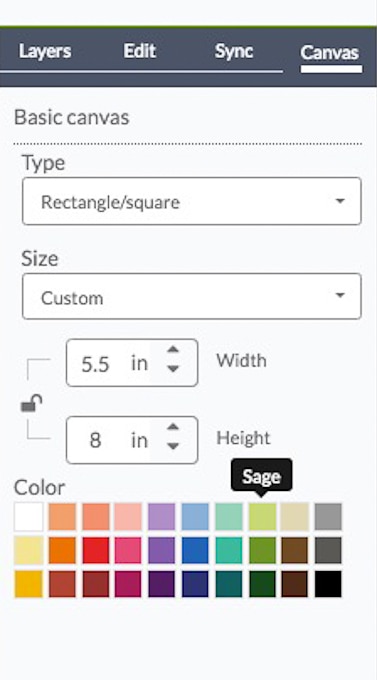
I’m using Chrome so my printable area is 5.5” x 8.” I always find it helpful to set a canvas to help visualize how your design will come out on the size material you are using. On the left-hand side of the screen, click on “Set Canvas” to open the canvas menu. Within this menu, you can choose from a variety of different “canvases” for your projects. Since we want to set up the cutting mat for a basic rectangle, select the “Basic Canvas” button.
Back on the main design space workspace, there is now a white outlined area representing the canvas. On the right-hand side toolbar, under the “Canvas” tab, make sure the type is set to “rectangle” and the dimensions match your “printable area” (for me that is 5.5” x 8”). To make it a little easier to see the “printable area” space, change the color to something brighter like green (Sage in Design Space).
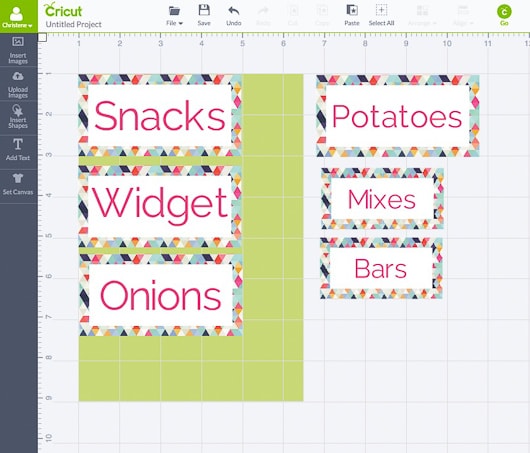
Now you can arrange your labels on the canvas. Since my labels are fairly large compared to the “printable area” this step isn’t as important. If you were making smaller labels, you might want to arrange your labels in a space-saving manner on the canvas and “Attach” them in place. I explained how to do this in my previous Cricut Explore Essentials tutorial for making gorgeous banners.
Once your labels are in place, select the “Go” button. You can see that to print all of my labels I will need two pieces of paper. The preview screen shows you the print layout and the cut sensor marks on the design. You can also see that the labels will be printed with a slight color bleed. This will make sure that there is no white space showing when the Cricut cuts out the label.
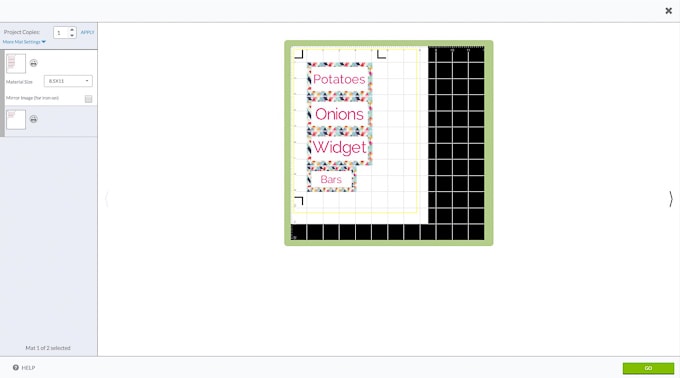
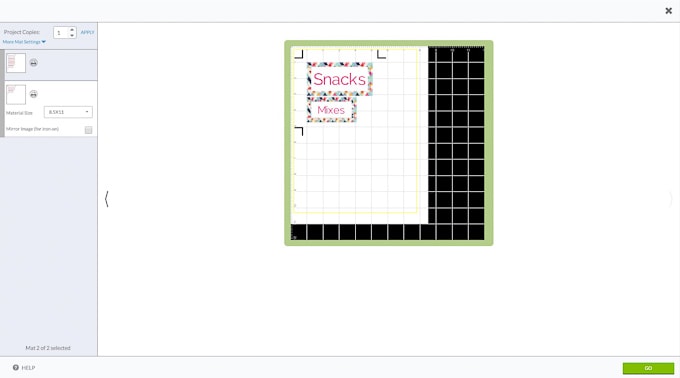
Select “Go” and you will be prompted by your home printer to print out the design. Only use 8.5” x 11” white paper when printing out print then cut designs. Otherwise, the Cricut will not be able to see the cut sensor lines. For sturdier labels, I recommend using a slightly heavier paper.
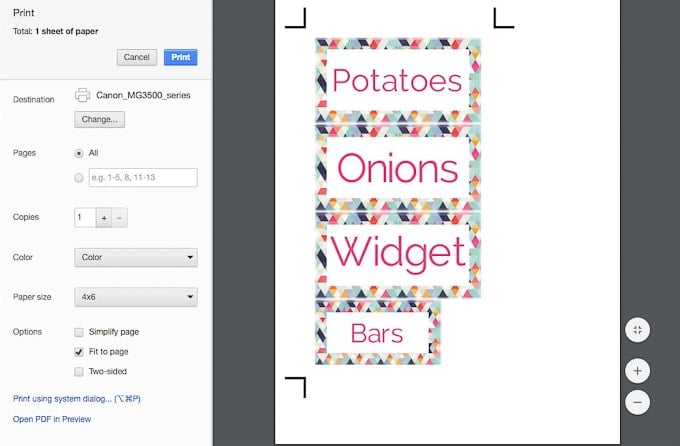
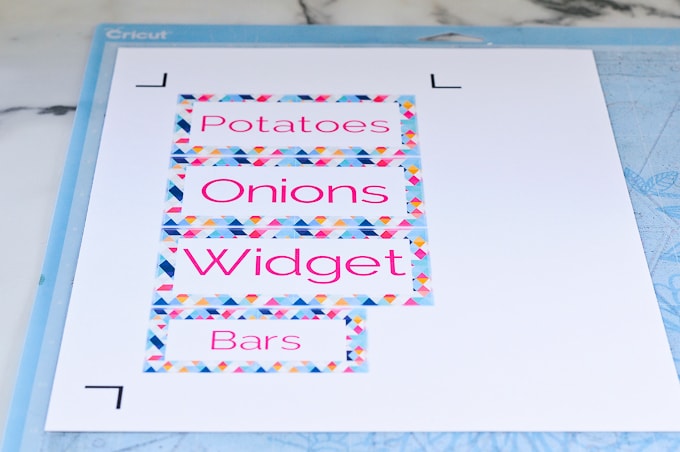
Once the design is printed, place the paper with the design in the top left corner of your cutting mat. Follow the instructions to load the paper and set the dial on the machine to the correct paper type. Once the images are cut out of the paper your labels are complete!
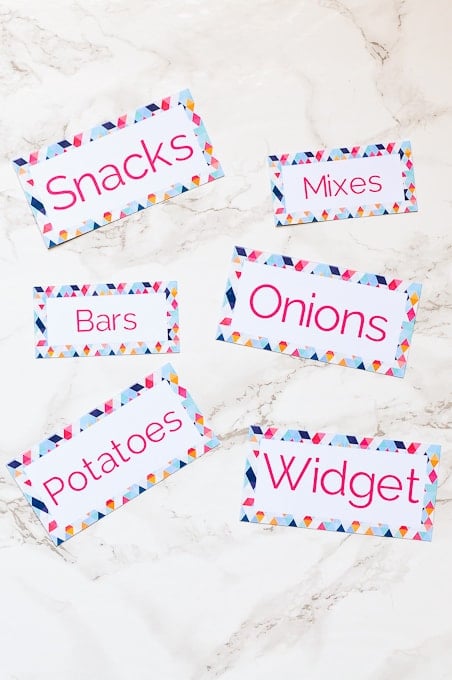
I love how fun and colorful these labels are! The best part is that they can be customized for any organizing project. Before starting your project, make sure to measure how big you need your labels to be. This design can be changed to create labels of any size with custom text.
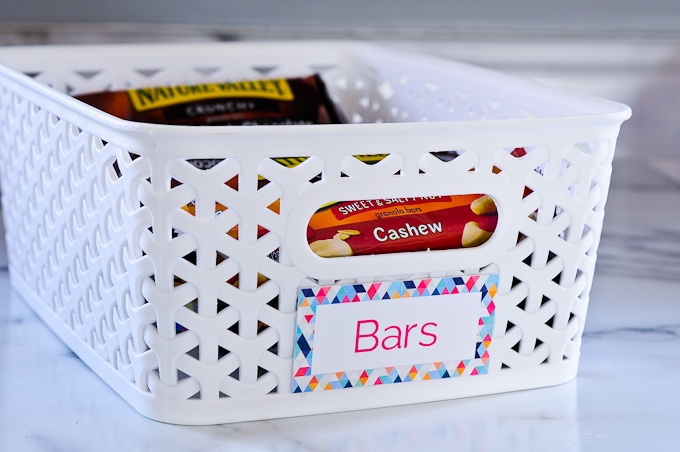
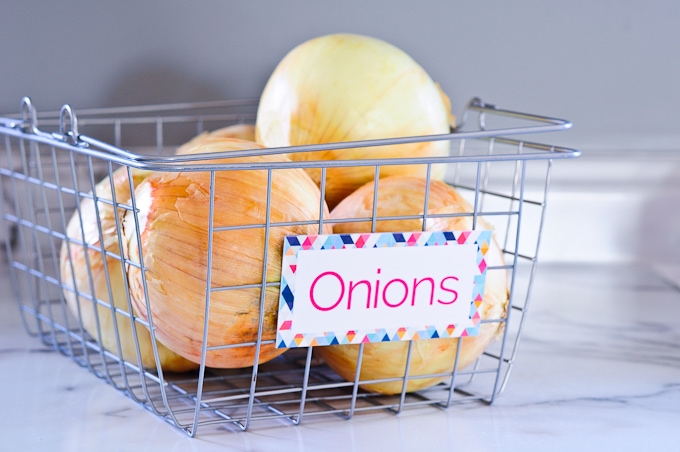
I hope that you enjoyed this second tutorial and that it inspires you to try out more projects using your Cricut Explore cutting machine.
Would you like to see more easy tutorials for home décor projects using the Cricut Explore? I’d love to hear your suggestions or Cricut questions in the comments below!
If you’d like to follow along with the rest of the Cricut Explore Essentials series, you can do so in the following posts:
Cricut Explore Essentials Part 1: How to Make Gorgeous Banners
Cricut Explore Essentials Part 2: How to Make Pretty Organizing Labels (You’re here!)
Cricut Explore Essentials Part 3: How to Make Modern Calligraphy Art
Cricut Explore Essentials Part 4: How to Make Custom Etched Glass
Cricut Explore Essentials Part 5: How to Make Your Own Stickers




i loved this tutorial! i learned so much about my new machine just through this project that i will be able to use in many projects. i will definitely be reading your other tutorials thank you so much!
Yay! I’m so glad Emily! Congrats on your new Cricut machine 🙂 It’s such a great tool to have. Glad to have you here on the blog!
>> Christene
Thank you for explaining the rectangle shape, Duh!