This post contains affiliate links for your convenience. For more information, see my disclosures here.
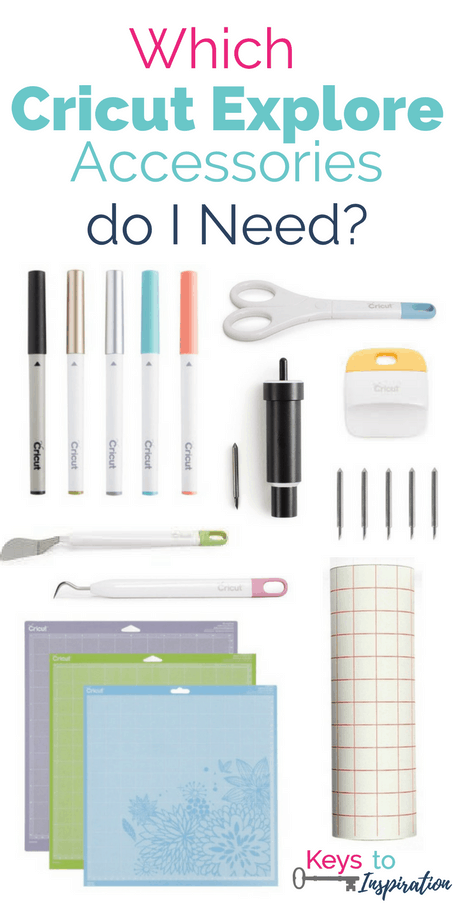
Every Cricut Explore machine comes with a few basic accessories to get you started. But, after that, it’s up to you to decide which accessories you will need to create your projects.
So, how do you know what you need?
There are tons of different items available to buy for your Cricut Explore. From tools to blades to pens, you could go on a shopping spree just for extras!
Before you go out and spend tons of money, it’s a good idea to learn about the extras and figure out what you will actually use. It’s going to be different for everyone depending on how you plan to use your Cricut Explore.
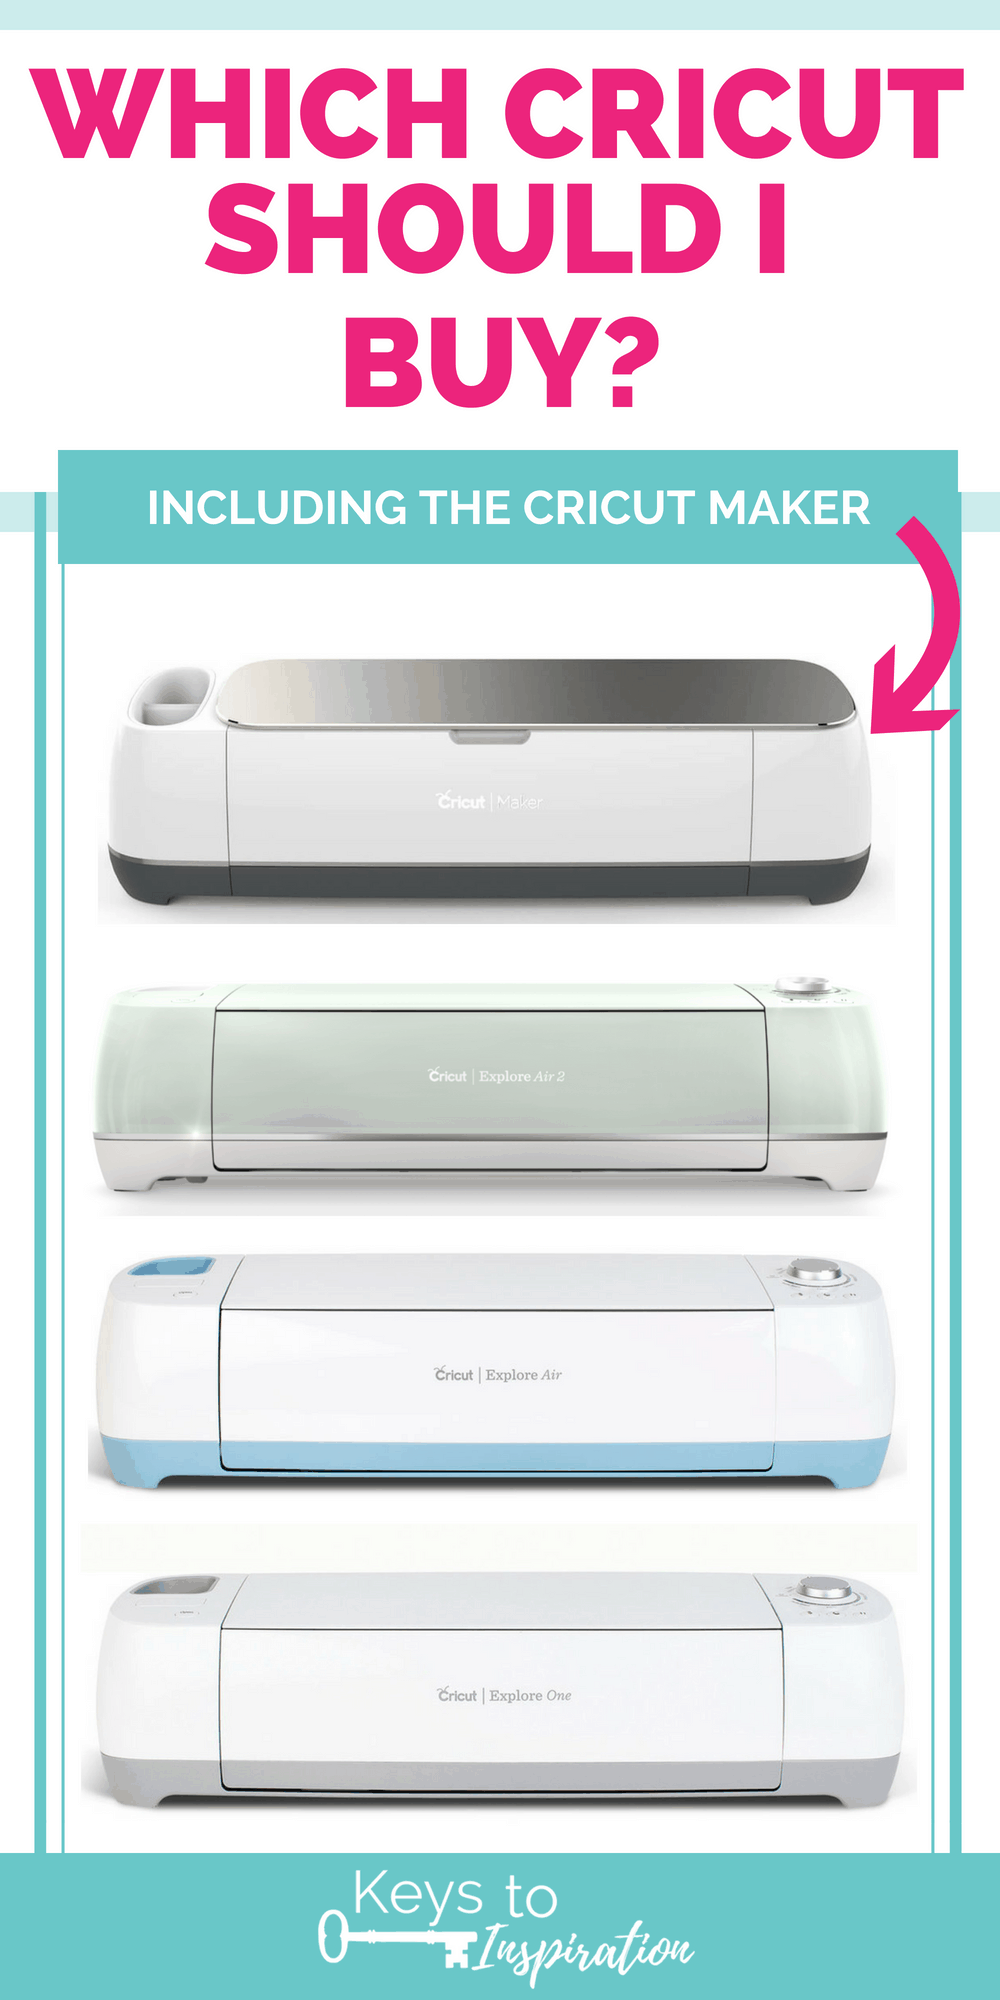
PS: If you are trying to figure out which Cricut you should buy, check out this post!
Which Cricut Explore Accessories do I Need?
There are some basic accessories that you will need to start making projects using your Cricut Explore. Things like the cutting blade and cutting mat are necessary to start creating and are included with the machine right out of the box.
There are also some additional accessories that you might want to have on hand to make it easier to create different projects.
Cutting Mats
In order for the Cricut Explore to cut the materials you are using in your projects, you need some way to secure them in place. That’s where the cutting mats come into play.

Cutting mats are the sticky plastic sheets used to hold materials as they are being cut by the Cricut Explore. They are perfectly sized to fit into the Cricut Explore machines and come in a couple of different lengths.
Cutting mats come with a plastic covering. This helps protect the sticky surface when it’s not in use. Make sure you keep the plastic covering nearby so you can cover the mat after you use it. This will help it last longer.
Every Cricut Explore machine comes with a standard cutting mat. This will get you started creating using your Cricut Explore, but eventually, you will want to have additional cutting mats available. There are 3 different types of cutting mats.
Light

The light cutting mat is blue and is used when you are cutting lightweight materials (printer paper, vellum, etc.). The light cutting mat comes in two sizes, regular 12” x 12” and extended 12” x 24.”
Standard

The standard cutting mat is green and is used when cutting normal weight materials (regular cardstock, vinyl, etc.). The standard cutting mat comes in two sizes, regular 12” x 12” and extended 12” x 24.”
Strong

The strong cutting mat is purple and is used when cutting heavyweight materials (chipboard, fabric with backing, felt, etc.). The strong cutting mat comes in two sizes, regular 12” x 12” and extended 12” x 24.”
The cutting mat that I use the most is the 12” x 12” standard cutting mat. I normally like to have 1-2 of them in my craft supplies at a time. The cutting mats become less sticky over time, so it’s nice to have extra cutting mats on hand.
Blades

The blades used to cut different materials fit into the Explore blade housing. This housing is already installed in the cutting mechanism when you get your Cricut Explore. Inside, there is a tiny German Carbide blade. This little blade is the secret to those extremely precise cuts that the Cricut Explore can make.
German Carbide Blade

The German Carbide blade (Regular blade) is designed for cutting light and regular weight materials. It’s the blade that I used for most of my projects.
Deep Cut Blade

The Deep Cut blade is designed for cutting heavy weight materials. It’s made of a harder, more durable steel so it can cut thicker materials. The deep cut blade also comes with a different housing that is shorter than the regular blade. That’s so there is clearance under the blade for thicker materials.
The blade housings are different colors so that you can tell them apart. The regular housing is silver while the deep cut housing is black. The tiny blades themselves are also slightly different so that you can tell them apart. The Regular blade has a red cap on top of it. The Deep Cut blade has a blue cap on top of it.
On the Cricut Explore machine, there is a small storage compartment that is designed to store blades and housings. There is even a magnetic strip that keeps the tiny blades from rolling around and getting lost.
Basic Tool Set
It’s always helpful to have a set of craft tools around when you are creating. Cricut has a basic tools set that includes tools specifically designed to use with the Cricut Explore. Each tool set comes with 5 tools.

Spatula – lifts images from the cutting mat
Scraper – cleans scraps from the cutting mat
Scissors – creates clean, precise cuts with the micro-tip blade
Weeder – removes unnecessary vinyl from paper backing
Tweezers – lifts and secures small items and embellishments to use in your design
I use the spatula tool and the weeder tool the most. I also love the scissors because they are extra sharp and are really useful for making small cuts on projects. When you are working with vinyl, the weeder tool is a must. It’s just way too difficult to remove unnecessary vinyl without this tool.
On the Cricut Explore machine, there is a large storage compartment that is designed to store Cricut tools. Also, on the top left of the machine, there is a cup that you can use to hold your tools when the Cricut Explore machine is in use.
Paper Trimmer
A compact paper trimmer is a great tool to have when you are creating Cricut Explore projects. Not only can you use it for cutting paper, but also for cutting materials to size. I use my paper trimmer when I need to cut materials to size or to fit on the cutting mat. It helps me create a clean cut of material right off of the roll.
Scoring Stylus
The scoring stylus is a tool that looks like a pen, but the tip is just a pointed piece of metal. It is perfectly sized to fit into the accessory adapter on the cutting mechanism. The scoring stylus is used to create fold lines on your projects. Fold lines are used in designs like cards or 3D objects.
Bone Folder

When you create projects with score lines, sometimes it can be difficult to actually get a clean fold on that score line. That’s where a bone folder comes in handy. The bone folder helps to get a clean, crisp fold right on a score line. If you are planning on creating lots of 3D objects with the Cricut Explore, you should definitely have a bone folder. It will make the assembly so much easier.
Pens
The Cricut Explore also has the ability to write using pens in the accessory adapter. Cricut makes pens that are perfectly sized to fit into the accessory adapter, but there are also a few other pens that I have found fit and work just as well.
Cricut Pen Sets – These pen sets are specifically made the fit into the accessory adapter on the Cricut Explore. They come in a variety of different colors. There is also a set of black pens that come in different thicknesses.
Elegant Writer Pens – These pens are not specifically made to fit into the accessory adapter, but they do fit and can be used with the Cricut Explore. These pens have an angled tip which, when used, creates the look of calligraphy.
Transfer Tape

When you are creating projects with vinyl, transfer tape is an extremely useful supply. Transfer tape is used to transfer a cutout design to a finished product without changing the configuration. It helps to keep everything aligned and spaced correctly. I use transfer tape all the time when I’m creating with my Cricut Explore.
Wow! That was a lot of information. There are so many different accessories you can use with your Cricut Explore machine. Each one is useful in its own way and will make creating your projects a lot easier.
I hope that this helps you choose the best accessories for your creative needs. Let me know in the comments which accessory is your favorite.





I actually have all these items for my explore air 2.
WHAT i NEED TO KNOW IS HOW TO PRINT ON CARDSTOCK WITH THE PENS THAT CAME WITH MY AIR2. I CAN’T FIND A GOOD TUTORIAL TO DO IT.
Hi Barbara,
Are you talking about printing and cutting or just using the pens to write on cardstock?
You can’t print then cut on colored cardstock – you need to use white paper or cardstock. You should be able to write on any paper. Just add the pen to the adapter B area and then choose your line type as “writing” for the image or text. Then the Cricut will use the pen instead of the blade on whatever is on the cutting mat.
Hope this helps.
>> Christene