This post contains affiliate links. For more information, see my disclosures here.
My favorite DIY crafting tool in the house is my Cricut Explore cutting machine. If you aren’t familiar with the Cricut Explore, it’s an electronic cutting machine that allows you to design and create DIY projects. It’s an amazing tool gives you the freedom to create whatever projects you can think of. I love my Cricut Explore and all the different things that I can do with it.
Because this machine has so many features, the possibilities for creativity are endless. Sometimes, this can actually be a roadblock for people! They buy the machine with all kinds of ideas in mind, get it setup, and then get stuck trying to figure out how they can make it do what they want it to do.
The Cricut Design Space software has some ready-to-make projects available for a small price, but most of the time, those aren’t really the projects people have in mind. They want to make their ideas come to life, but aren’t really sure how to use the Cricut to make that happen.
I’ve gotten lots of questions about how to use the Cricut Explore machine, so I’ve decided to start a series called
Cricut Explore Essentials
I’m going to show you how you can design your own simple projects in the Cricut Design Space and teach you about some of the features of the design software along the way.
- Related: Which Cricut Should I Buy?
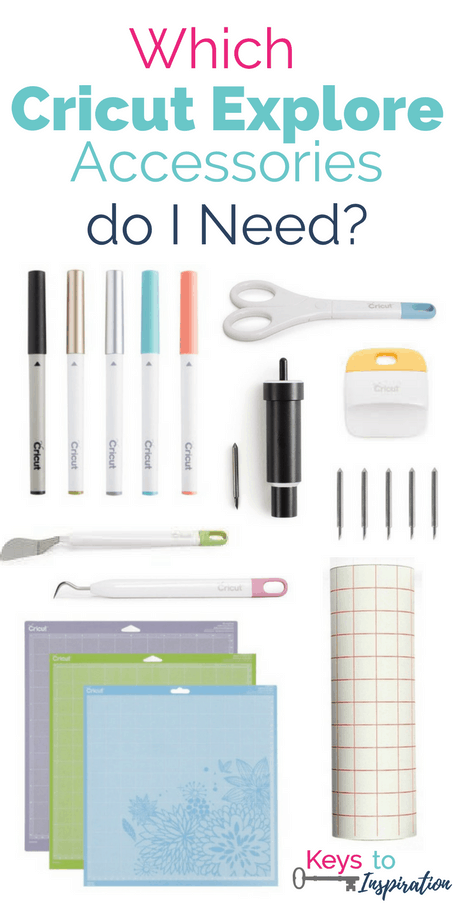
- Related: Which Cricut Explore Accessories do I Need?
- Related: Crafting Blanks for your Cricut Explore Projects
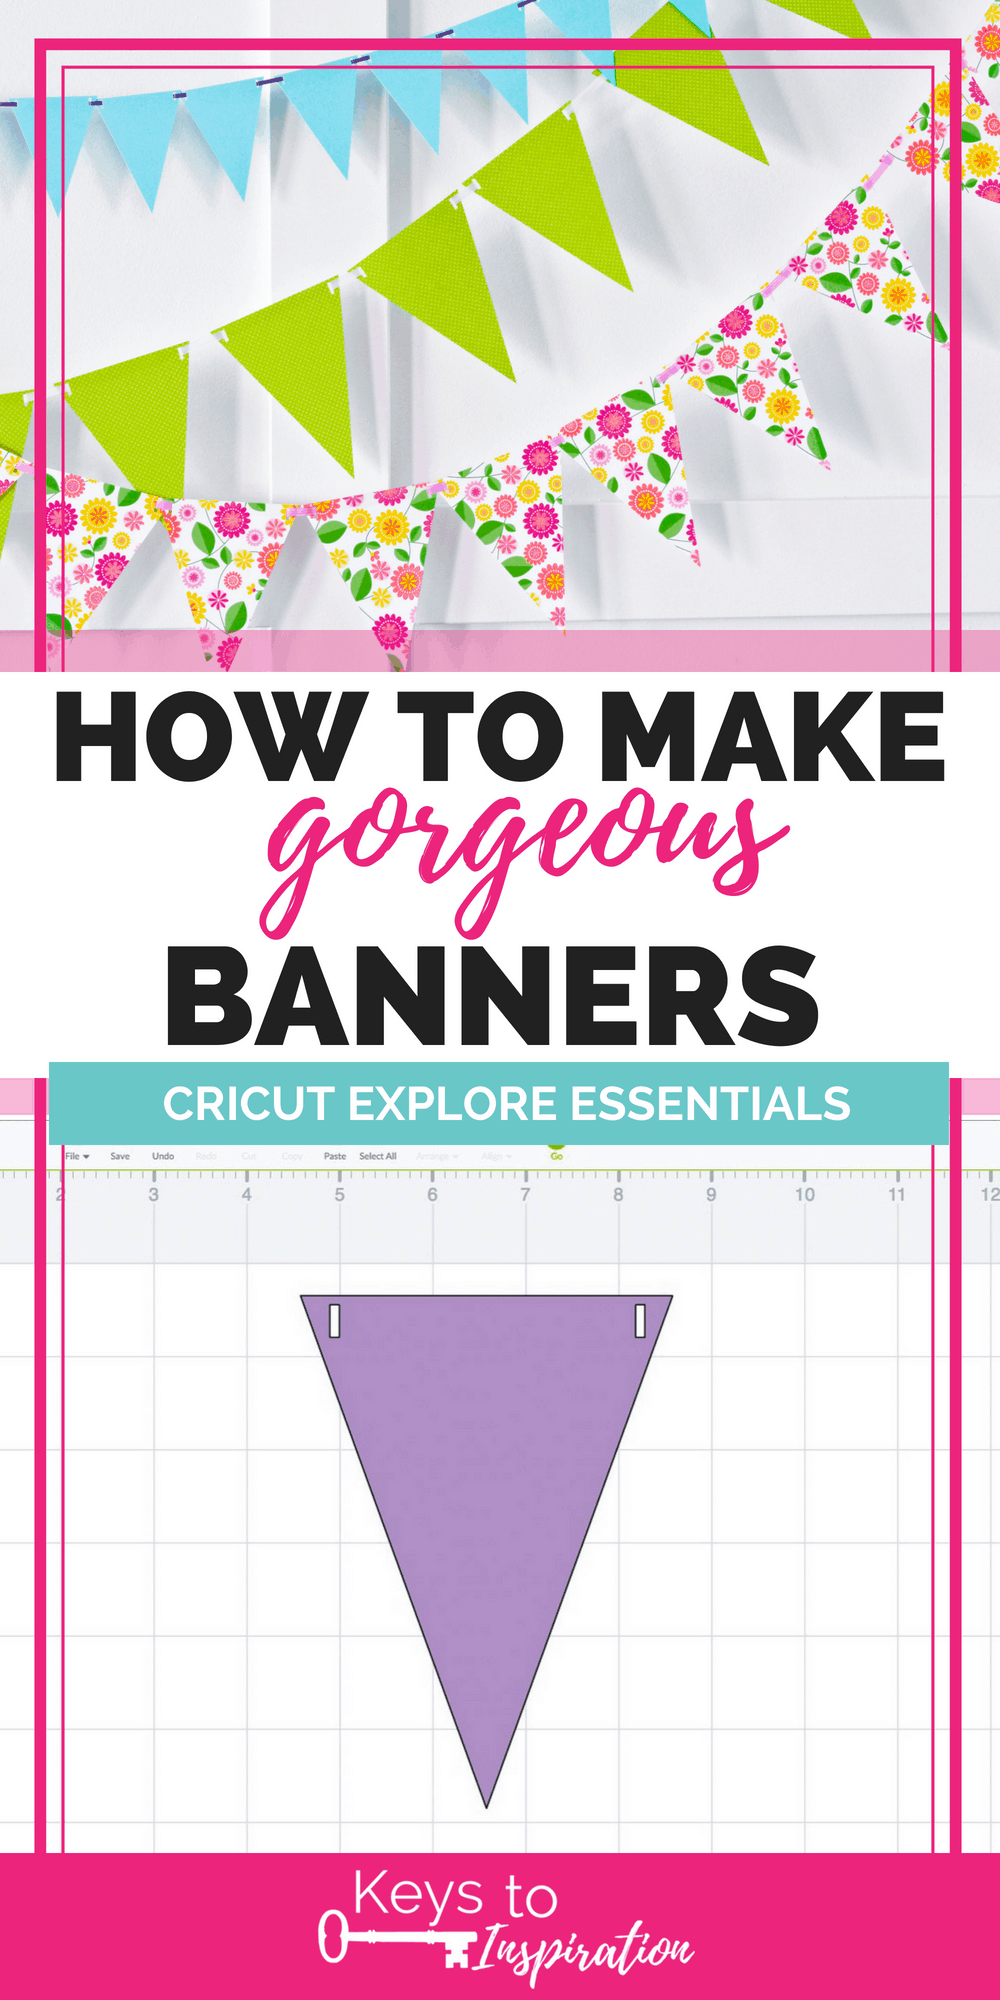
The first project that I’m going to show you how to make is gorgeous banners using a simple design. For this project you don’t have to buy any images from the Cricut image library because I’m going to teach you how to create the image you need for FREE! Let’s get started!
How to Make Gorgeous Banners
Materials:
- Cricut Explore
- Regular Cutting Mat
- Basic Tool Set
- Solid Cardstock
- Patterned Cardstock
- 1/4″ ribbon
- larger banner
- 1/8″ ribbon
- smaller banner
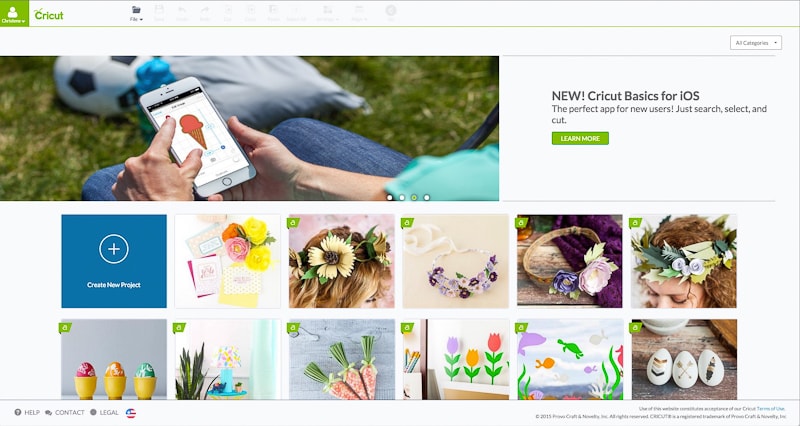
First open the Cricut Design Space by clicking here and selecting “Cricut Design Space” from the top right of the screen. This will open up the Design Space main screen. Click on the first box with the “+” sign that says “Create New Project.” This will open a new blank project for you to work from.
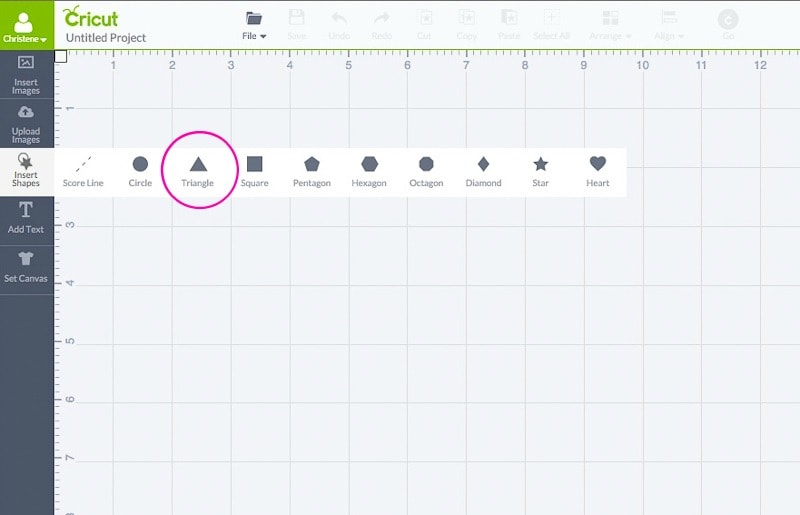
The banner that we want to make is a simple pennant shape that is basically a triangle. First, on the left-hand side of the screen, click on “Insert Shapes” and then select the triangle.
The basic triangle that is part of the Cricut Design Space shapes is a symmetric triangle. We want our pennant to be a more elongated triangle so we need to change the shape. To adjust an image, first, we need to unlock it. When an image is selected there are 4 icons shown around the border. One of these icons is shaped like a lock. When you click on the lock, it will change to an unlocked lock.
When an image is unlocked you can stretch an image in any direction and you can resize an image to exact dimensions. When an image is locked, any resizing of the image is done within the proportions that the shape currently has. The lock icon for an image can also be found on the right-hand side of the screen under the “Edit” tab.
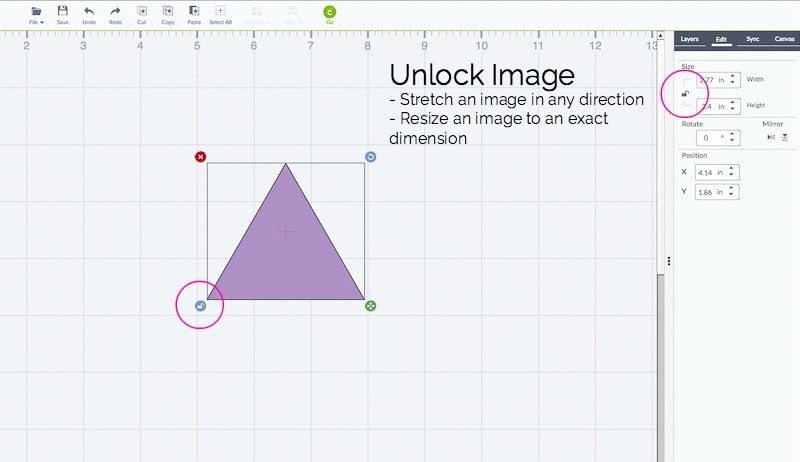
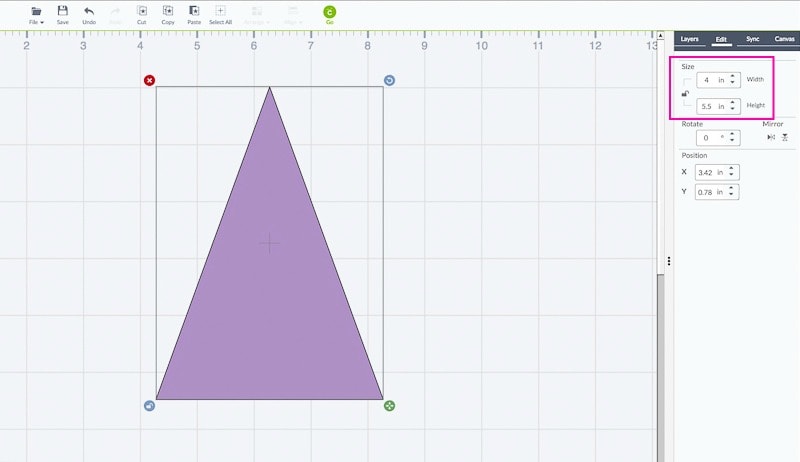
Now that the image is unlocked, resize the triangle to a width of 4” and a height of 5.5”.
Using the “Edit” tab rotate the image by either typing in 180 degrees or using the vertical mirror button. This will flip the triangle image so that it now resembles a pennant.
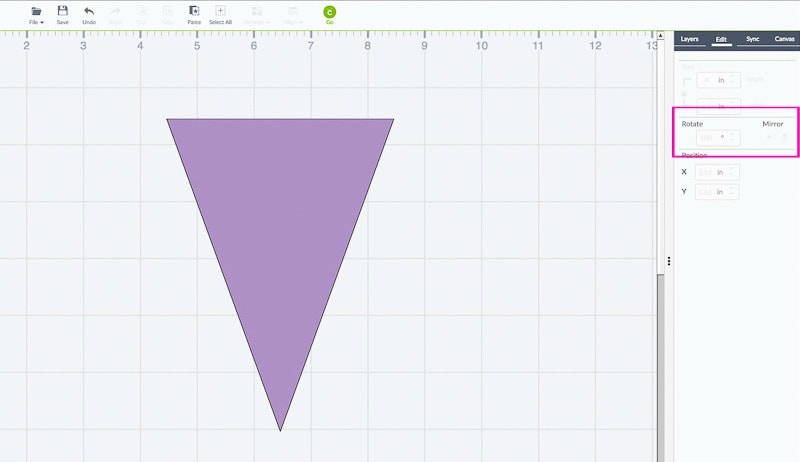
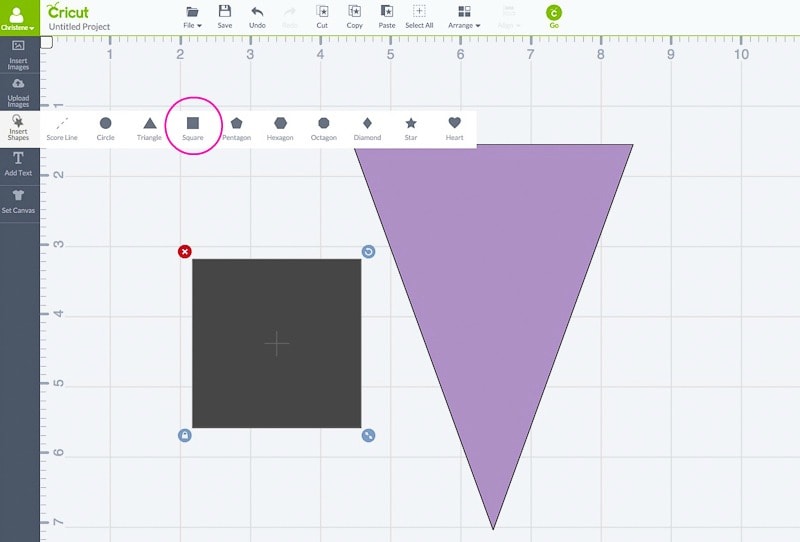
Now we have the pennant shape! The next step is to add the holes for the ribbon that we will use to string the banner together. Click the “Insert Shapes” button and this time, select the square.
We want to reshape this square so click on the lock icon to unlock the image. Next, resize the square to a width of 0.1” and a height of 0.35”.
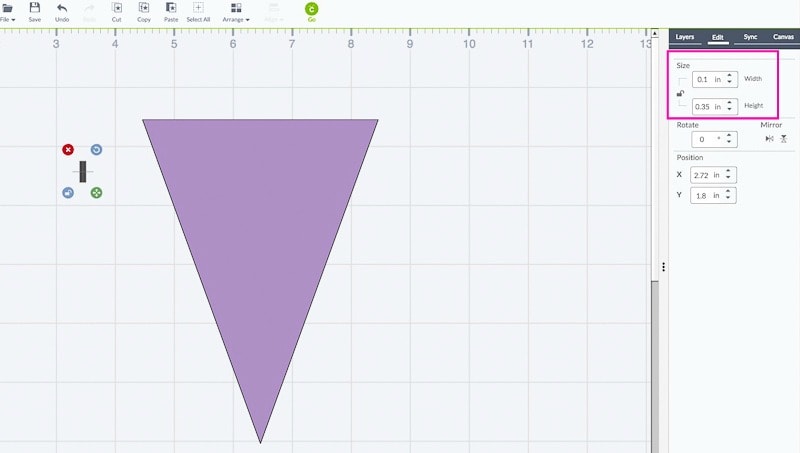
Now we have a tiny rectangle shape. This will be just the right size for our ribbon. We need two holes for either end of the triangle so select the image and then copy and paste it to create an identical copy.
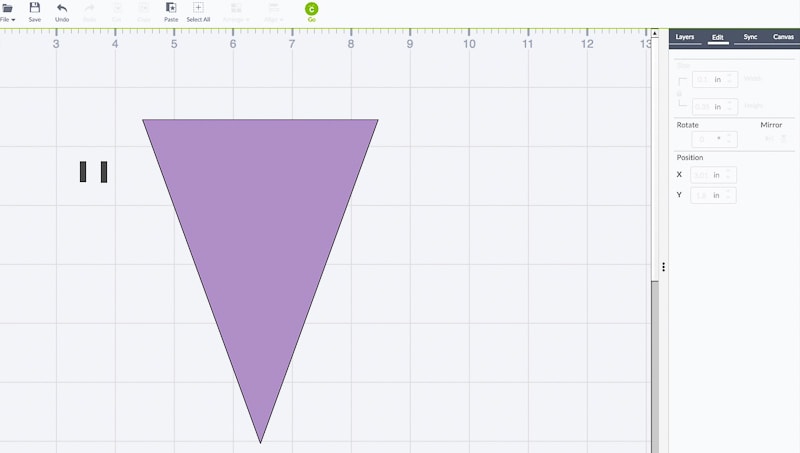
Next, drag the rectangles to the top left and right of the triangle. Try to put them in the general area where they belong, but it doesn’t have to be perfect – Design Space will help up with that. Once you have them at the right spacing horizontally, select both of the rectangles by clicking on one, then holding down the “shift” key, and clicking on the other. Now you can see that both rectangles are selected and Design Space has put a large box around the outside of both.
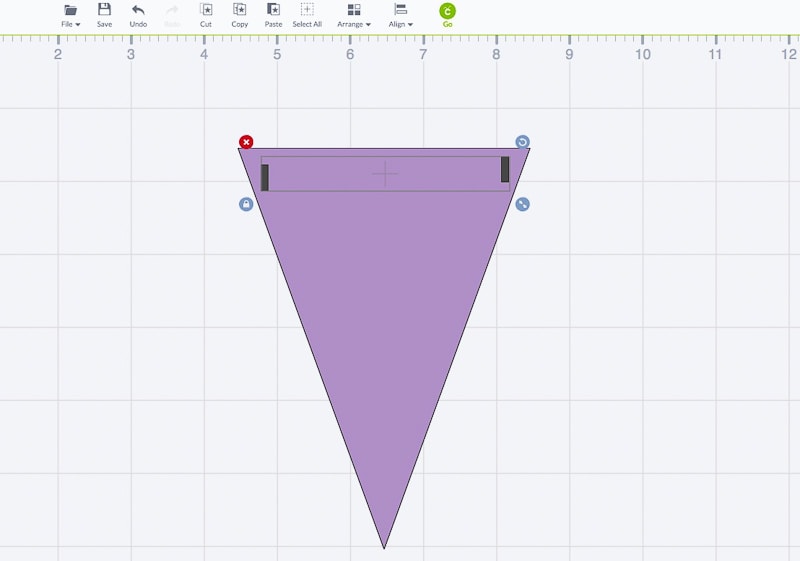
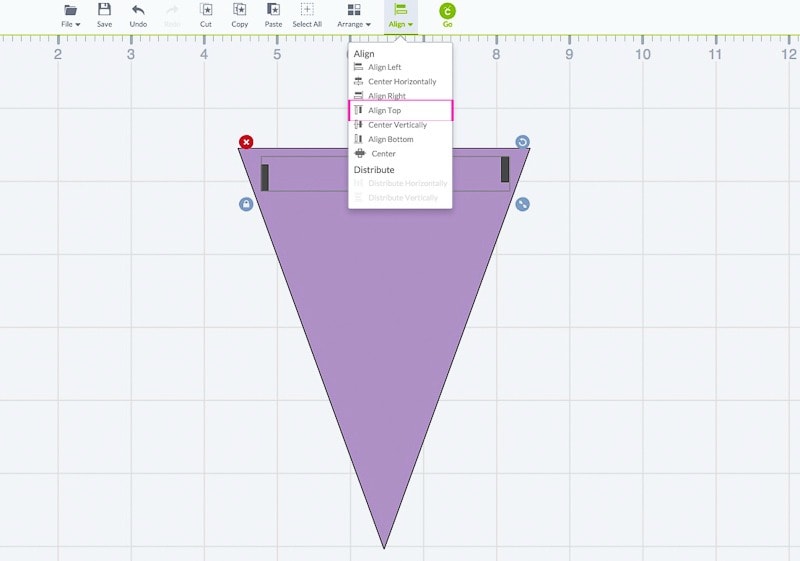
We want both of these shapes to line up so that they are at the same position, but trying to eyeball that is difficult. While both shapes are selected, click on the “Arrange” drop down at the top of the screen. Then select “Align Top.” This will align both images to the top-most position of all the selected images. Remember how Design Space put that box around both shapes? The top line of that box represents the top-most position of the shapes, which happens to be the top border of the right rectangle.
Now you can see that both rectangles are aligned to that top-most position and the new box around both images touches the top and bottom borders of both rectangles.
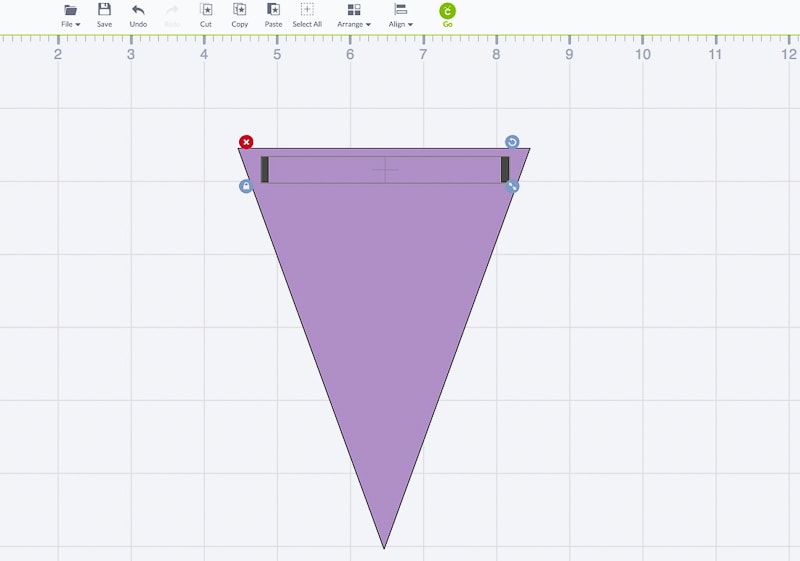
These rectangles represent the shape and location of the holes we want the Cricut to cut out for the ribbon, but they aren’t holes yet. They are still just shapes on top of the pennant shape. We need to tell the Design Space software to use these shapes as a stencil for cutting out a piece of the pennant shape. To do this we are going to use a feature called “Slice.”
“Slice” is a feature in Design Space that allows you to make a cut out of one image in the shape of another image. To do this, you must have two images that are overlapping one another. “Slice” can only be used when two images are selected (three or more images can’t be “sliced”). Also, once an image has been “sliced” it can’t be “sliced” again. This is somewhat restrictive for our project because we want to cut two rectangle holes into the pennant shape and Design Space will only allow us to cut one. To get around this limitation, we need to make the two rectangles into one single “image.” Then we can slice the rectangle image into the pennant image.
To combine two shapes into one image, we are going to use the “Weld” feature. The “Weld” feature is normally used to combining two overlapping images into one image, but it can also be used to effectively group two non-overlapping images into one image. First, select both rectangles again so that they are grouped together and drag them above the pennant image. Make sure they are not touching or overlapping the pennant image.
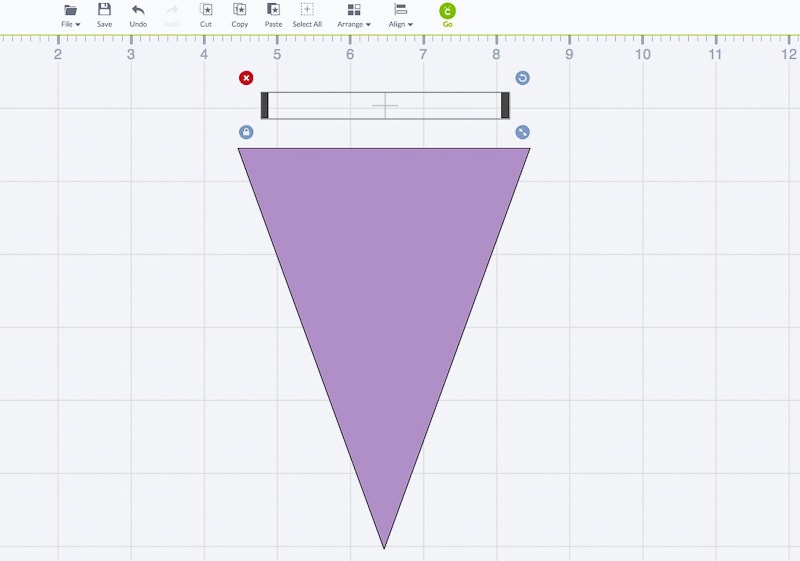
On the right-hand side of the screen, you can see on the image toolbar in the “Layers” tab that both images are selected because they both are highlighted in gray. Select the “Weld” button.
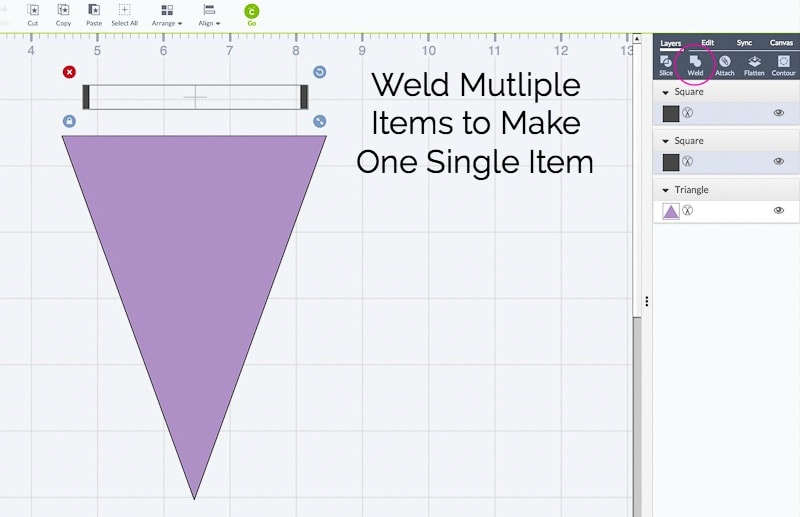
Once the process is complete, you will now see in the toolbar that both images have been combined into a single “welded image.”
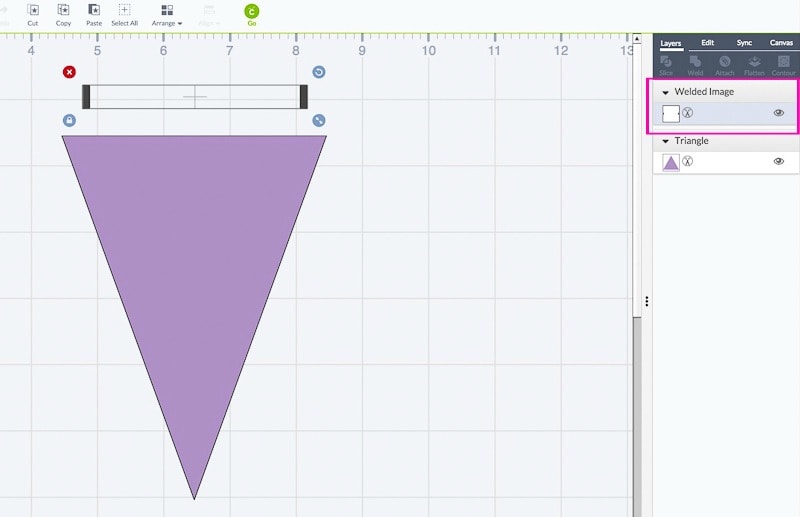
Select the welded image and drag it back down onto the pennant image.
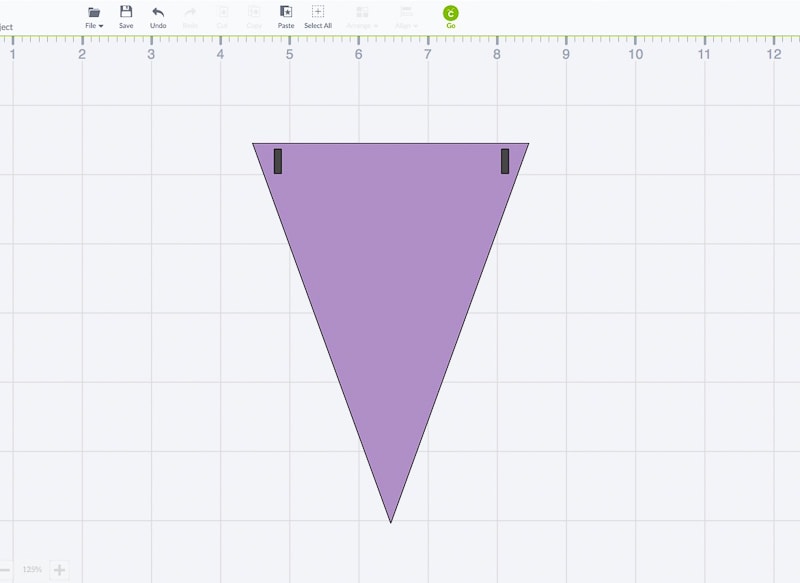
Now that the images are overlapping, we can use the “Slice” feature. Select both the pennant image and the welded image (click + shift + click). You can see in the image toolbar in the “Layers” tab that both images have been selected because they are highlighted gray. Next, select the “Slice” button.
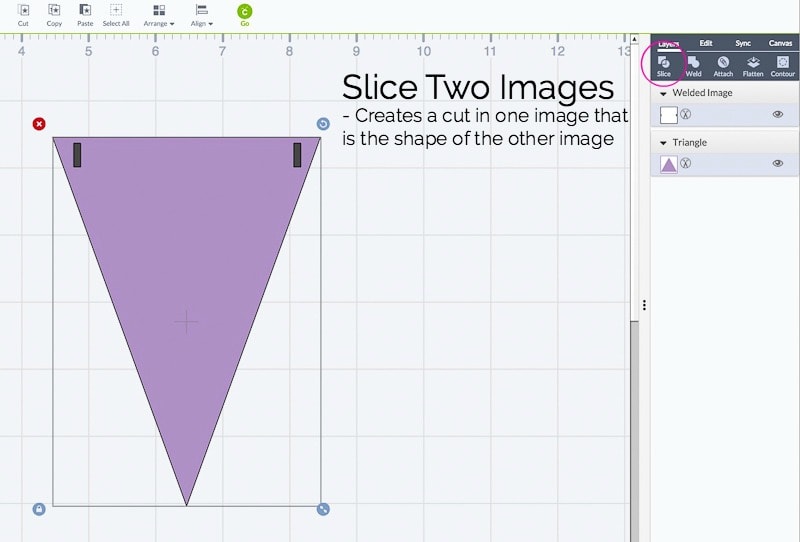
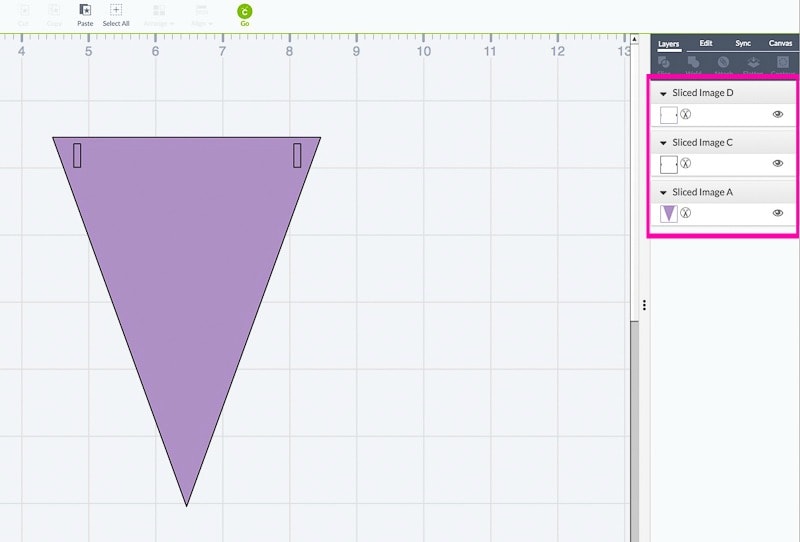
Once the slice is complete, you will see cut lines on the pennant image in the shape of the welded rectangles image. In the image toolbar, under the “Layers” tab you can see that there are now three images. This is the slightly confusing part about the “Slice” feature. Just like if you were cutting out these holes using real paper and a stencil, the Design Space software saves all of the pieces and scraps of the cut.
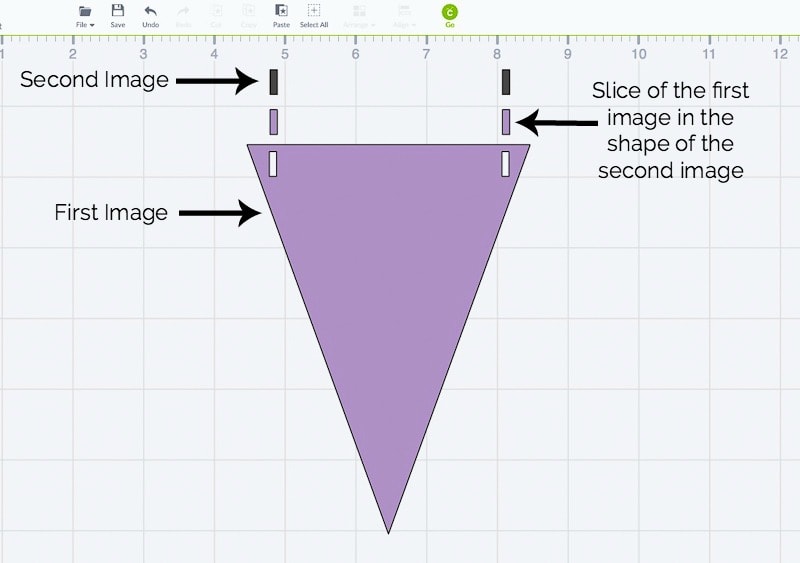
To see all of these pieces, select the purple rectangle image and drag it away from the pennant. Underneath, there will be the gray rectangle image, which can also be dragged away from the pennant. Now you can see exactly how the slicing was done with the two original images that left behind the hole in the pennant that we wanted.
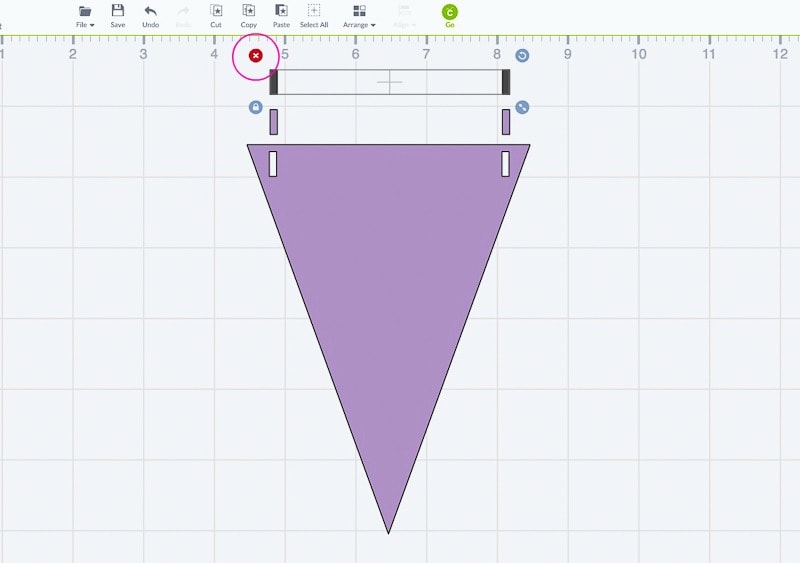
Since we only want the pennant image, the other two sliced pieces can be deleted. Click on one of the images and select the “X” icon to delete it.
Now we are left with the pennant image with the holes cut out for the ribbon. Our design is complete and it’s time to cut it out!
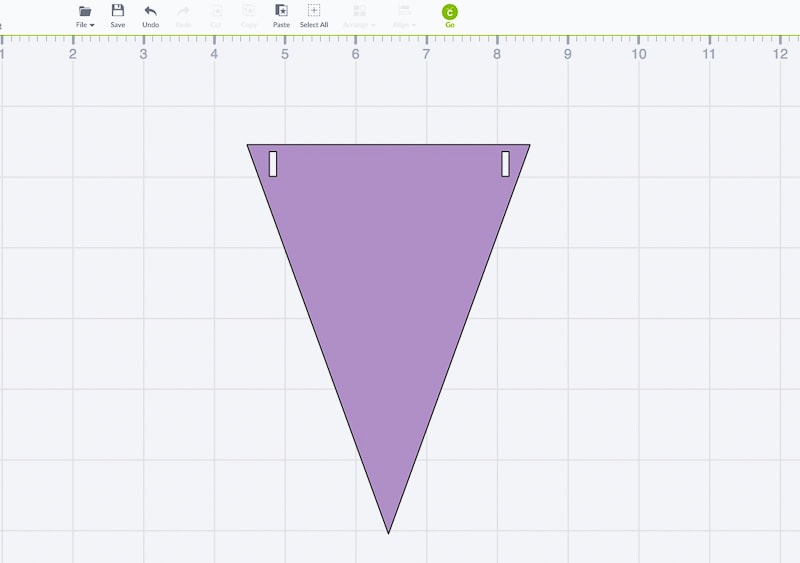
The Cricut Explore can cut out designs from a 12” x 12” area or a 12” x 24” area. For a basic project like this, the 12” x 12” mat is the best option and will fit a standard piece of scrapbook paper. To make sure we get the most out of our paper, we need to try and fit as many of the pennant images into the cutting space as possible. Design Space has a feature that allows you to duplicate an image before you cut, but this feature doesn’t allow for space saving.
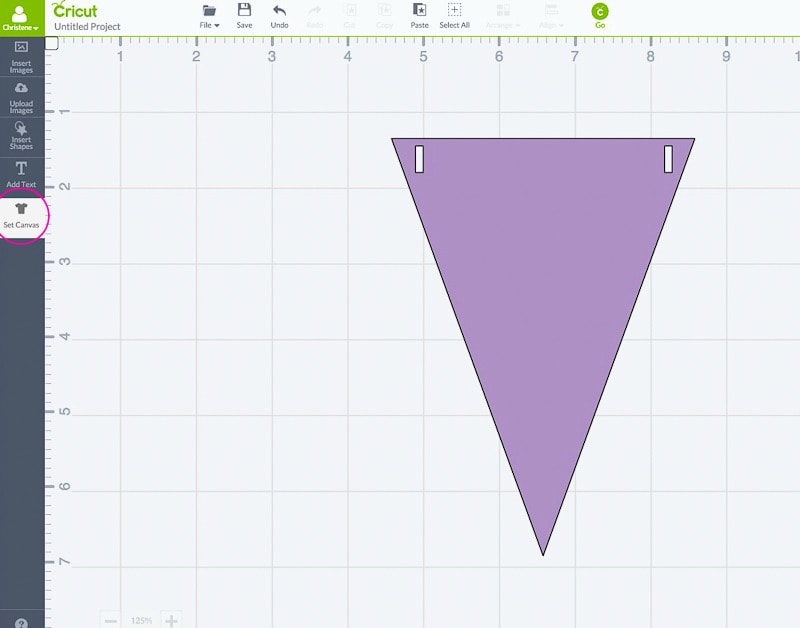
First we need to define our canvas, or our cutting area, for this project. On the left-hand side of the screen, click on “Set Canvas” to open the canvas menu.
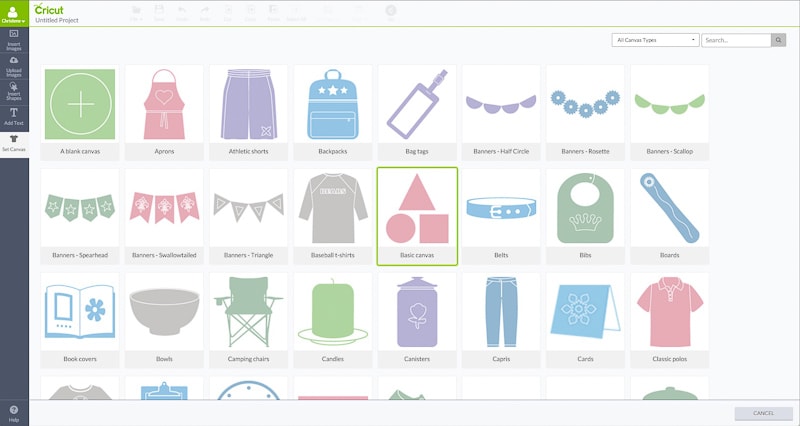
Within this menu, you can choose from a variety of different “canvases” for your projects. Since we want to set up the cutting mat for space saving, select the “Basic Canvas” button.
Back on the main design space workspace, there is now a white outlined area representing the canvas. On the right-hand side toolbar, under the “Canvas” tab, make sure the type is set to “rectangle” and the dimensions match the cutting mat (12” x 12”).
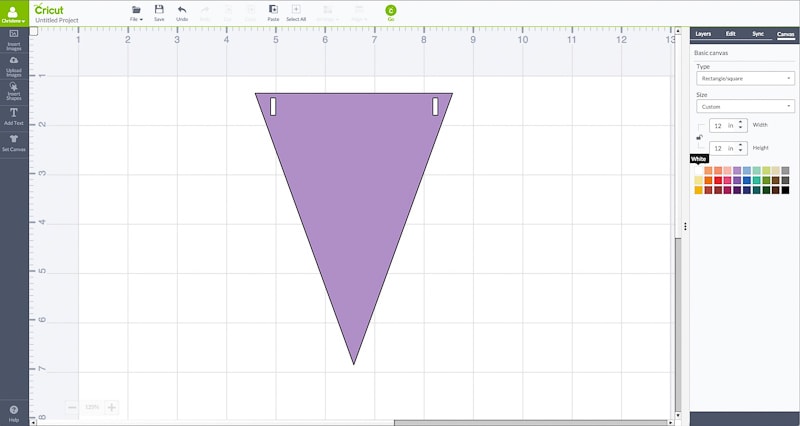
To make it a little easier to see the cutting mat space, change the color to match the mat color – green.
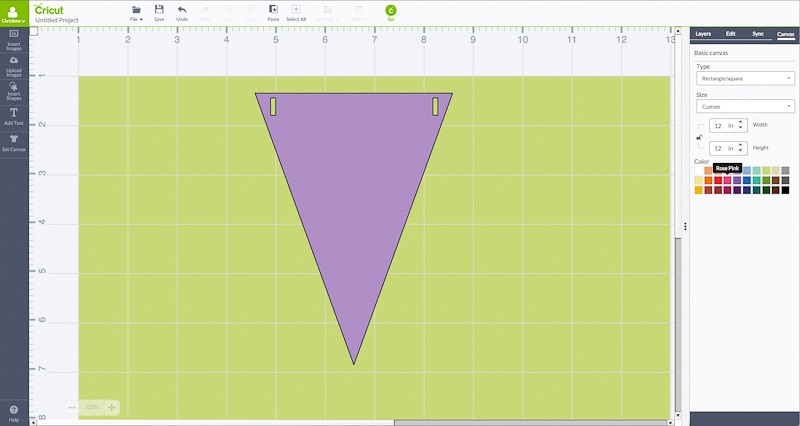
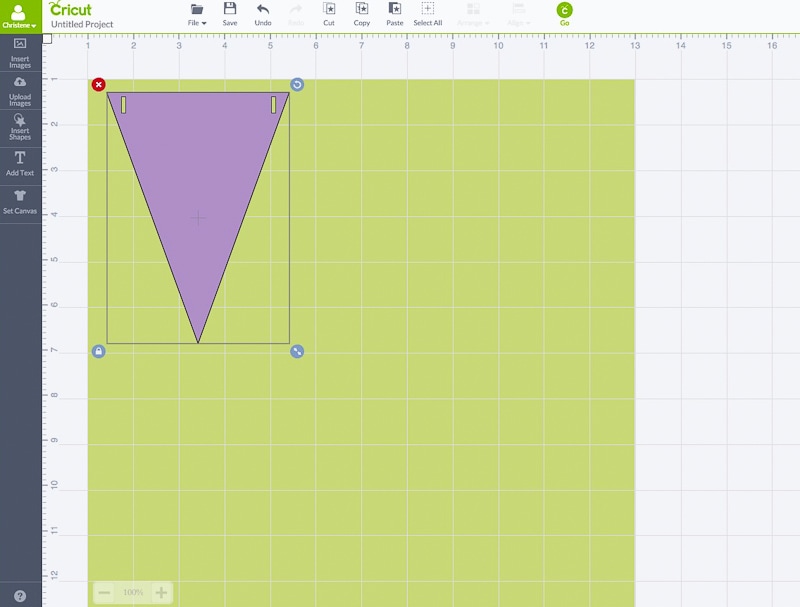
Using the green areas as a guide, move the pennant image into the top left corner.
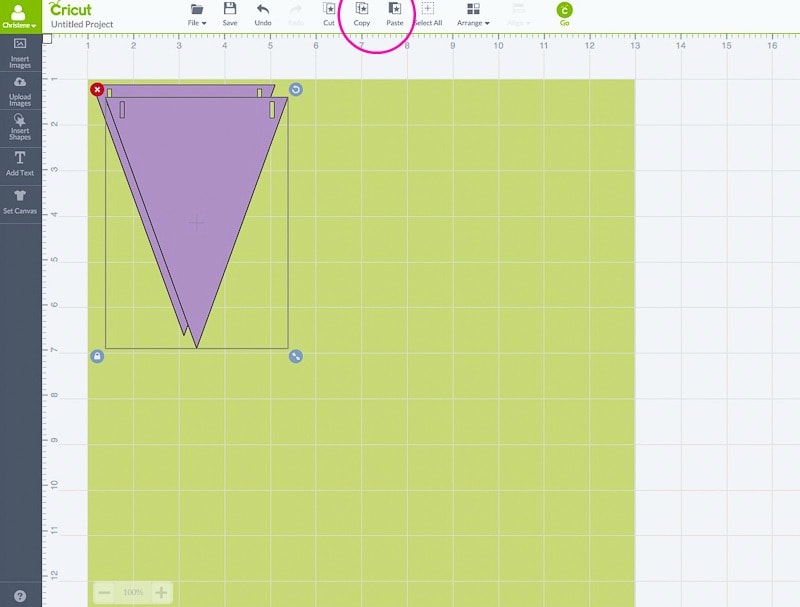
Copy and paste the image and to create another pennant. Then, rotate the image so that it is flipped and can fit close up against the first pennant.
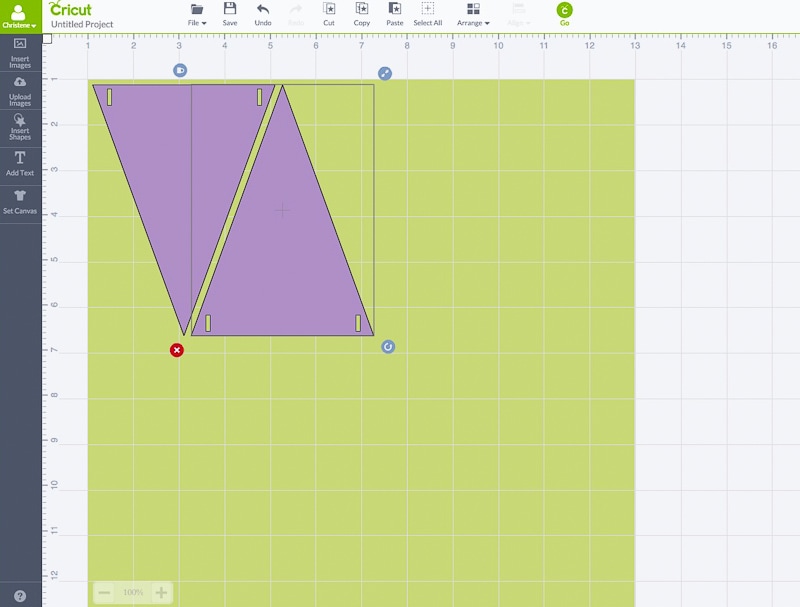
Repeat this process until the top of the cutting mat is filled and you are using as much space as possible.
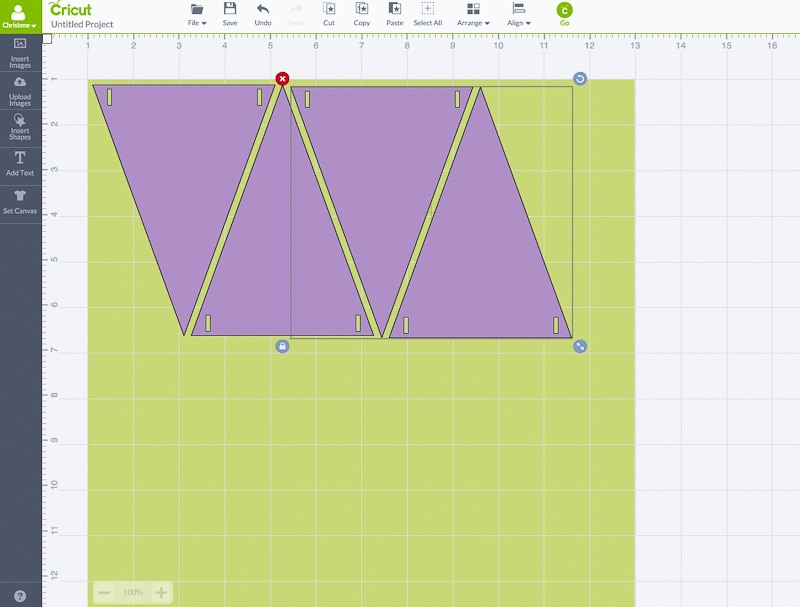
Once there isn’t any more room, we want to make sure that the images are spaced evenly. Select all of the images and click on the “Arrange” drop down at the top of the screen. Then select “Distribute Horizontally.” This distributes all the images evenly in the horizontal direction, leaving an even amount of space between each image. When I did this, my images didn’t move very much, which meant I got them very close to evenly spaced. I like to take this step anyways to make sure there is enough space between the images for cutting.
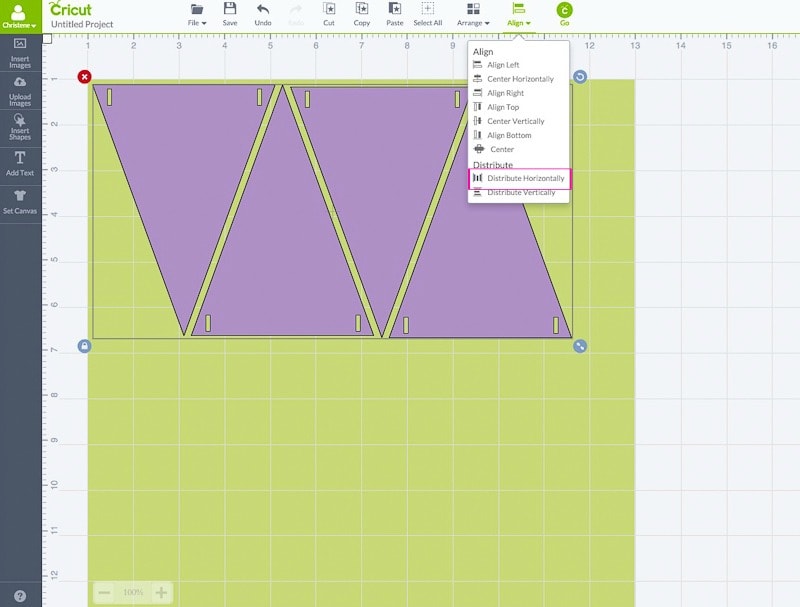
To fill up the rest of the cutting space, select all of the images and copy them as a group. Then paste the images and rotate as needed to fill the rest of the green space.
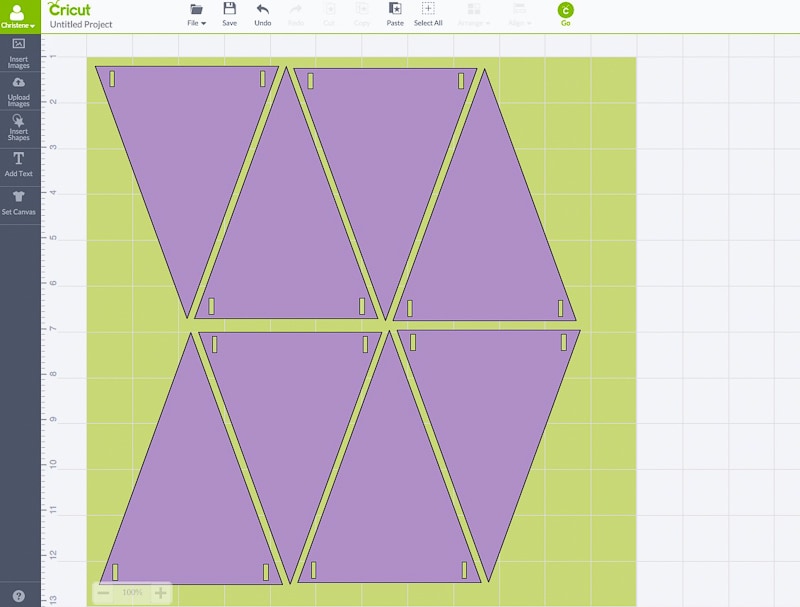
Now that we have everything in a layout that we like for space-saving purposes, it’s time to cut it out. If you were to select the “Go” button at this point, the Design Space software would take each single image and distribute them as it wants, which normally will not be in a space-saving format. To preserve this layout that we made, we need to “attach” all of the images to their current location.
At the top of the screen, select the “Select All” button to highlight all of the images. Next, on the image toolbar in the “Layers” tab, select the “Attach” button.
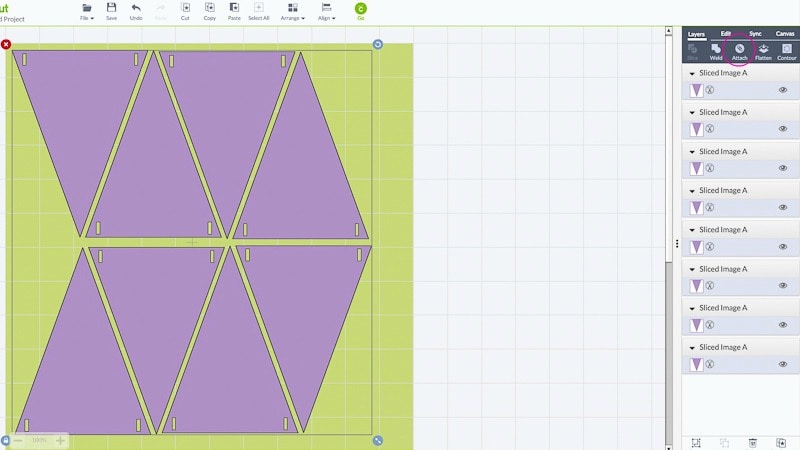
You can see in the image toolbar in the “Layers” tab that all of the images have been grouped into an attached set. This means that they are all “attached” to their current configuration and will be cut as shown.
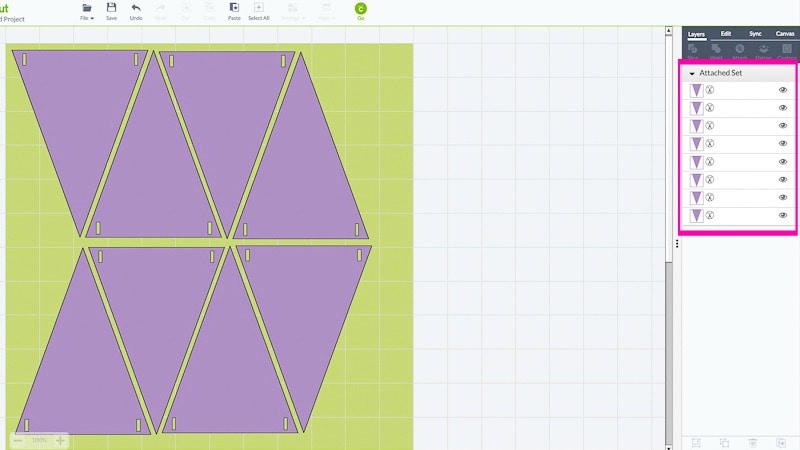
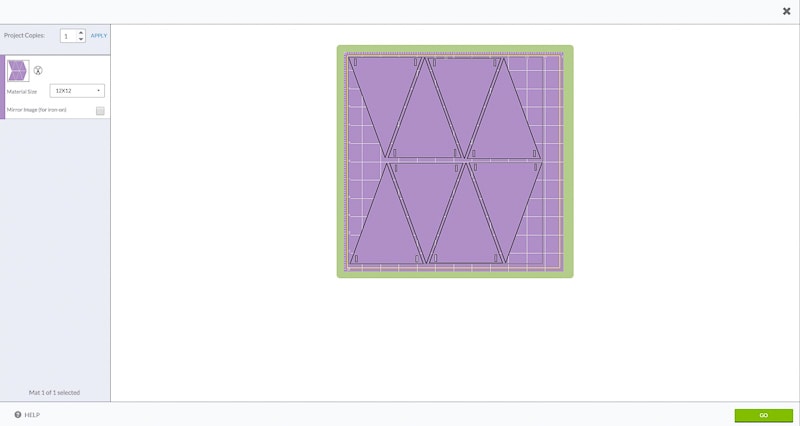
Select the “Go” button to begin the cut. Follow the instructions to load the paper and set the dial on the machine to the correct paper type for the materials you are using.
I also created a smaller version of the pennant type by resizing the image proportionally (with the lock in the locked position)
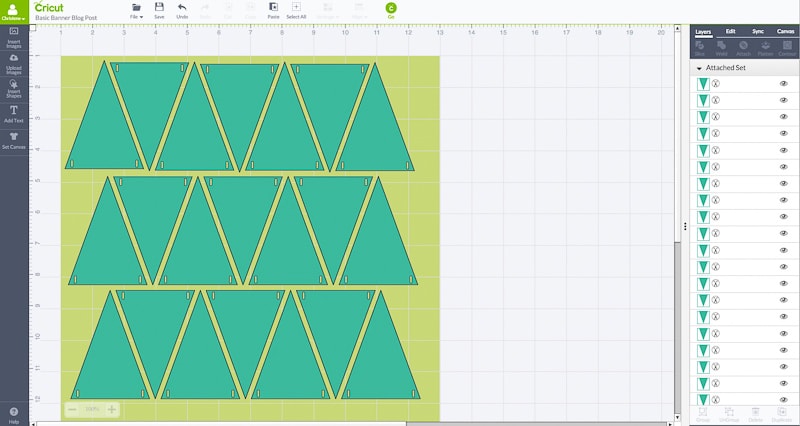
Once the images are cut out of the paper, just use some ribbon to string all of the pennants together. I used ¼” ribbon for the larger pennants and 1/8” ribbon for the smaller pennants.
Tada!!! – gorgeous banners that can be customized for just about anything!
- Related: Banner Builder
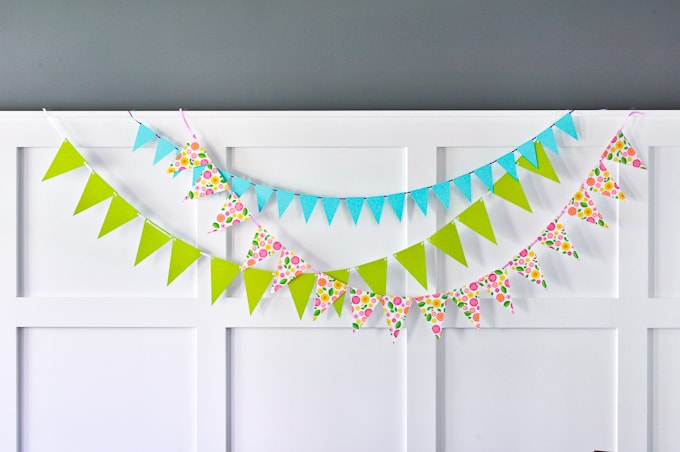
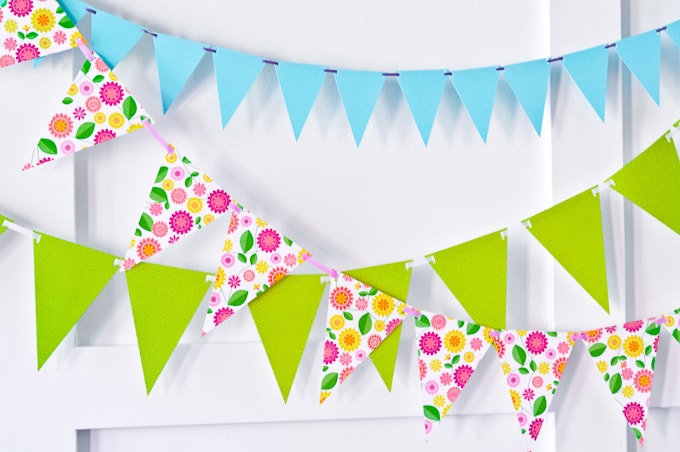
I love these types of banners for parties but they can also be used as home décor for different seasons and holidays.
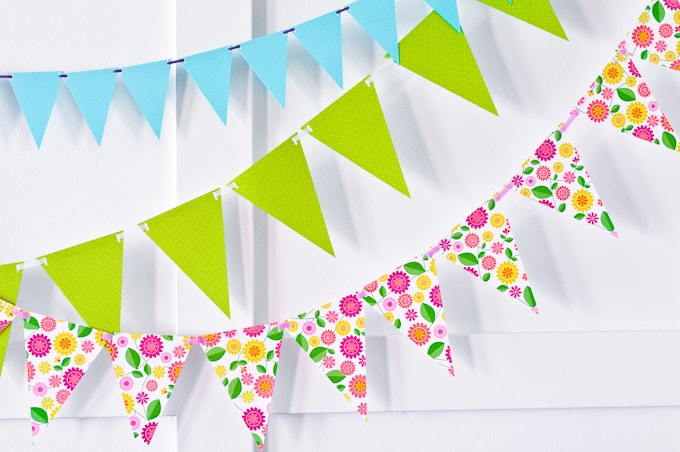
You can make a more custom banner by added letters to each pennant to spell out a phrase or by adding images. This design is a great base for any type of banner you can imagine.
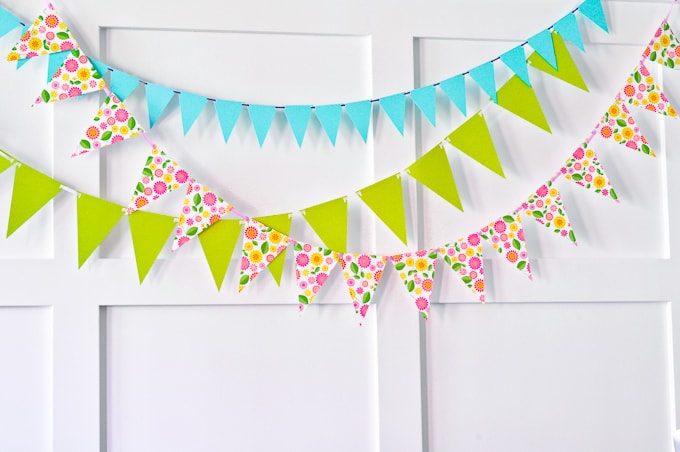
I hope that you enjoyed this tutorial and that it inspires you to try out more projects using your Cricut Explore cutting machine.
Would you like to see more easy tutorials for home décor projects using the Cricut Explore? I’d love to hear your suggestions or Cricut questions in the comments below!
If you’d like to follow along with the rest of the Cricut Explore Essentials series, you can do so in the following posts:
Cricut Explore Essentials Part 1: How to Make Gorgeous Banners (You’re here!)
Cricut Explore Essentials Part 2: How to Make Pretty Organizing Labels
Cricut Explore Essentials Part 3: How to Make Modern Calligraphy Art
Cricut Explore Essentials Part 4: How to Make Custom Etched Glass
Cricut Explore Essentials Part 5: How to Make Your Own Stickers





I really like the location of your photo the white background and wood paneling make a perfect backdrop. The step-by-step tutorial makes it so easy to follow along. Thank you for the great tips
Loved your banner tutorial. It taught me several tips about Cricut Design Space that I did not know. I want to make a lot of banners for lical Fall boutiques. Thanks so much!
YAY! I’m so glad to hear that Karen. I love your fall banner idea.
>> Christene
I love your banners. They are so cute! Thanks for posting this tutorial at Work it Wednesday!
To be honest I have been half afraid of my Cricut. You have no idea how much your tutorial will help me and means to me. I’m pretty digitally ditzy, can do simple things but am so afraid of messing things up, have done that. I won my Cricut late last year, was so awed by idea of having this incredible machine. Then had shoulder replacement surgery in early Dec. and then physical therapy and the holidays. Was so overwhelmed didn’t take my Cricut out of box for while. Seeing your tutorial is a reminder I need to get that wonder machine out and use it, past time.
Thank you so much for going to so much trouble to prepare this for people(like me). Am now so excited to get Cricut out and do things with as it was intended.
I’m so glad to hear that this is helpful! I will hopefully have some more tutorials coming soon. The Cricut is really a powerful tool and you can do a lot with it which can really be overwhelming. You’re not alone. There’s a little bit of a learning curve but once you start trying some things here and there you will get the hang of it. 🙂 Congrats on winning a Cricut! That’s awesome!!! I know when I got mine, it came with some materials and instructions for doing a couple small projects to get you started (one of the projects was a Thank You card). Start with those projects and you will feel more comfortable with the machine in general. 🙂
Thanks for commenting and have fun crafting!
>> Christene
Great tutorial. I have a Silhouette, but I bet I can do something similar. Thanks for sharing on Merry Monday.
I have a friend who has this and it is wonderful. She creates such beautiful cards using her Cricut. I do like their products.
Here I am and still haven’t ventured to get Cricut out yet. Think might have printed out same tutorial from last time but that’s ok. I’m slow to do things but then when I do really get with it.
I subscribe to Lia Griffith’s blog, she has projects almost daily can use my Cricut for. Again have been chicken.
Thought would be good to follow the tutorial as I go along, maybe get better idea how to work this baby. How in world did you figure Cricut out? Must be one very smart person.
Am so appreciative of your time and knowledge. Am determined to use my wonderful machine. Lia swears by her Cricut. She includes in how-to’s SVG to make projects. Have to learn how to use those.Again have to thank you so very much. Happy week
Hey
Great share!!!
Cool ideas to use waste banners to decorate your home. As we can use these banners to cover our windows.
Thanks for posting!
I don’t know if you are still checking comments, but your banner tutorial is the best! So thorough yet easy to understand. Thank you!!
Thanks Tonja! I’m glad that it has been helpful for you. I love teaching people how to use their Cricut Explore because it’s my favorite DIY tool!
>> Christene
Really essentials!! Great cricut banner ad design for newbies designer. Keep sharing and give us all update info about banner design
Thank you for the step by step, very helpful for a new cricut owner. Can’t wait to make this banner for our GS cookie booth. Best part is you offered it free.
Thank you !!!!!