Welcome back to my Cricut Explore Essentials series!
In this series, I’m showing you how to design your own simple Cricut Explore projects using Cricut Design Space. Along the way you will learn some of the features of the design software. If you missed the first or second project in the series, don’t worry! You can find those tutorials by clicking on the links below:
Cricut Explore Essentials Part 1: How to Make Gorgeous Banners
Cricut Explore Essentials Part 2: How to Make Pretty Organizing Labels
This post contains affiliate links. For more information, see my disclosures here.
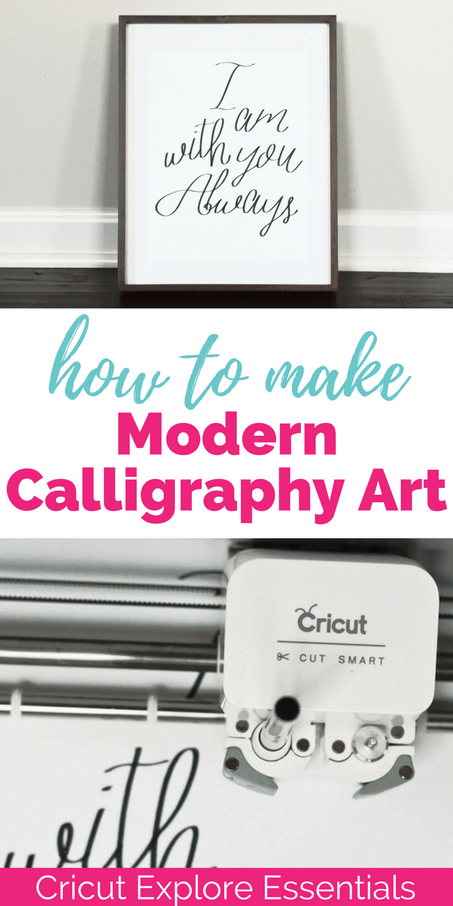
In this third project, I’m going to show you how to make modern calligraphy art using writing style fonts and the pen adapter. For this project you will need to purchase one writing style font from the Cricut library for $4.99. The font I chose is called “Adalaide.” It’s a pretty script-like font that has a casual hand-lettered feel to it. Once you purchase the font, you will have it forever to use in any future projects you create.
Let’s get started!
How to Make Modern Calligraphy Art
Materials:
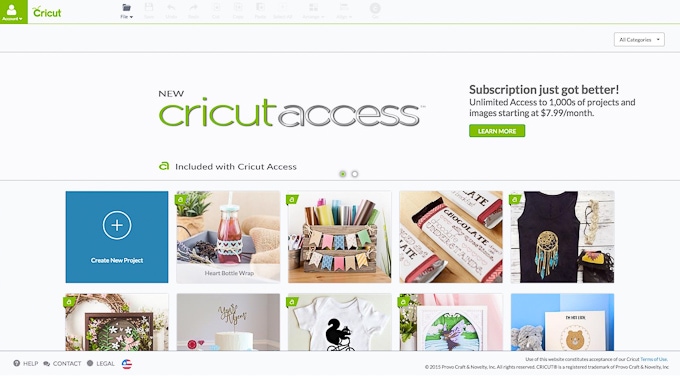
First open the Cricut Design Space by clicking here and selecting “Cricut Design Space” from the top right of the screen. This will open up the Design Space main screen. Click on the first box with the “+” sign that says “Create New Project.” This will open a new blank project for you to work from.
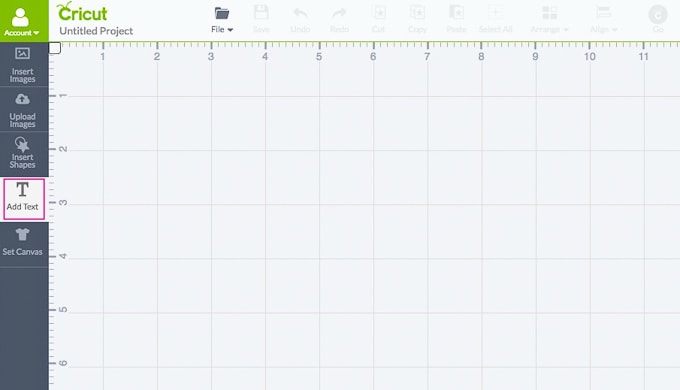
On the left-hand side of the screen select “Add Text.” This will insert a new text box into the design. Then type in the phrase for your calligraphy art. For my art, I’m using the verse Matthew 28:20 – “I am with you always.”
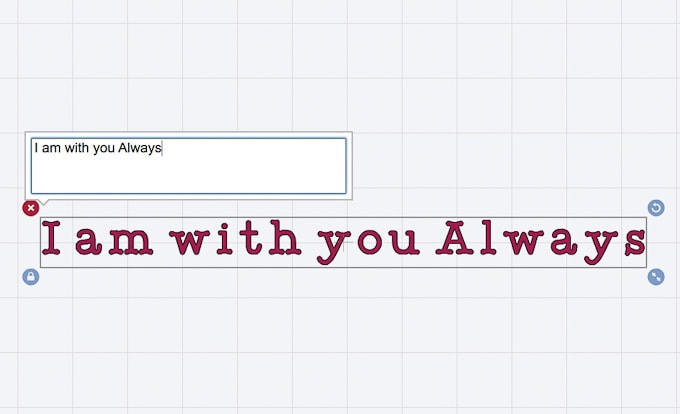
Cricut Design Space always defaults to the font “Cricut Alphabet.” This can be changed by selecting the text box and then, on the right-hand side of the screen, selecting the “Edit” tab. For this project, we are going to use a Cricut font specifically designed for writing using the pen adapter. To see all the fonts designed for writing, select the drop down next to “All Fonts” and select “Has a Writing Style.”
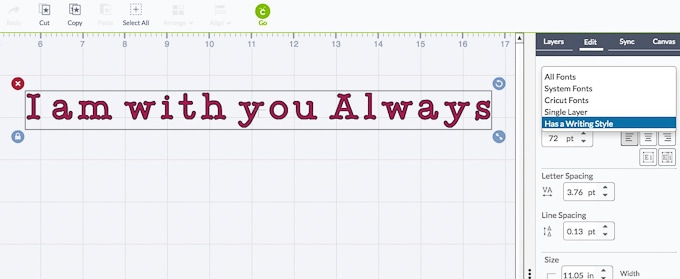
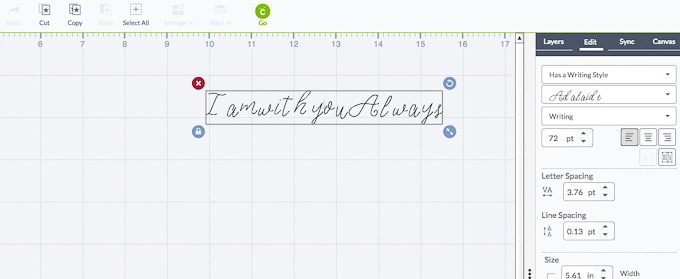
Then, under the second drop down, select the font “Adalaide” (remember – this font will need to be purchased for $4.99). Selecting a writing style font changes the layer attributes of an image to “Write” instead of “Cut.” Now the Cricut knows that this layer will be written onto the project using the pen adapter. You can tell this by looking in the “Layers” tab. Next to the text “image” there will be a pen symbol.
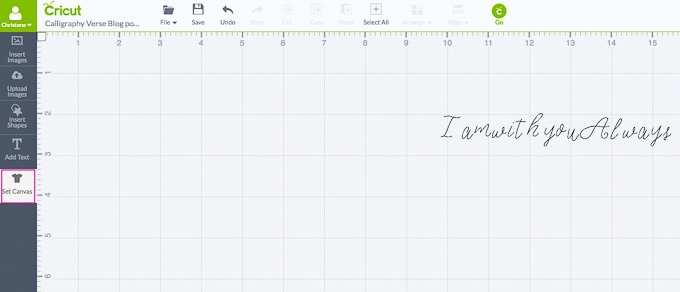
Next, set the canvas for the size of art you are designing. On the left-hand side of the screen, click on “Set Canvas” to open the canvas menu.
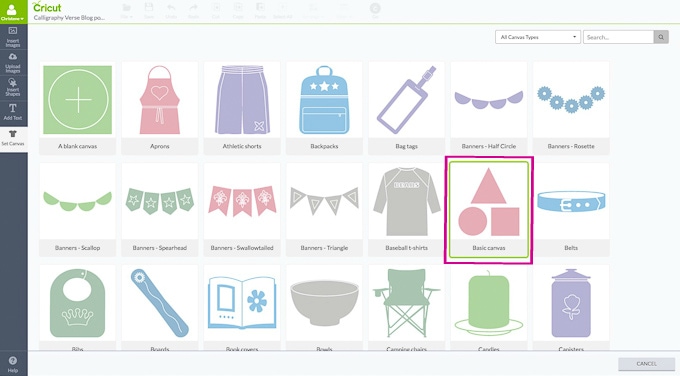
Within this menu, you can choose from a variety of different “canvases” for your projects. Our art design is going to be a basic rectangle, so select the “Basic Canvas” button.
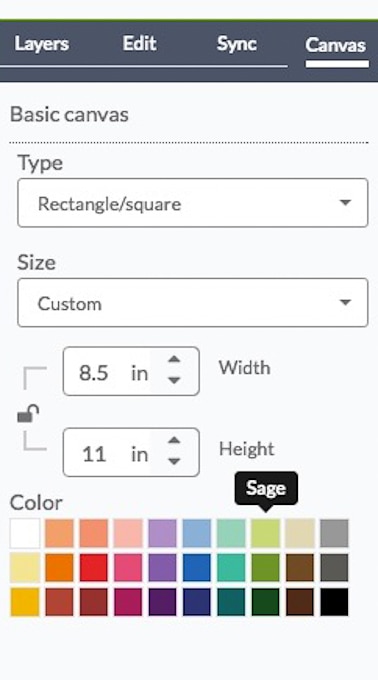
Back on the main design space workspace, there is now a white outlined area representing the canvas. On the right-hand side toolbar, under the “Canvas” tab, make sure the type is set to rectangle. The dimensions should be set to the size of your art. For this project, I’m going to be making an 8.5” x 11” portrait orientation calligraphy art design. Also, to make it a little easier to see the art in Design Space, change the color to something brighter, like green (Sage in Design Space).
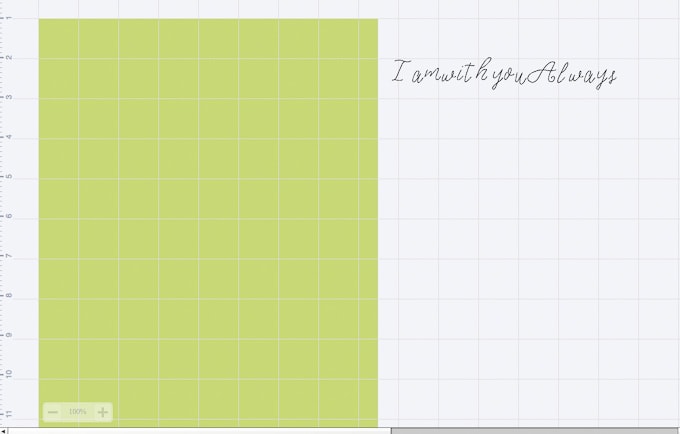
Select the text box and drag the bottom-right corner to make the text larger. Now you can see the text layout a little bit better. Looking at the phrase, you can see that the spacing between the letters and the words is a little off. All of the letters are disconnected and don’t look hand-written, which is what we want to get that calligraphy look.
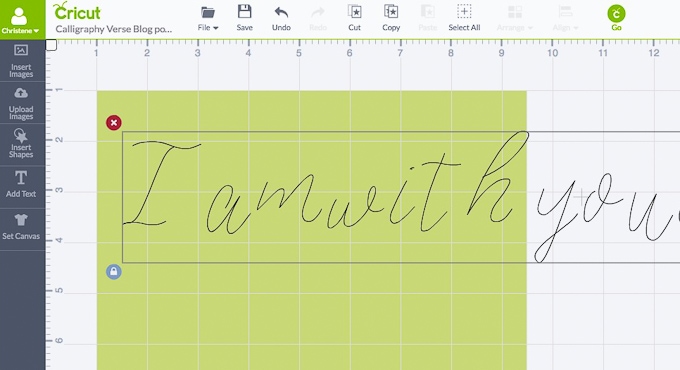
With the text box selected, on the right-hand side of the screen select the “Edit” tab. Select the symbol that shows an “E” and an “i” with boxes around each letter individually.
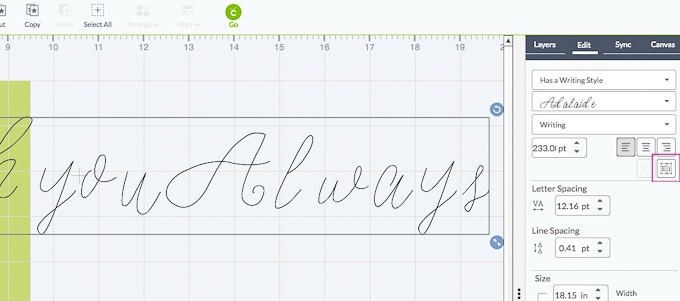
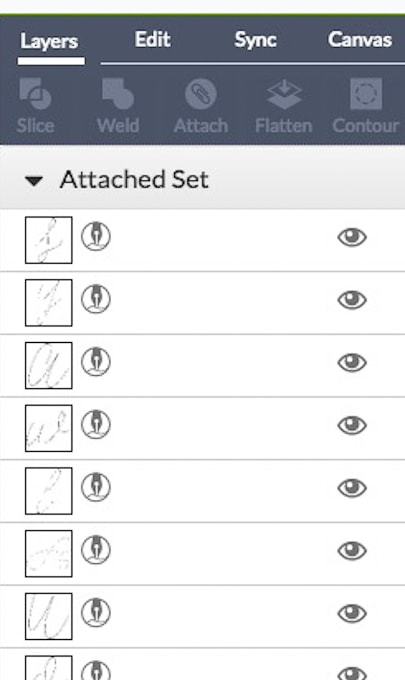
This will separate the text phrase “image” so that each individual letter is a single image. You can now click on a single letter and a box will appear around just that letter. Also, each letter can be moved around individually apart from the phrase. You can see on the image toolbar that each letter is now a separate image.
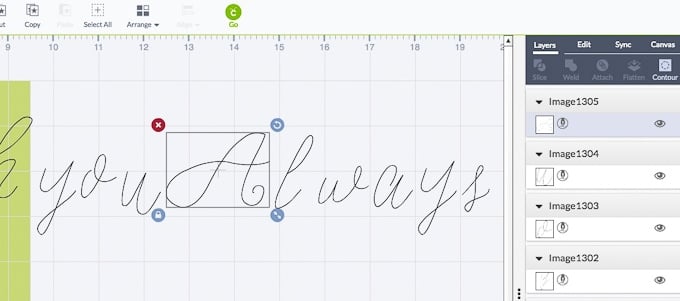
In order to look like calligraphy, each letter in a word should be connected. Drag the letters in a word close to each other so that the lines overlap. You might have to rotate the letters using the symbol in the top-right of the selection box. Try to line up the strokes as best as you can to make it look like natural handwriting.
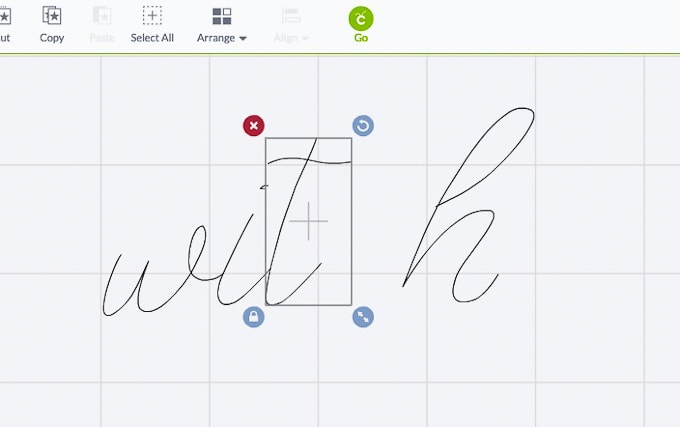
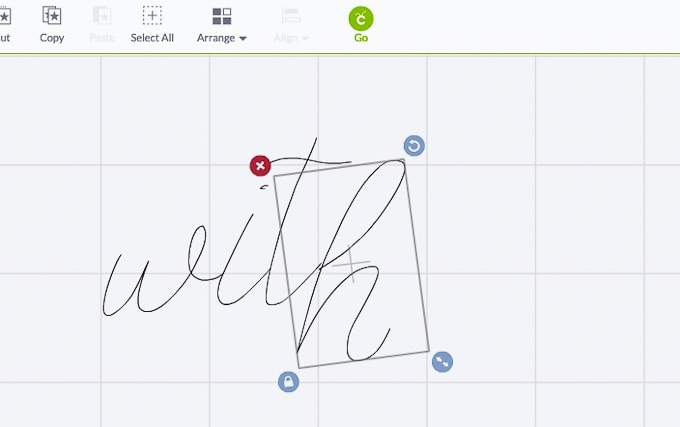
The reason that I love this writing style font so much is because of the way it looks when you match up the stroke lines. It has a casual modern calligraphy look to it because the bases of the letters don’t line up perfectly.
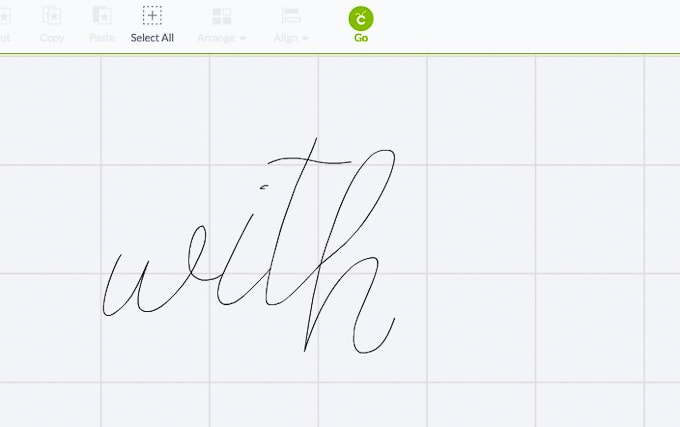
Once your letters are all connected, drag your cursor over the whole word to select all of the letters.
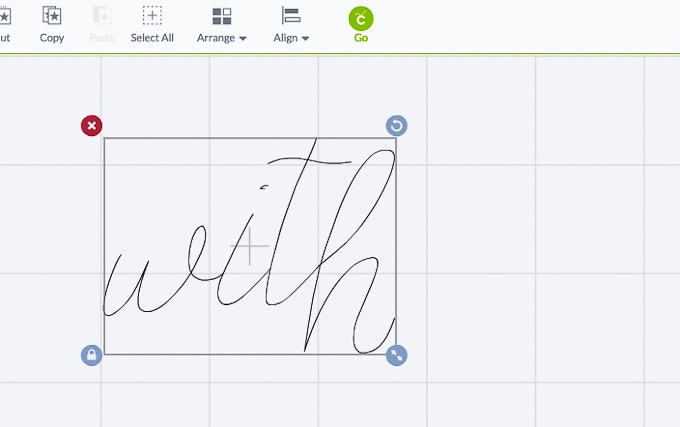
Right-click and select “Group” to group each letter “image” together to form a word.
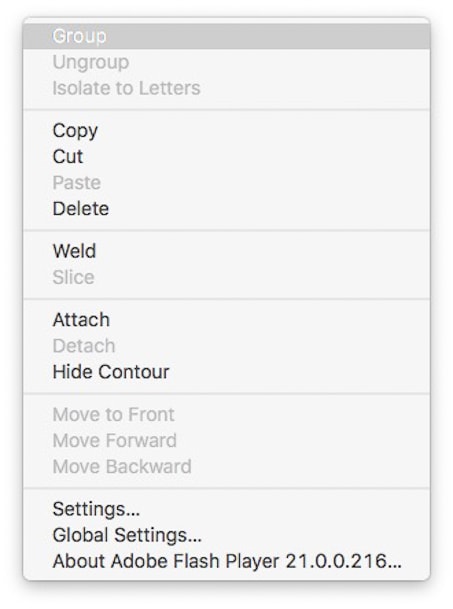
Now you can move and resize all the letters of the word together. Repeat this process of lining up the strokes of each letter of a word and grouping the letters together.
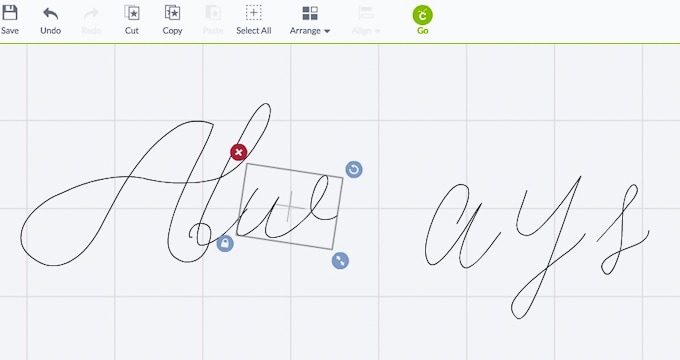
Once all of your words are done, move them over to the canvas. Arrange the words however you like and resize them as needed to fit. I also rotated some of my words so that they fit together better.
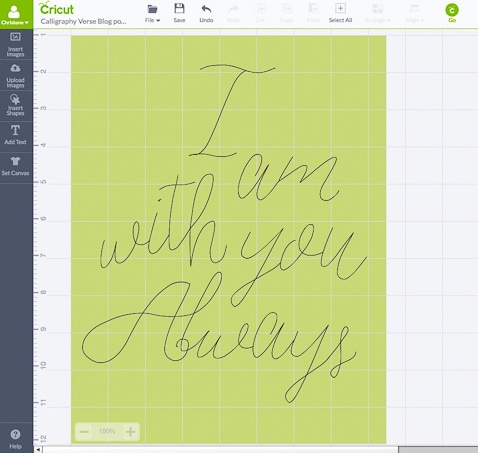
Once you are happy with the arrangement of your words, click “Select All” at the top of the screen. On the right-hand side of the screen in the image toolbar select the “Attach” button. You can see in the image toolbar in the “Layers” tab that all of the words have been grouped into an attached set. This means that they are all “attached” to their current configuration and will stay as shown when we “cut” (write) using the pen adapter.
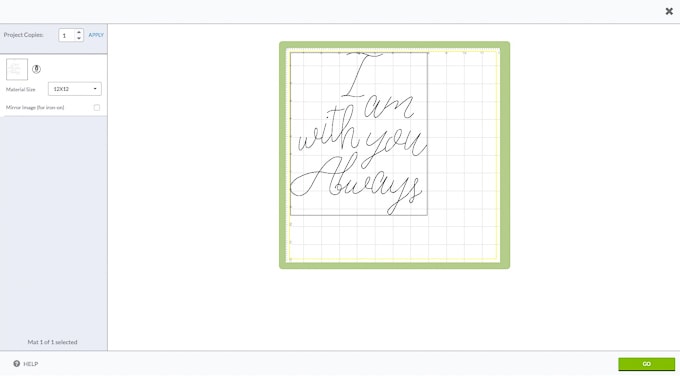
Now we are ready to write. Select the “Go” button at the top of the screen. Now in the preview screen, we can see that the design is going to be written in the top left side of the cutting mat. The Cricut always defaults to this area.
For this project, you will need to position the text and the paper a little differently. I found this out after some trail and error testing out this project. Because we are writing with an actual pen, as the Cricut moves the paper back and forth, the rollers on either end of the machine will sometimes roll over the text that was just written. When this happens, the rollers pick up the ink and then distribute it to other areas of your design, which is not what we want. To avoid the roller issue, place your card stock in the middle of the cutting mat.
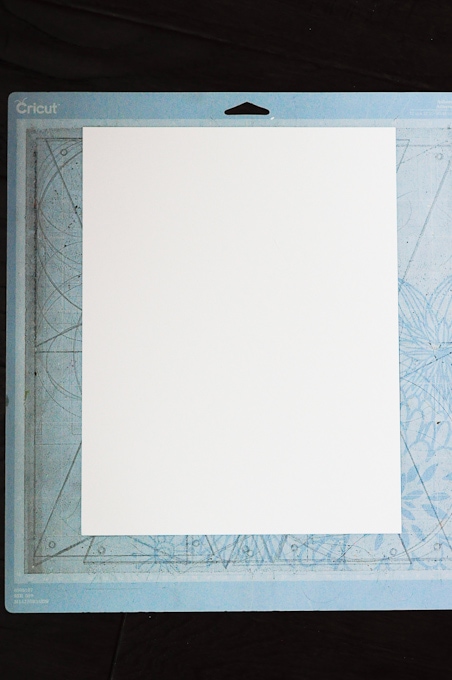
Take note of the gridlines and numbers on the cutting mat because the same markings are shown in the preview screen. This will help you line up your design in Cricut Design Space. Back on the preview screen, click on the image and drag it to the new location of the card stock on the cutting mat using the gridlines and numbers as your guide.
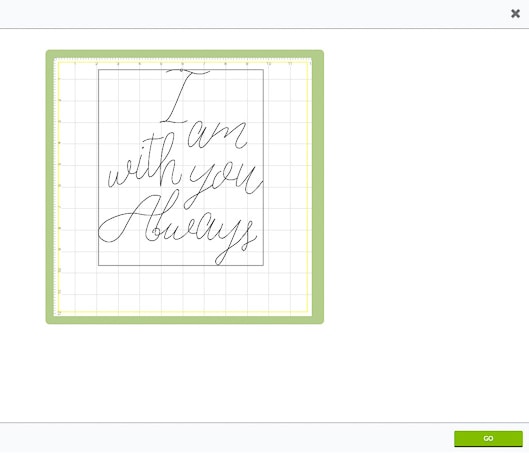
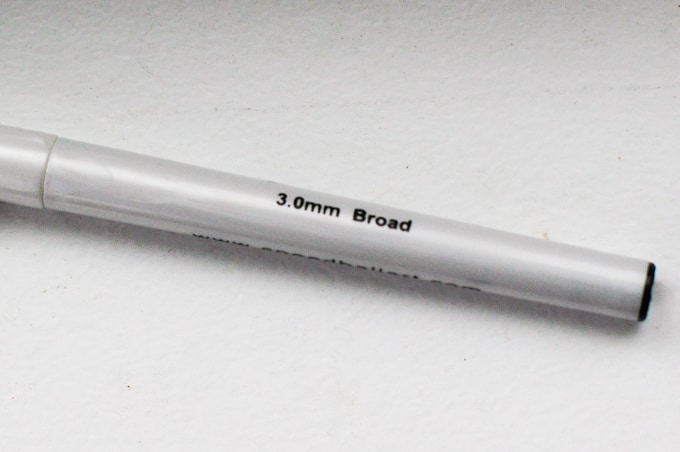
Before you select “Go” you will need to prepare the machine. For this project, we are going to be using the pen adapter attachment. The pen adapter is specifically made the hold Cricut pens, but I have found that it fits other pens as well that are similar sized. I used one of my Elegant Writer pens with a 3.0 mm tip. These pens are designed for writing that looks like calligraphy. The tip is angled so that as you write, you get those classic thick strokes.

The pen adapter is right next to the blade adapter. The latch has a letter “A” on it. Open the latch and insert the pen into the adapter.
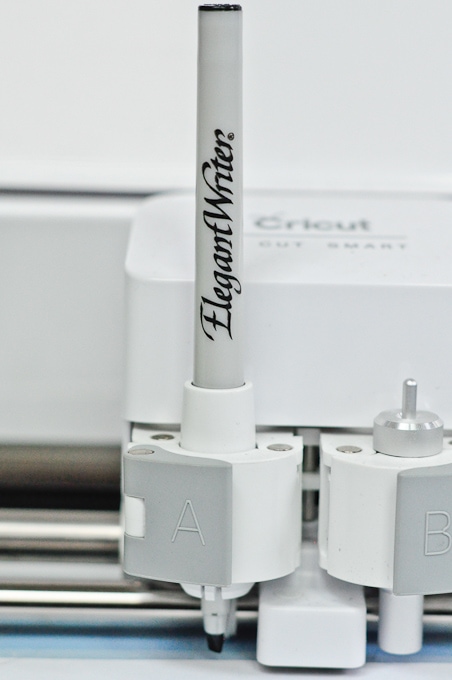
Push it down so that the tip of the pen is lined up with the bottom of the white middle piece on the cutting mechanism. Then close the latch to hold the pen in place.
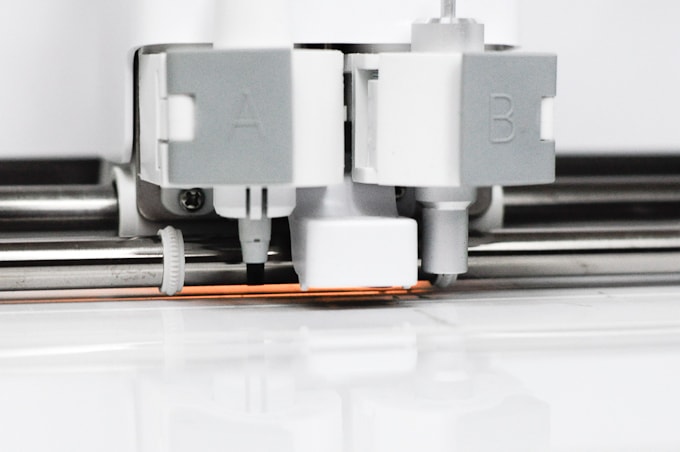
Before starting your final project, place a test piece of paper on the cutting mat. Select “Go” in Design Space and watch the Cricut start to write out your design. Make sure that the pen makes contact with the test paper and isn’t writing too lightly. If it is missing the paper completely, your pen is too high in the housing and needs to be pushed down some more. Adjust the pen and do another test run.
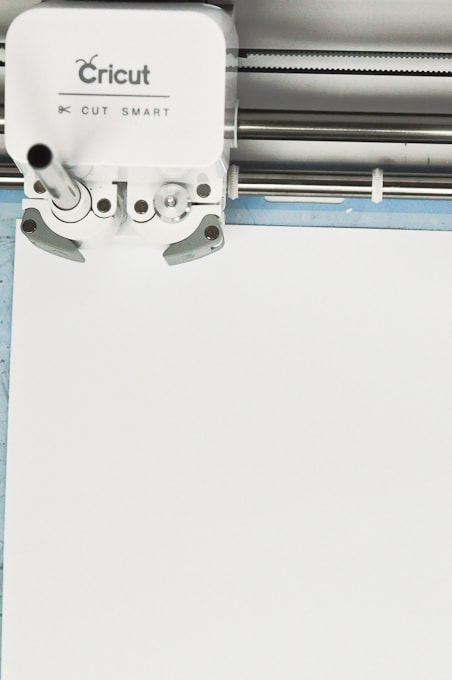
Remove your test paper and place your card stock on the cutting mat in the correct location. Load the mat into the machine and select “Go.”
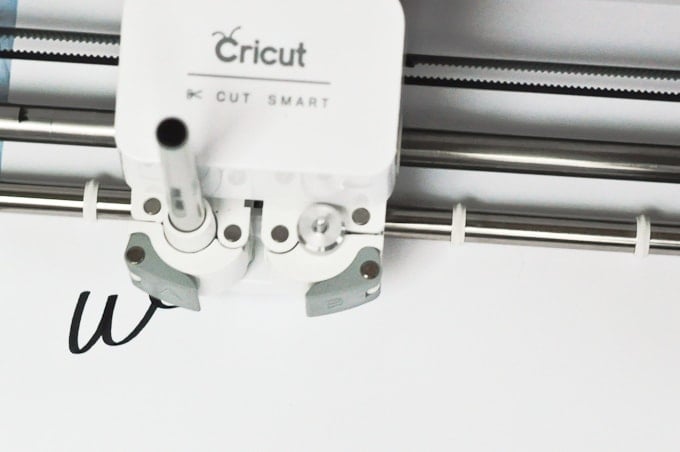
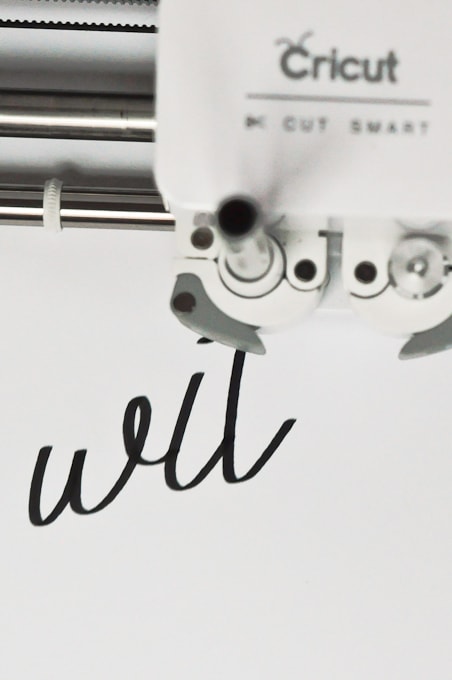
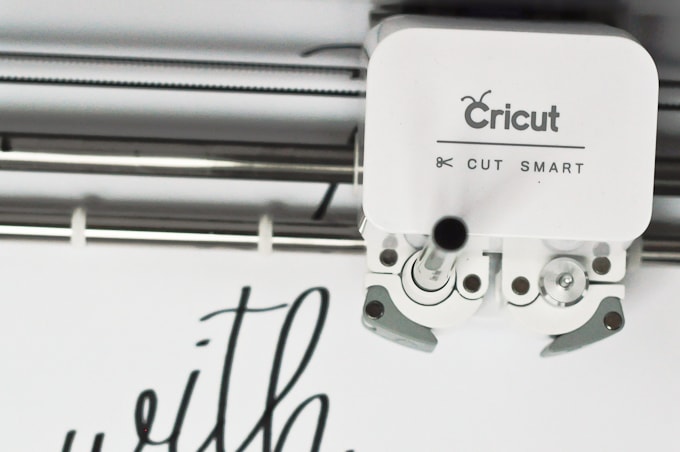
Watch as the Cricut writes out your design in pretty calligraphy!
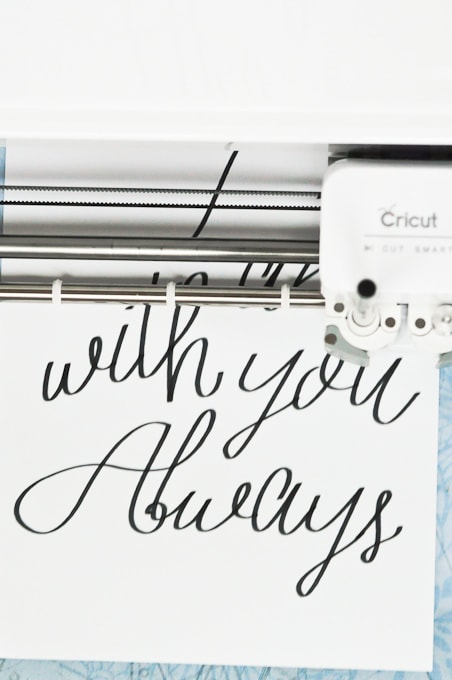
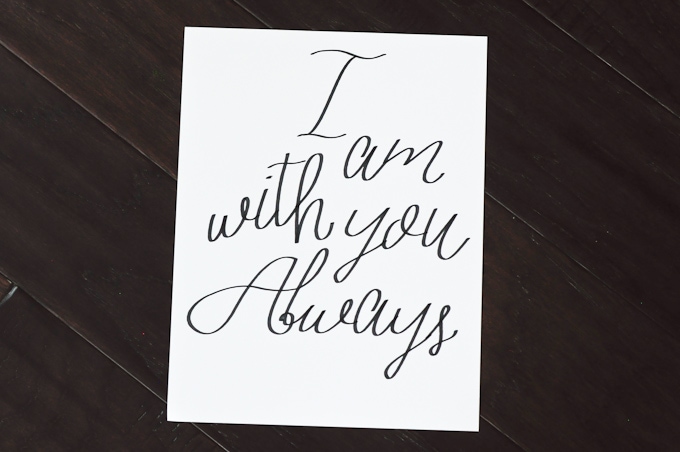
Once your design is finished, just pop it into a picture frame and you will have the perfect calligraphy art for your home.
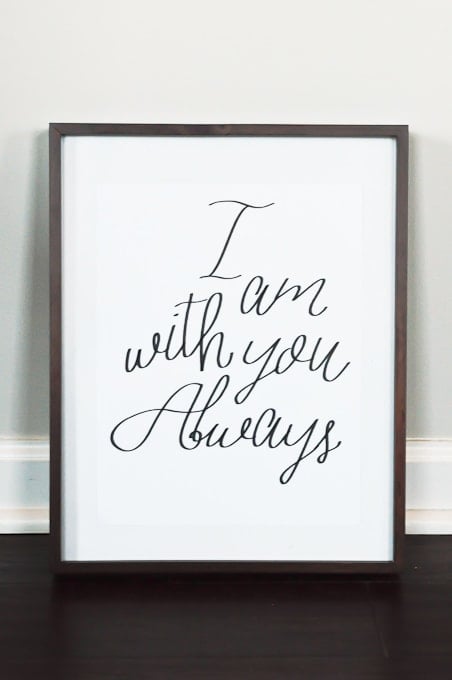
Modern calligraphy is the perfect decoration in any home. It’s a classic look with a fun twist. You can customize this project with any phrase that you want and can even change the look of the calligraphy by using pens with different sized tips.
I hope that you enjoyed this third tutorial and that it inspires you to try out more projects using your Cricut Explore cutting machine.
Would you like to see more easy tutorials for home décor projects using the Cricut Explore? I’d love to hear your suggestions or Cricut questions in the comments below!
If you’d like to follow along with the rest of the Cricut Explore Essentials series, you can do so in the following posts:
Cricut Explore Essentials Part 1: How to Make Gorgeous Banners
Cricut Explore Essentials Part 2: How to Make Pretty Organizing Labels
Cricut Explore Essentials Part 3: How to Make Modern Calligraphy Art (You’re here!)
Cricut Explore Essentials Part 4: How to Make Custom Etched Glass
Cricut Explore Essentials Part 5: How to Make Your Own Stickers




Thank you so much for the tutorial. I tried to write a project last week and had all kinds of problems. You have answered all my questions especially about the pens, the original pens I have just made a mess when I was trying to writes a smaller item. I will look for these pens with a smaller tip for my project.
Can you to a tutorial on how to design a logo?
Thanks so much!
Craftingafmaily.com
I had no idea the Cricut could write! Thanks for sharing.
I love my Cricut and I love how you showed how to kern the letters. Thanks for sharing your post with us as #CCBG Creatively Crafty Link Party http://tryit-likeit.com/entries/link-party
Thanks Janet! Yay fellow Cricut lovers!
>> Christene
The Cricut board can do so much!
This is awesome! I love calligraphy signs, but suck at calligraphy 🙂 Thanks for sharing at the Wednesday Showcase party.
Thanks Kati! Yea I’m not the best at calligraphy either. It’s the spacing that gets me. I want it to look casual and modern but I always end up being very rigid and writing in a straight line. Thanks for stopping by the blog! Can’t wait to share more projects on the Wednesday Showcase!
>> Christene
Great tutorial! Thank you for sharing at Merry Monday!
Thanks Amanda! Have a great week 🙂
>> Christene
Thanks for sharing at Peace, Love, Linkup! The next party kicks off tomorrow at 6! Hope to see you there : )
‘Great tutorial! I just found your website on the Peony Project and look forward to reading more of your posts.
Thanks Maria! So glad to have you here from the Peony Project 🙂
>> Christene
Had anyone figured out how to make it write a letter on lined paper I.e. notebook paper yet?