Learn how to make a mini felt stocking using the Cricut Maker. This cute Christmas stocking will look great as home decor. It also makes a fun gift!
Welcome to Have Yourself A Very Cricut Christmas: 25 Days of Homemade Holiday Crafts!
Each day in December, I’ll be sharing a new Christmas project that you can make using your Cricut. It’s going to be a blog version of an advent calendar! Come back every day to get a new “gift.”
Today’s gift is a Mini Felt Stocking.

Stockings are an essential part of Christmas! I always loved coming downstairs on Christmas morning and finding my stocking filled with all kinds of goodies.
I love the idea of a stocking as a gift vessel. They are just super cute! I designed this mini felt stocking as a creative way to “wrap” gifts. It would look so cute stuffed with a gift card, some candy canes, and other tiny trinkets.
You’re going to love this Mini Felt Stocking. Here’s how to make it!
How to Make a Mini Felt Stocking Using The Cricut
This post contains affiliate links for your convenience. For more information, see my disclosures here.
Materials:
- Mini Felt Stocking SVG file
- Red Felt Sheet 9” x 12” (I used 2 sheets for my stocking)
- You can choose any color as the base of your stocking
- White Felt Sheet 9” x 12” (I used 1 sheet for my stocking)
- White Thread
Tools:
- Cricut Machine (You will need a Cricut Maker for this project)
- Fabric Grip Cutting Mat
- Cricut Rotary Blade (comes with the Cricut Maker)
- Cricut Brayer Tool
- Sewing Machine
- Straight Pins
- Hot Glue Gun and Hot Glue Sticks
How to Cut Out The Project Using The Cricut
First, you will need to download the Mini Felt Stocking SVG file.
Get the Free Mini Felt Stocking SVG File

Start by opening Cricut Design Space and creating a new project.
Upload the SVG File
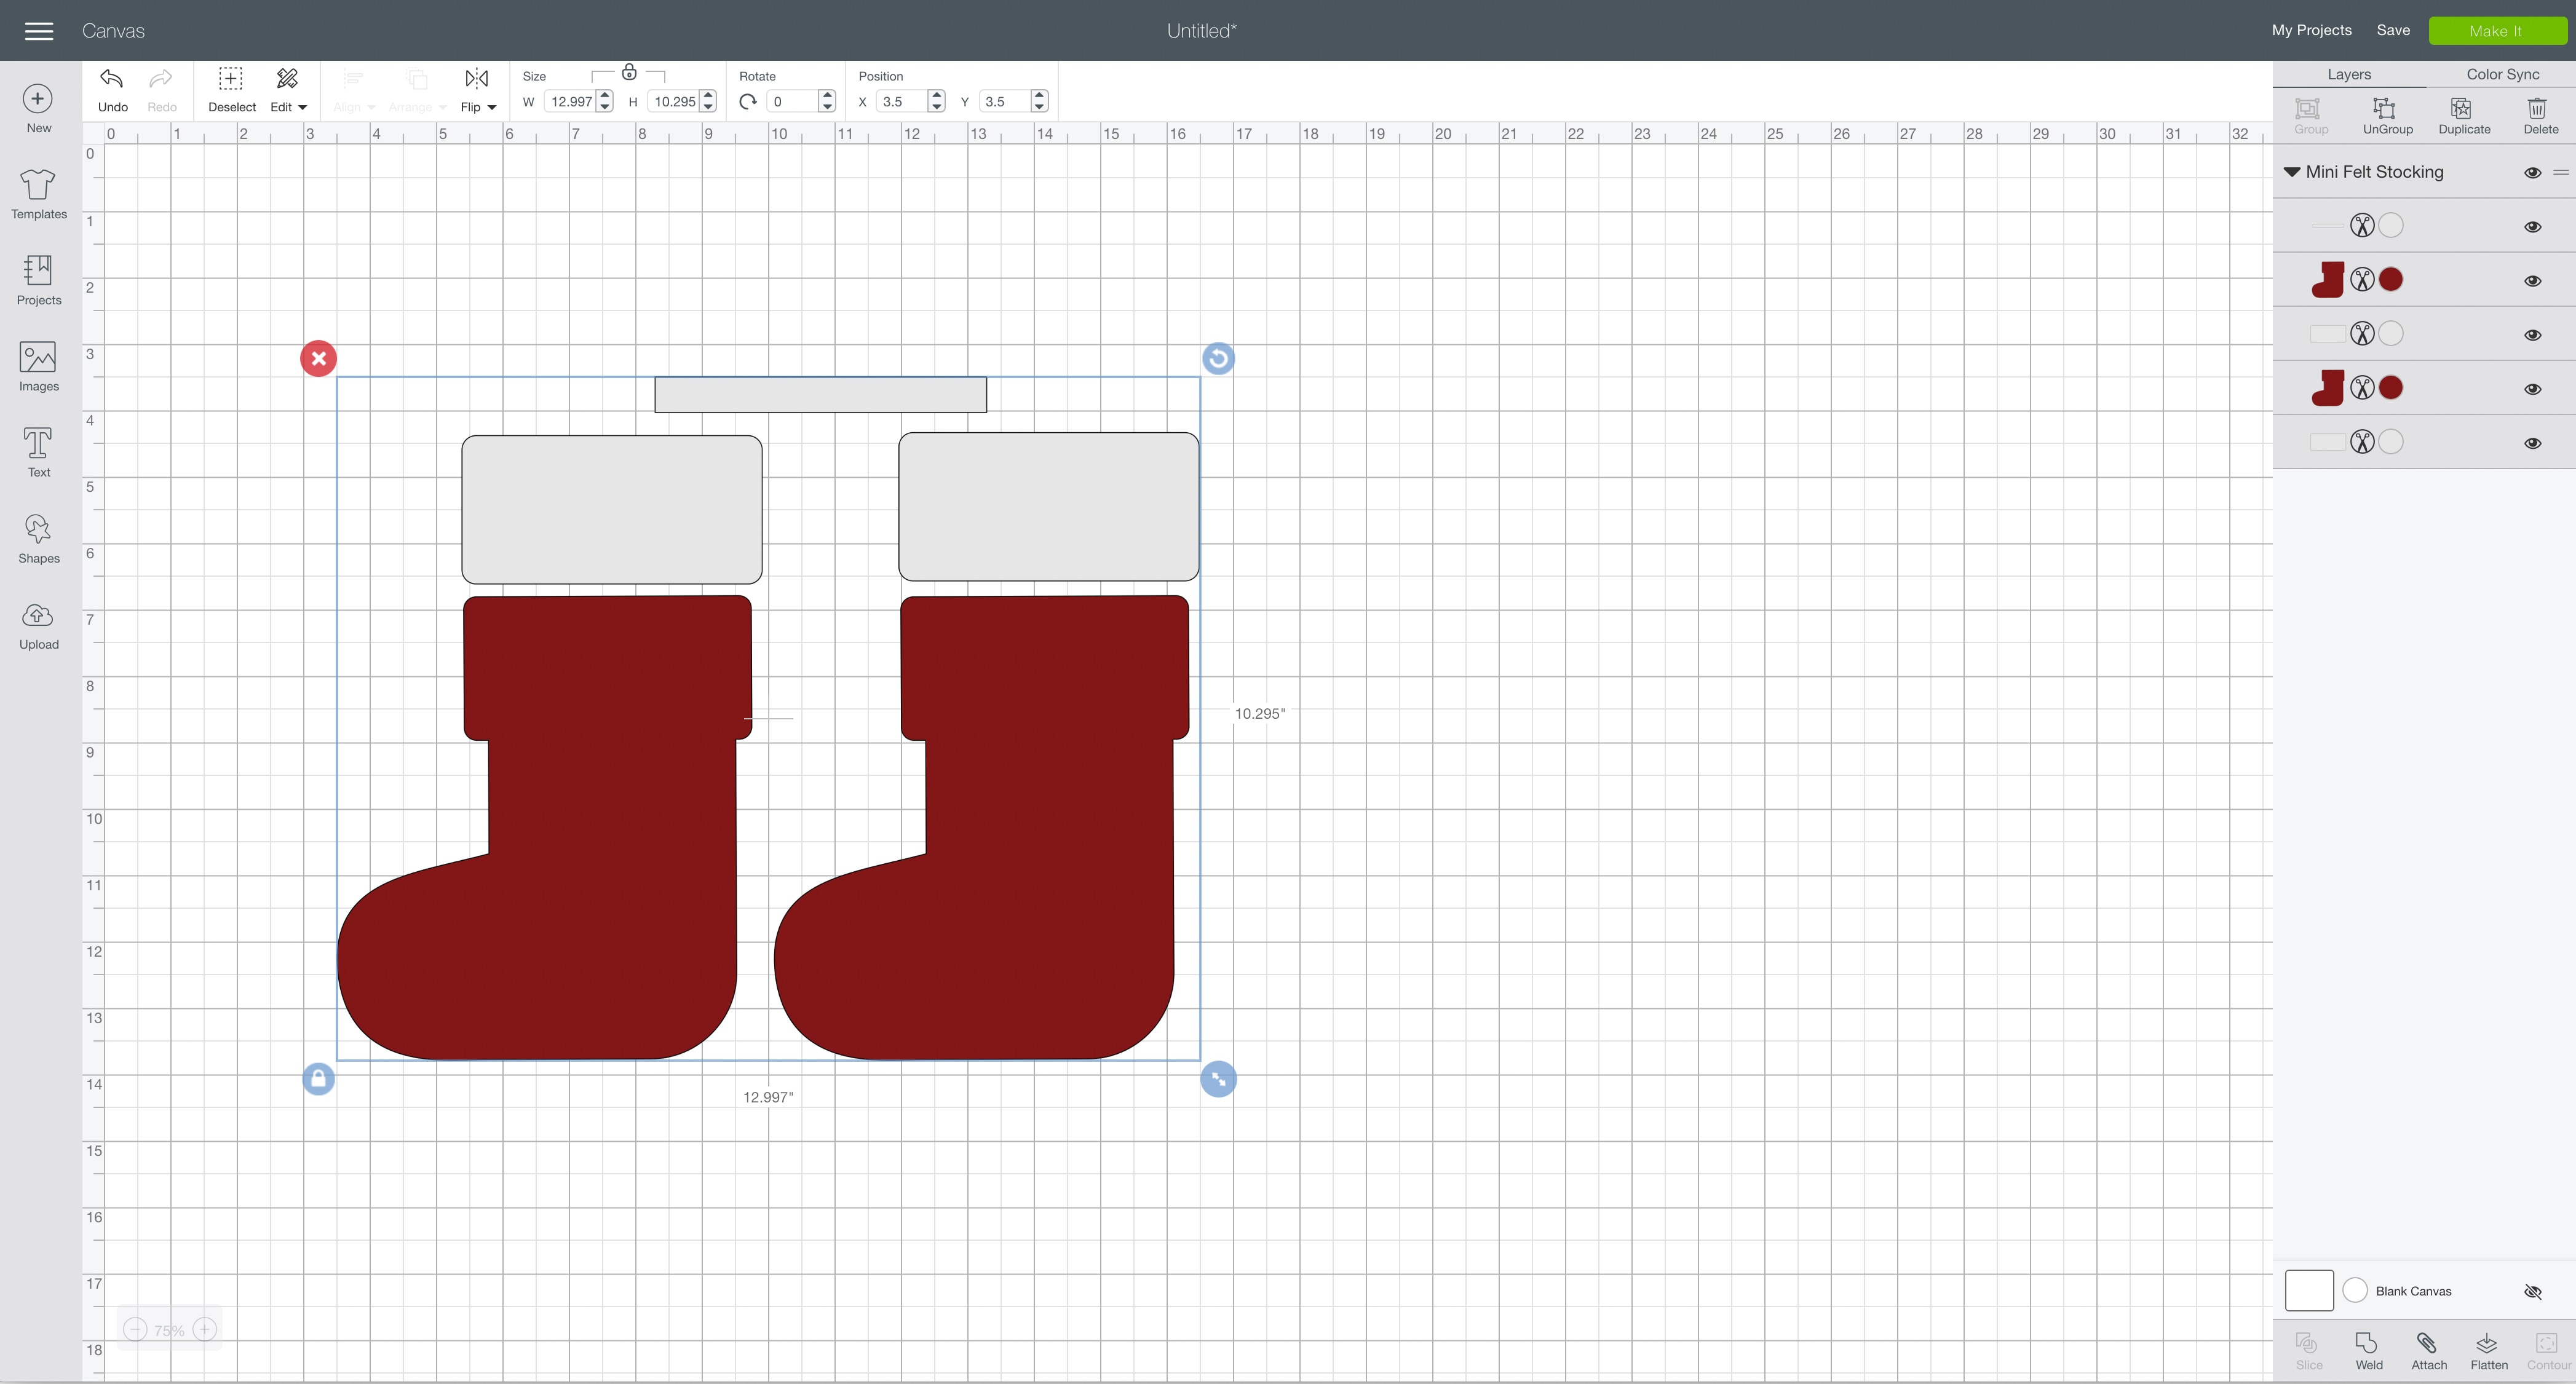
Then, upload the SVG file by selecting the Upload button and then Upload Image. Next, drag and drop or select the SVG file you want to upload.
After the SVG is uploaded, add the image to your design canvas.
If you need a little more help uploading SVG files, you can learn more in this post.
The SVG file will already be sized properly for this project.
Cricut Machine Requirement
For this project, you will need to have the Cricut Maker machine. The Cricut Maker comes with a rotary blade that is designed to cut fabric and felt.
I just got this machine and I love it! I feel like I can create so many more things now that I can cut fabrics.
The rotary blade is designed to be used with the fabric grip cutting mat. This mat is the pink one and is made for fabrics.
If you buy a Cricut Maker, you will get the rotary blade and a fabric grip cutting mat in the box. The best part is, you don’t need any backing for the Cricut Maker to cut fabrics. It just cuts out the pieces perfectly using the rotary blade!
Make It
Now it’s time to make your project!
Click on the Make It button in the upper right of the screen.
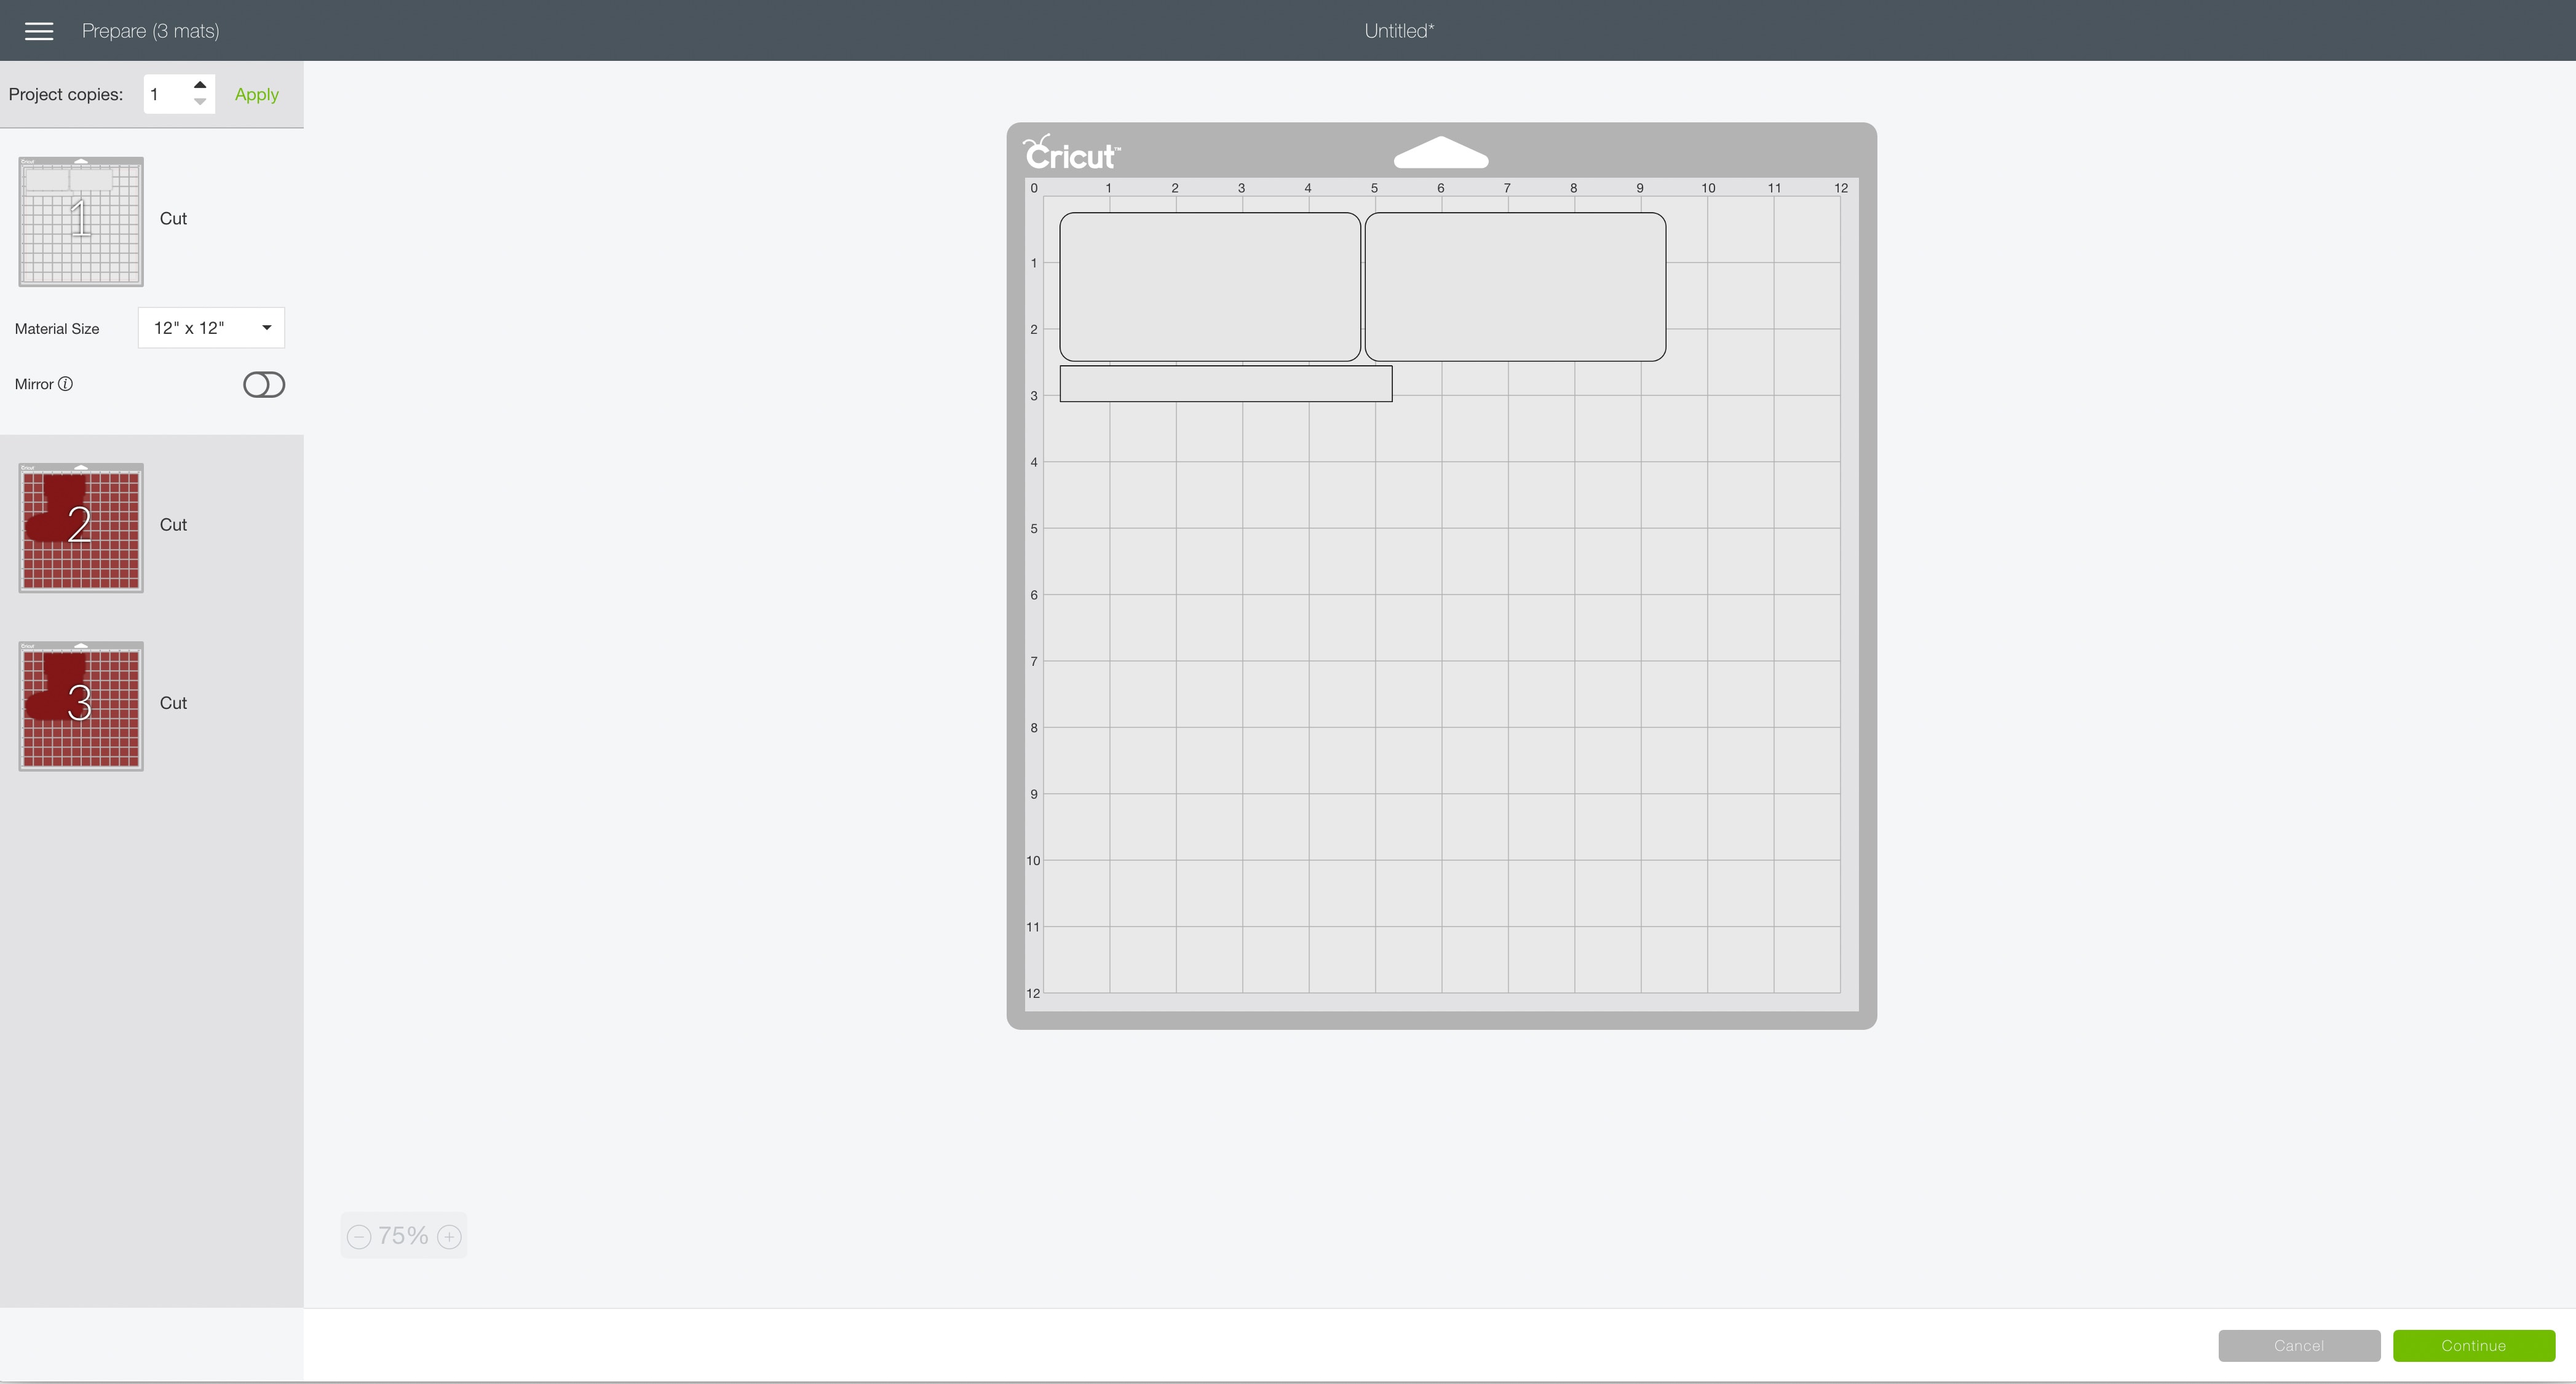
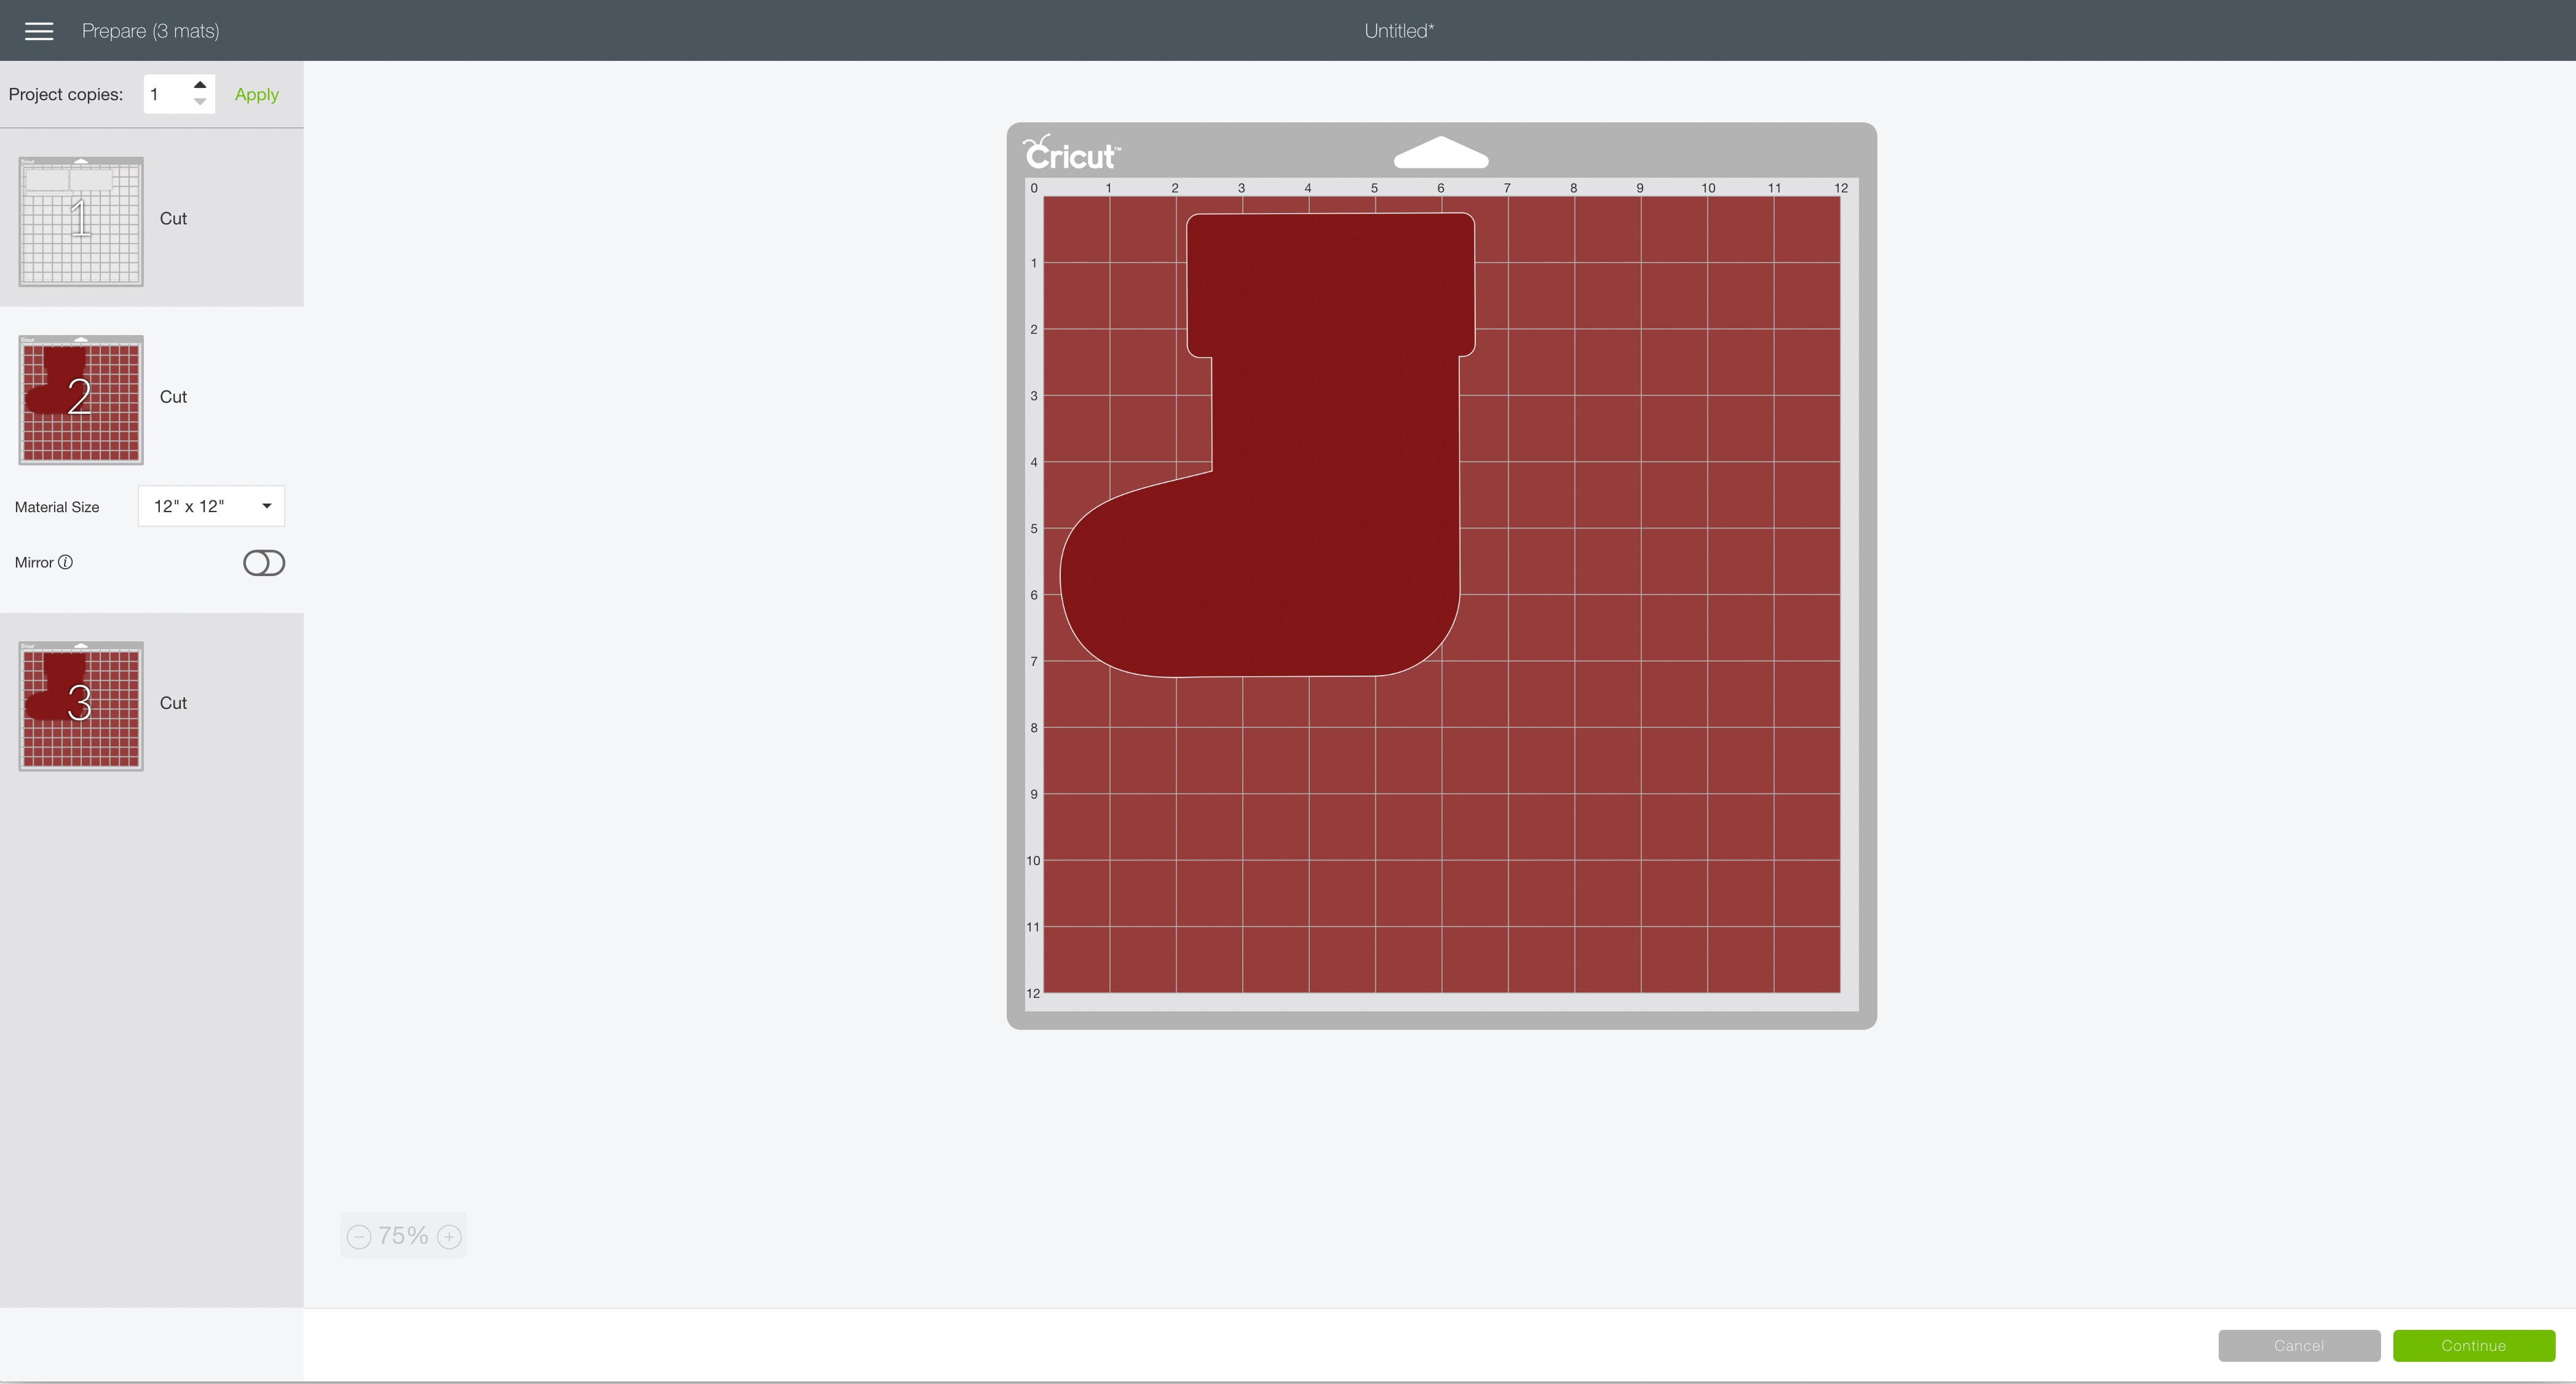
The first screen you will see is the Mat Preview Screen. This will show you all of the different mats needed for your project. Each mat represents another piece of material.
For this project, the white layer represents the pieces you will be cutting out of white felt.
The red layers represent the pieces you will be cutting out of red felt.
Click on the Continue button in the lower right of the screen.
Connect your Cricut machine.
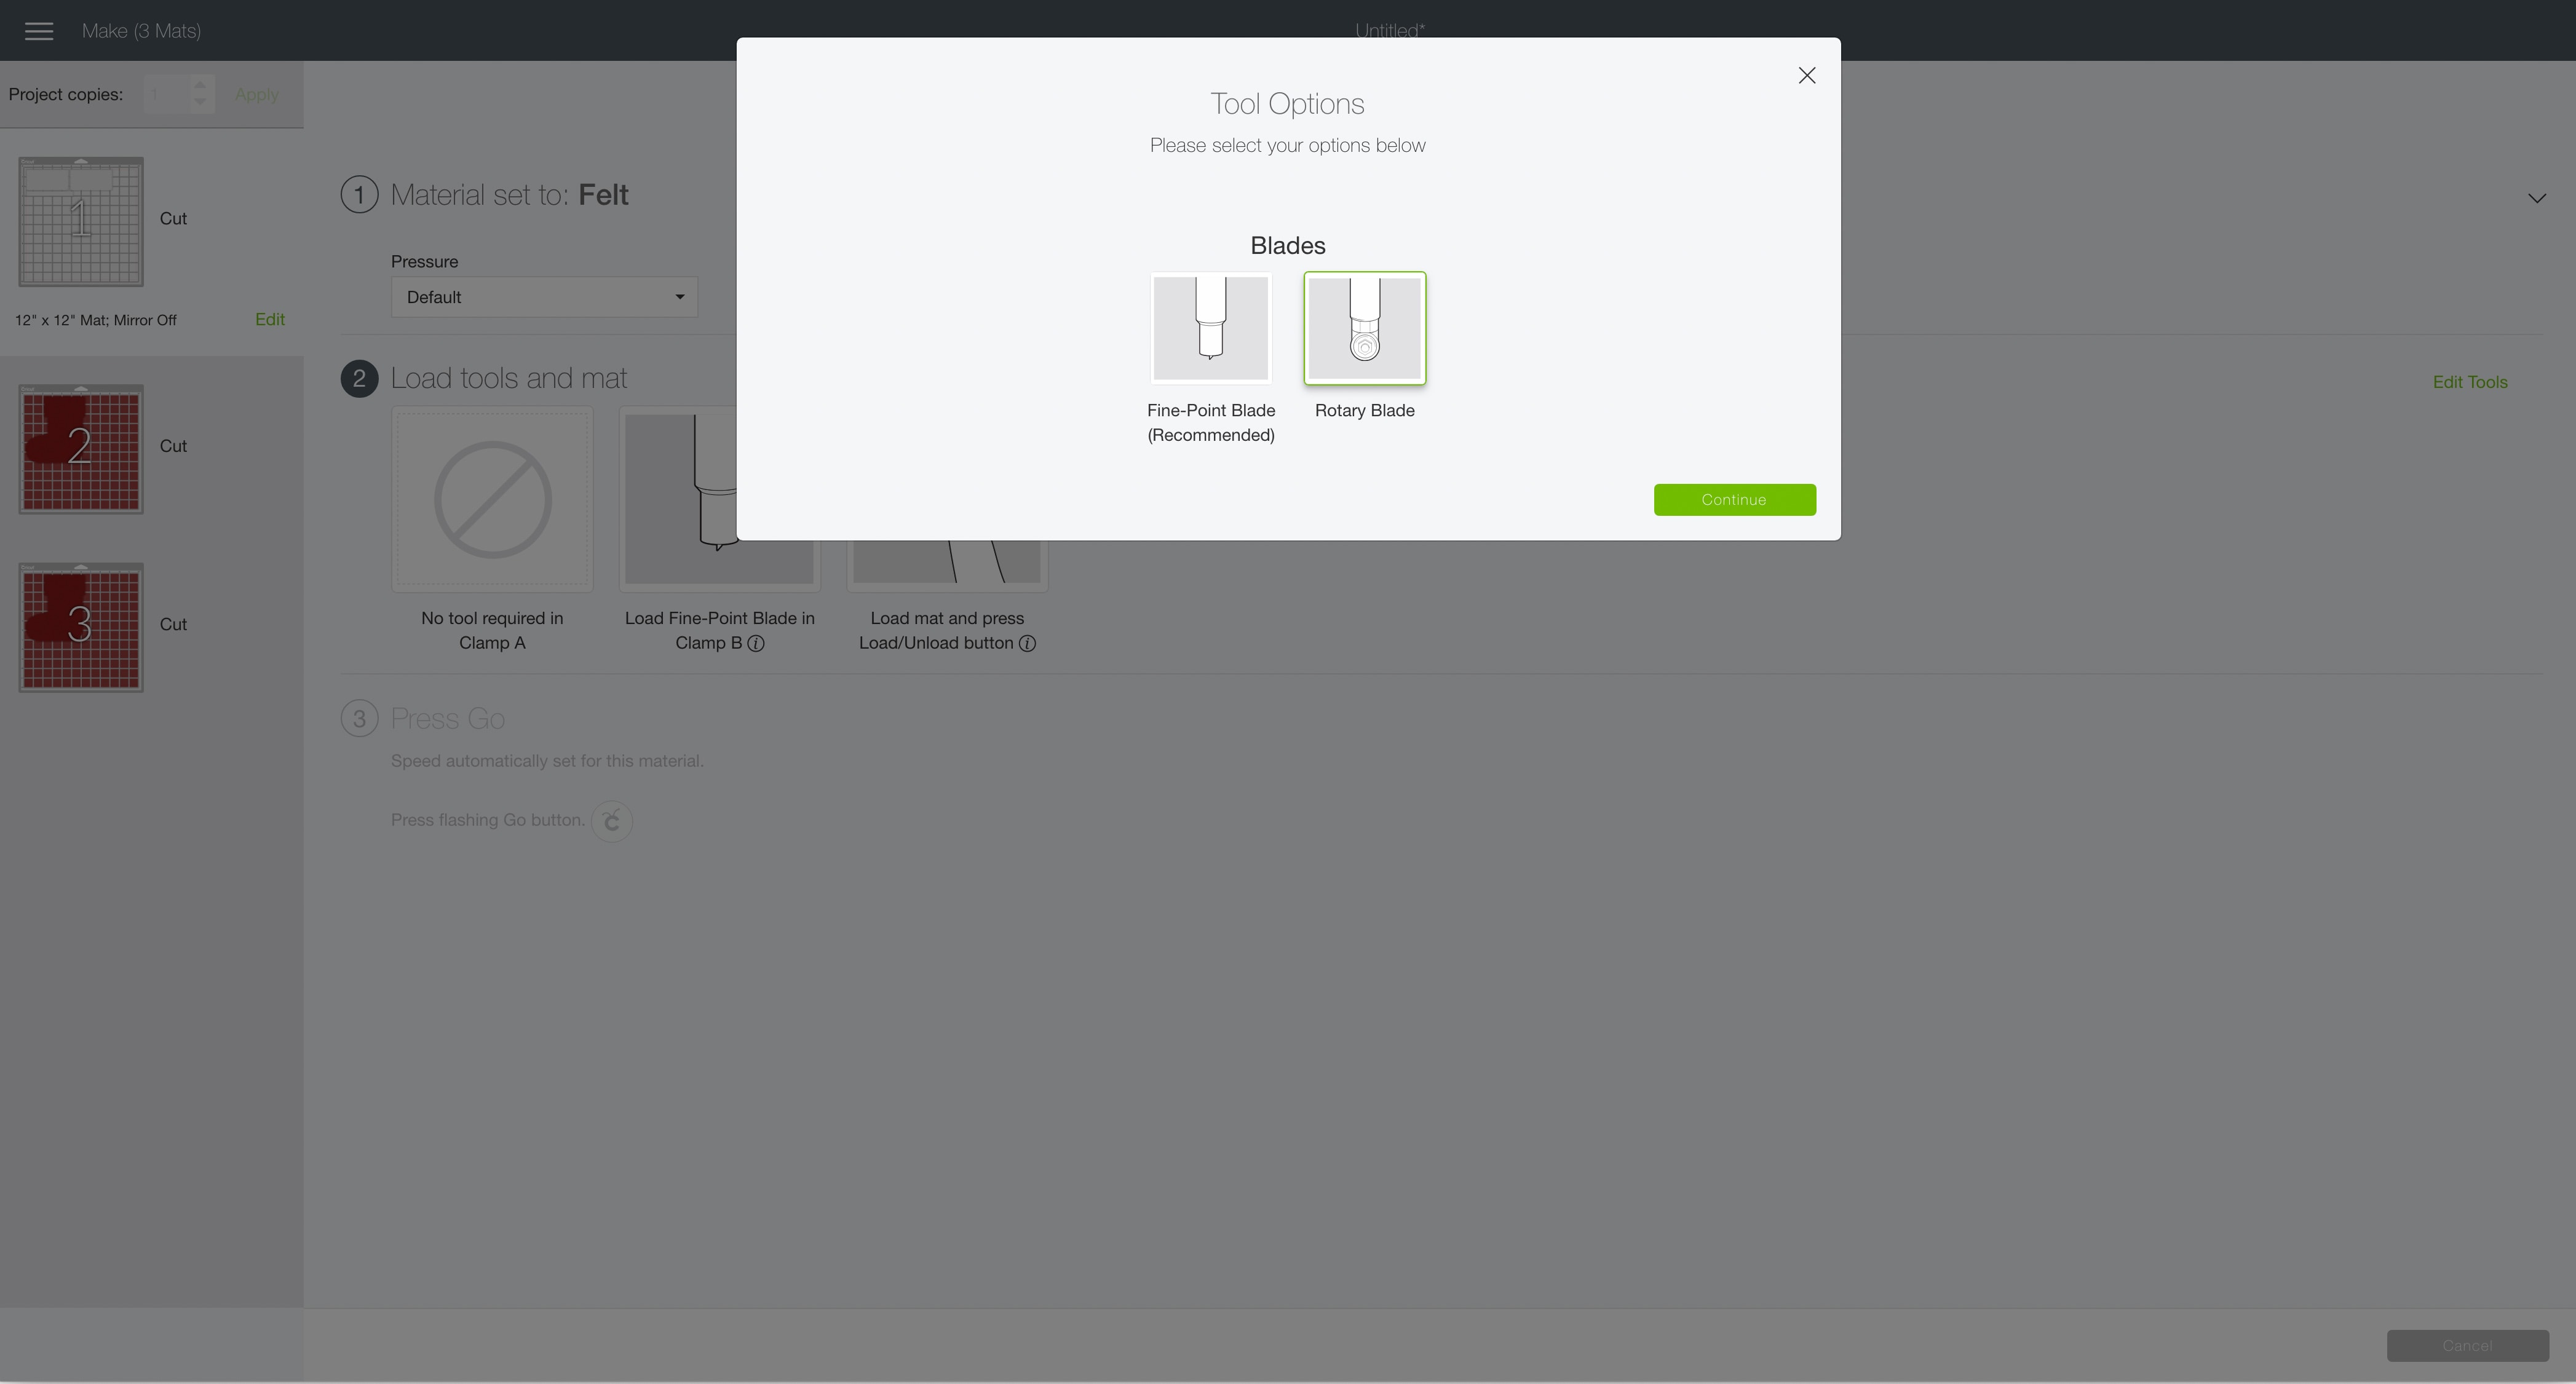
For all three mats, adjust your settings as follows.
Material: Felt
Pressure: Default
Tools: Rotary Blade
Click on Edit Tools to adjust which tools you are using.
Load the fabric grip cutting mat with your first material into the machine. Then, press the flashing Go button to begin the cutting process.
Load each new piece of felt and press the flashing Go button to duplicate the cut until all of the pieces are cut out.
Cricut Tip: Use the Cricut Brayer tool to get fabric and felt to stick to the fabric grip cutting mat in the best way. I love this tool because it really helps me to smooth down any material onto the cutting mats.
How to Assemble The Project
Once all of your pieces are cut out, it’s time to assemble the project.
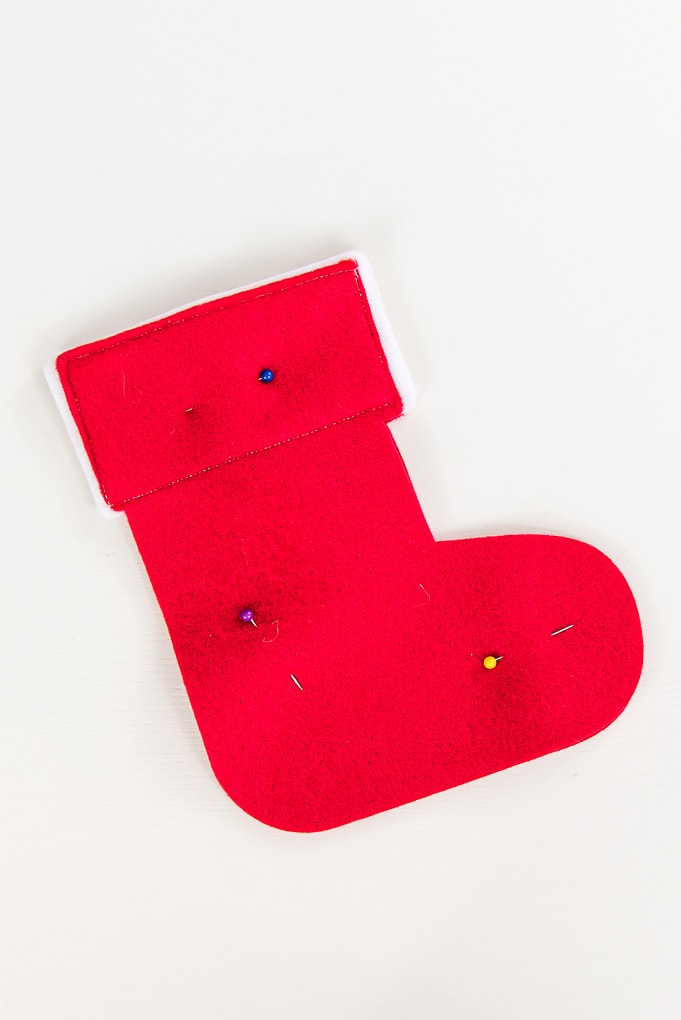
There should be one stocking base piece facing either direction. Take one of the white felt cuff pieces and place on top of each base piece.
Use a sewing machine and some white thread to sew the cuff pieces to the base pieces.
Take the small white felt loop piece and use a hot glue gun to hot glue the ends together and create a loop for hanging the mini stocking.
Next, place the stocking base pieces with the fronts toward one another. That means the white cuff sides should be facing in. Use straight pins to pin the two pieces together.
Use a sewing machine and some white thread to sew both pieces together. Make sure to leave the top of the stocking open! You don’t want to sew everything closed.
Once you are done sewing, remove the straight pins and turn the stocking right side out. You can use a straight tool like a pencil to help poke out the curved pieces.
Once it’s right side out, use hot glue to attach the white felt loop to the top of the mini stocking. I just glued the loop to the back inside of the stocking.
Now your Mini Felt Stocking is ready!
I love how this stocking turned out! It looks so cute and I can’t wait to make more in all kinds of different colors.
This stocking is perfect for giving smaller gifts like gift cards and little trinkets. You can even add it to your presents as a gift topper.
I also think it looks cute if you hook on one of the faux leather tassels from day 5 of this series. You can learn how to make one of those here.
I hope you love this Mini Felt Stocking.
If you decide to make this project, I would love to see!
Tag me on Instagram. Use the hashtag #25daysofcricut so that we can all see each other’s projects too!
To see more projects from Have Yourself A Very Cricut Christmas: 25 Days of Homemade Holiday Crafts!, click here!
If you want to follow along and see all of the projects for Have Yourself A Very Cricut Christmas: 25 Days of Homemade Holiday Crafts!, you can bookmark this blog post and visit it each day to see the newest project.
>> Want to remember this? Save the Mini Felt Stocking to your Pinterest boards by clicking here! <<


