I don’t know about you, but lately I’ve been struggling with managing my time.
Days seem to fly by without me realizing and everything I had hoped to get done that day just gets pushed into the next day.
Then the next day comes and the same thing happens again.
Sometimes I feel like I just can’t keep up! Have you ever had weeks like that? I hope I’m not the only one. I try to stay organized by keeping a to-do list and a calendar on my phone, but really those are just “lists” and not time-management systems.

Recently, I’ve been seeing lots of people trying out time blocking to manage their time. What’s time blocking? It’s a method of planning out each day by assigning a time for each of your tasks. That way you can visualize the hours you have in a day and how all of your to-do list items actually fit into a day.
Let me tell you, this was a game changer for me! In the past, my typical way of “planning” a day involved me trying to do more things in a day than there were hours. I would sort through my list and think “of course I can do that today” and completely forget about everyday tasks or things that might come up unexpected. I always ended my days feeling like I accomplished nothing until I started using time blocking.

Each week I sit down with my to-do list and calendar and start filling in my time blocks. First I write any calendar items into my worksheet because those have specific times already. Then I go through my to-do list and try to give each task a “slot” in my time block worksheet. This helps me to see what I can actually accomplish each day and what I just don’t have time for because the hours in that day are already filled up.
Now, I know you might be thinking what if you miss your to-do list time? What if something comes up? What if a task takes longer than you expected? At first, I thought the same things. I thought time blocking would be too restrictive and make me feel stressed out trying accomplish everything at the exact times I specified.
The secret to making time blocking work is to schedule in some buffer time between tasks and activities. I try to overestimate how long I think a task is going to take. That way if it takes longer than expected or something else comes up, I can adjust my plan for the day and not have my whole schedule ruined. Time blocking helps me to see my day as a whole and stay on track towards accomplishing my tasks.
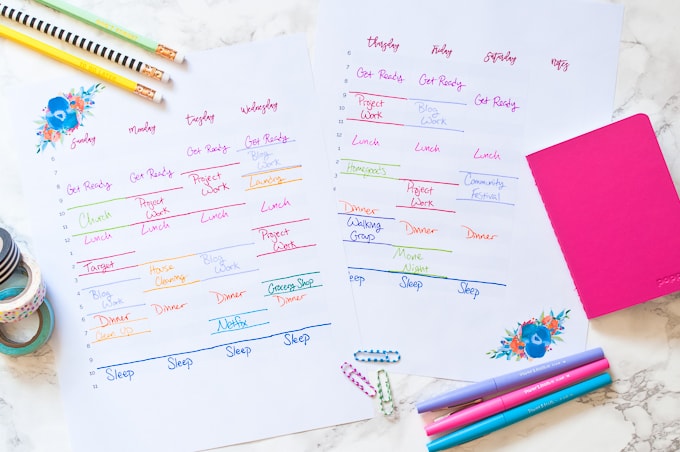
Time blocking can be done with just a blank sheet of paper and a pen, but I think everything is always better when you have a pretty printable! Here’s my method for creating your own time blocking worksheets using Microsoft Word.
PS: You can also grab these time blocking printable worksheets for FREE at the end of this post.
Create a Structure
Open up a blank Microsoft Word document. You want as much of the page to be available to create your time-blocking worksheet so there’s more room to write things and add in notes. To do this, you need to make the margins narrower. Click on the “Layout” tab and select “Margins.” In the drop-down click on the “Narrow” option. This will make all the margins smaller and leave more room for the pretty design.

The structure of this worksheet is going to be a table. That’s going to help you create a design where everything is lined up and even. Start by selecting the “Insert” tab and then select “Table” to insert a table that is 5X6.
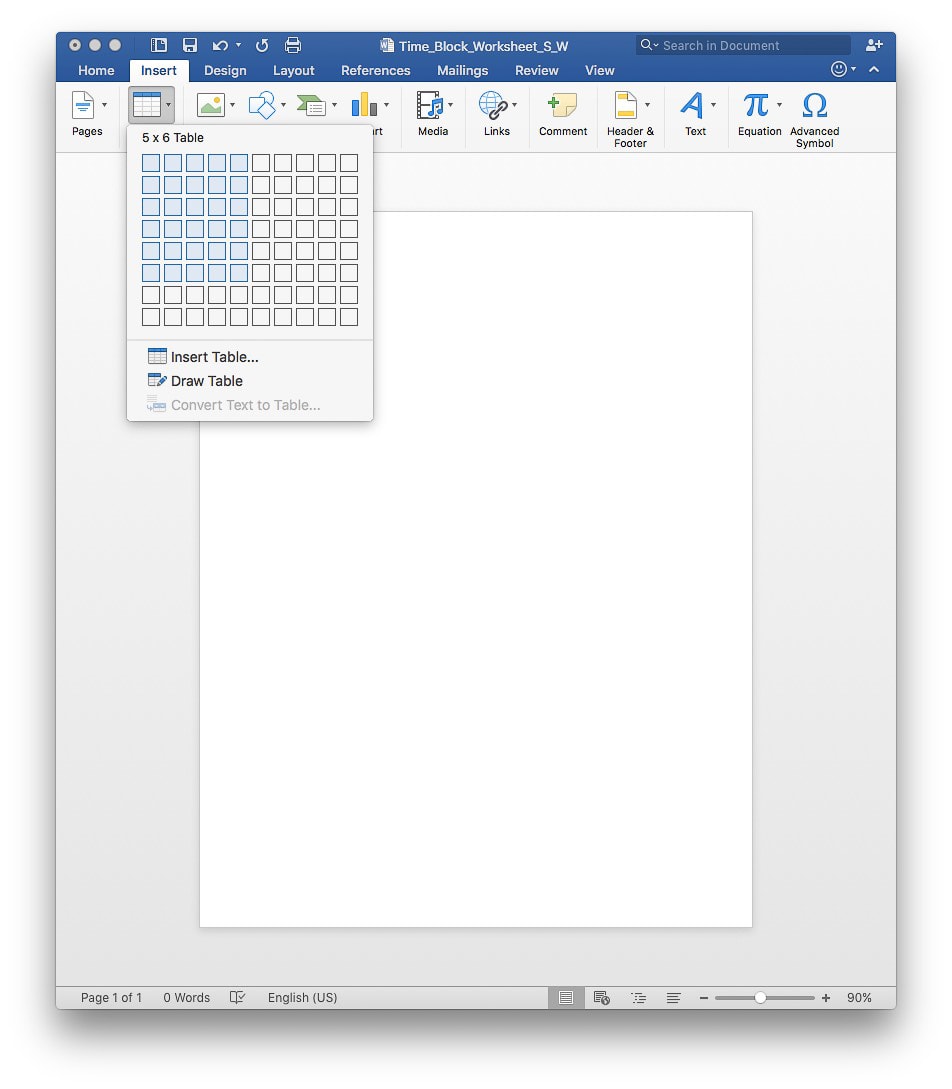


Highlight the top row of cells, right-click, and then select “Merge Cells.”
Click inside the merged cell that you just created and then click on the “Table Layout” tab. Change the vertical size of this cell to 1”. This is going to be the heading space for your time-block sheet.

Add Days and Times
Next, go to the second row of cells. In the four right cells, type in the days of the week – Sunday, Monday, Tuesday, and Wednesday. Don’t worry about the other days now, you will create a copy of this sheet for the other half of the week later. Highlight all four cells with the days of the week and select the center justify button to center the text.
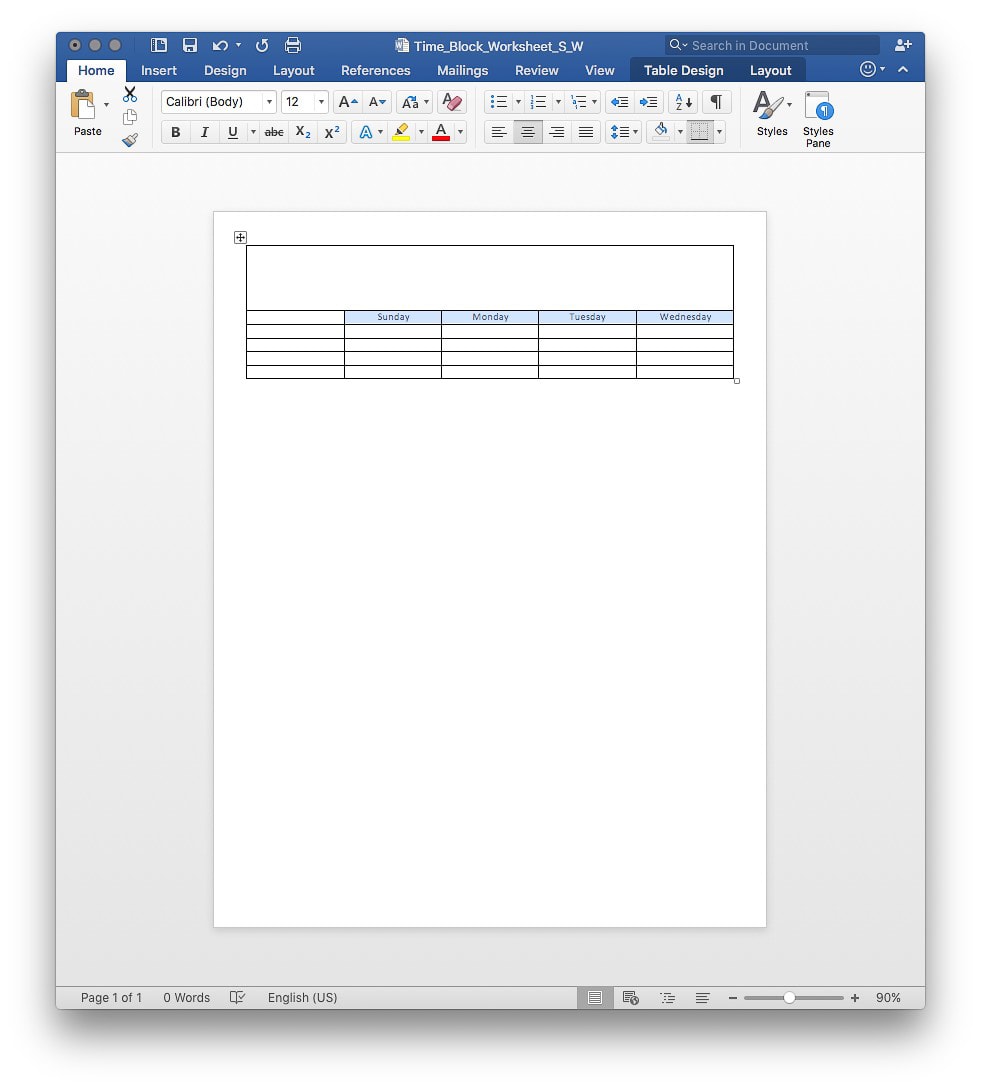
Then change the font to a pretty font, resize the words, and select the bold button to make the text stand out. The font that I used is called Tropical Nights.

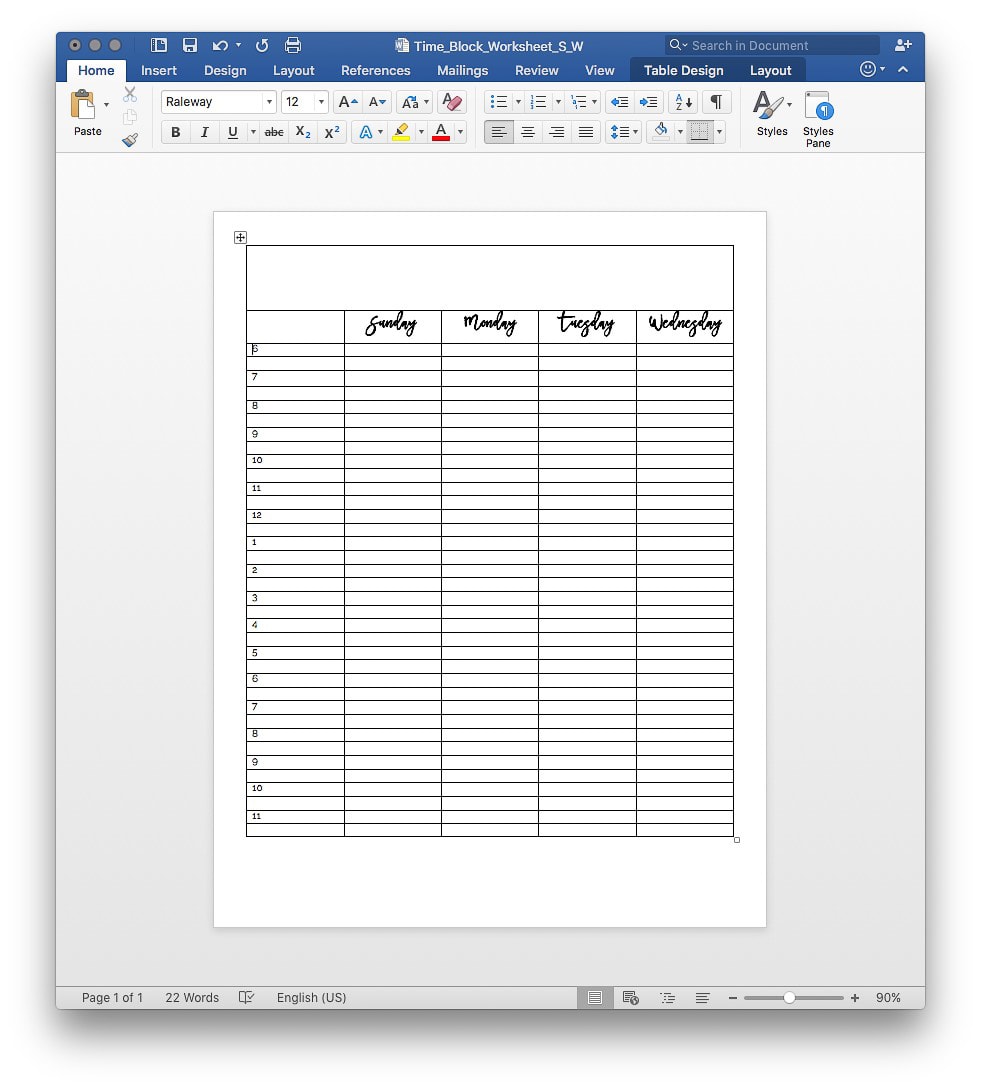
Now you need to add the hours into your worksheet. In the third row in the first column, enter the number 6. I’m starting my time-block worksheets at 6 AM, but if you early-birds want your worksheet to start earlier, go ahead and put in an earlier time here.
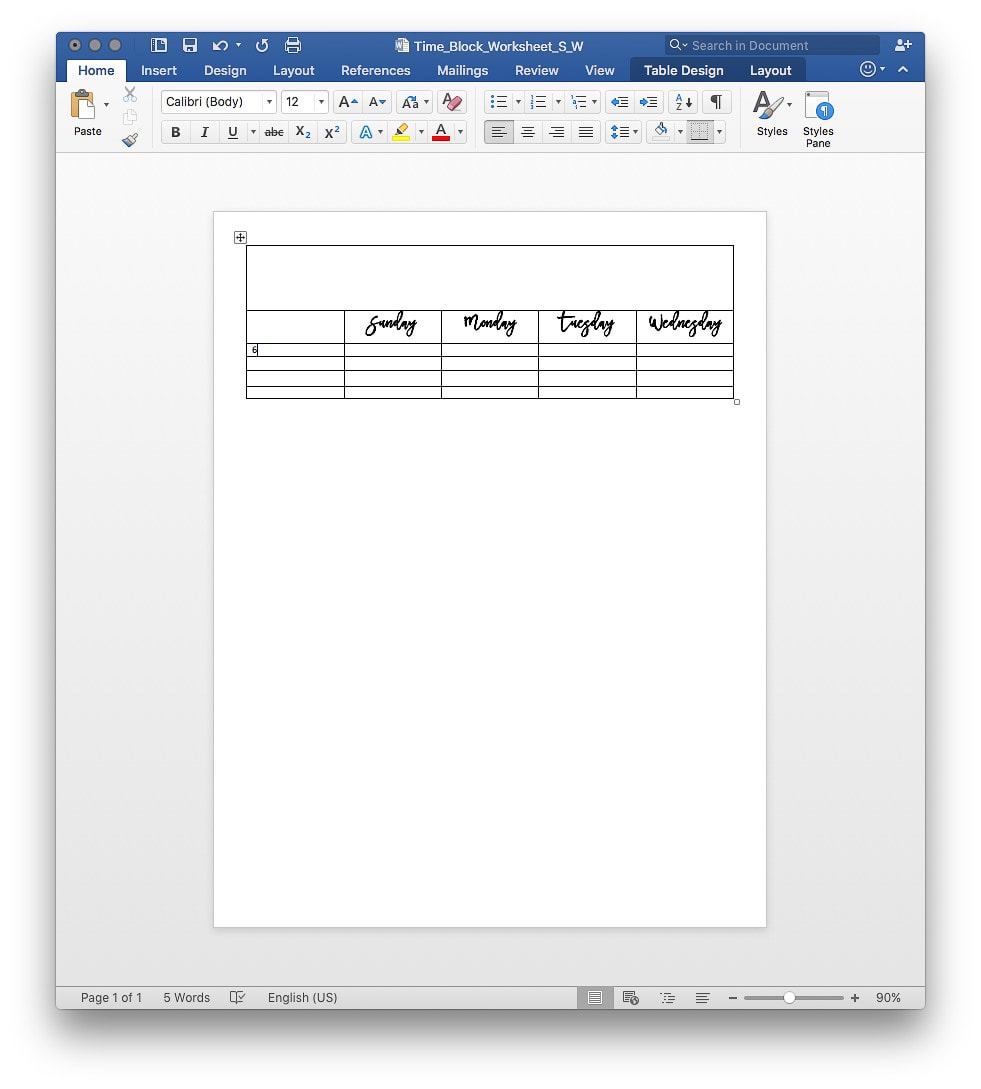
Leave the next row blank and go to row 5. Enter 7 (or the next hour in your time list).

To fill in the rest of the time you need more rows. Click on the “Table Layout” tab and find the “Insert Below” button. Put your cursor in the last row of the table and click that button to add more rows to the table.

Once your rows are added, continue adding the numbers for each hour for however late you want your time-block worksheet to go, making sure to skip a row each time. Mine ends with 11, which gives me a block from 11-12. #Nightowl

You can also change the font for the numbers. I used the font Raleway for my numbers. Make sure that your font is small enough to keep all of your hours on one page. You can change the font and sizing around as necessary
Resize and Adjust
Now that you have a basic structure of the worksheet, it’s time to do some formatting. Highlight all of the numbers in the first column and click the “Table Layout” tab. Click on “Alignment” and then click “Align Top Right” button to move all the numbers to the right-hand side of the column.

The column for the numbers is pretty big and it really doesn’t need to be that big. It’s better to have that extra space distributed throughout the other columns. To resize the first column, highlight all of the cells. In the “Table Layout” tab change the width to 0.32”. You may have to adjust this depending on the size of your numbers, but try to make it as small as possible.

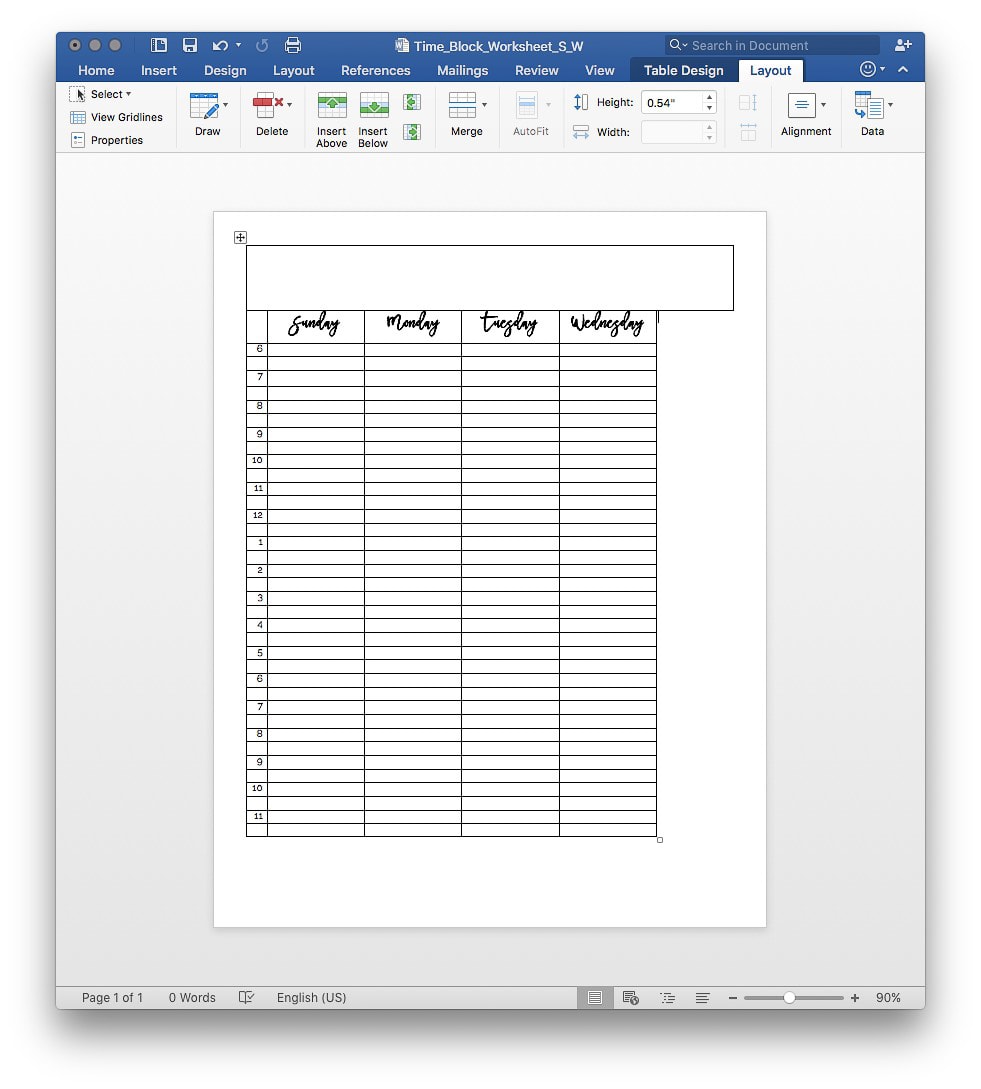
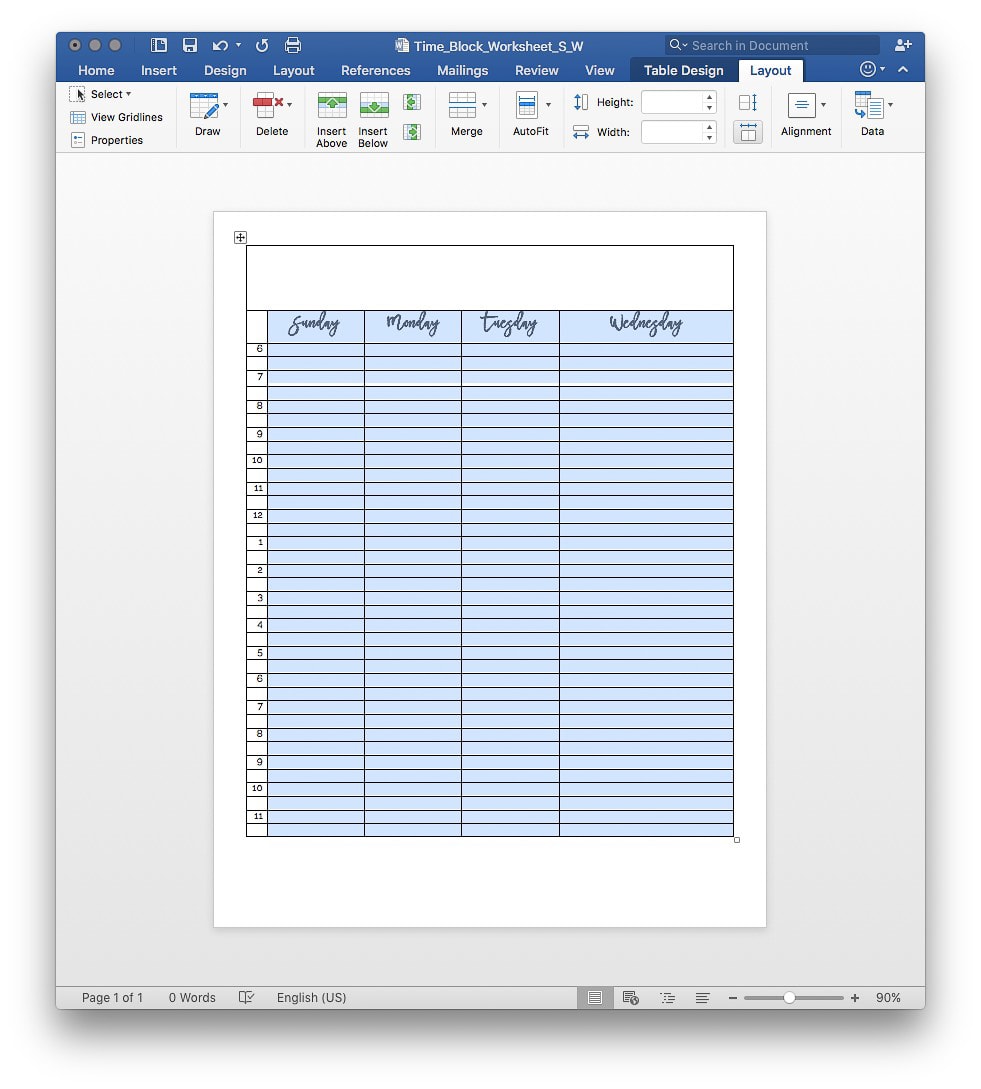
Now you need to resize the rest of the columns to take up the extra space that was just made. Click on the right border of the “Wednesday” column and drag it to make the cell larger. Extend it so that it matches up with the width of your header row.

Next, select all four columns (all of the rows) and in the “Table Layout” tab click “Distribute Columns.” This will make all of the columns the same width in the space that you have.

Add Design Elements
Now that the formatting is looking good, it’s time to add some design and style into your worksheet. The first thing you need to do is add some visual separation between each hour block. At the top of your worksheet, highlight rows 3 and 4 (which are the first hour block in your worksheet) and click the “Table Design” tab. Look for the paint can symbol for shading and select a light color. I’m going to use one shade darker than pure white.
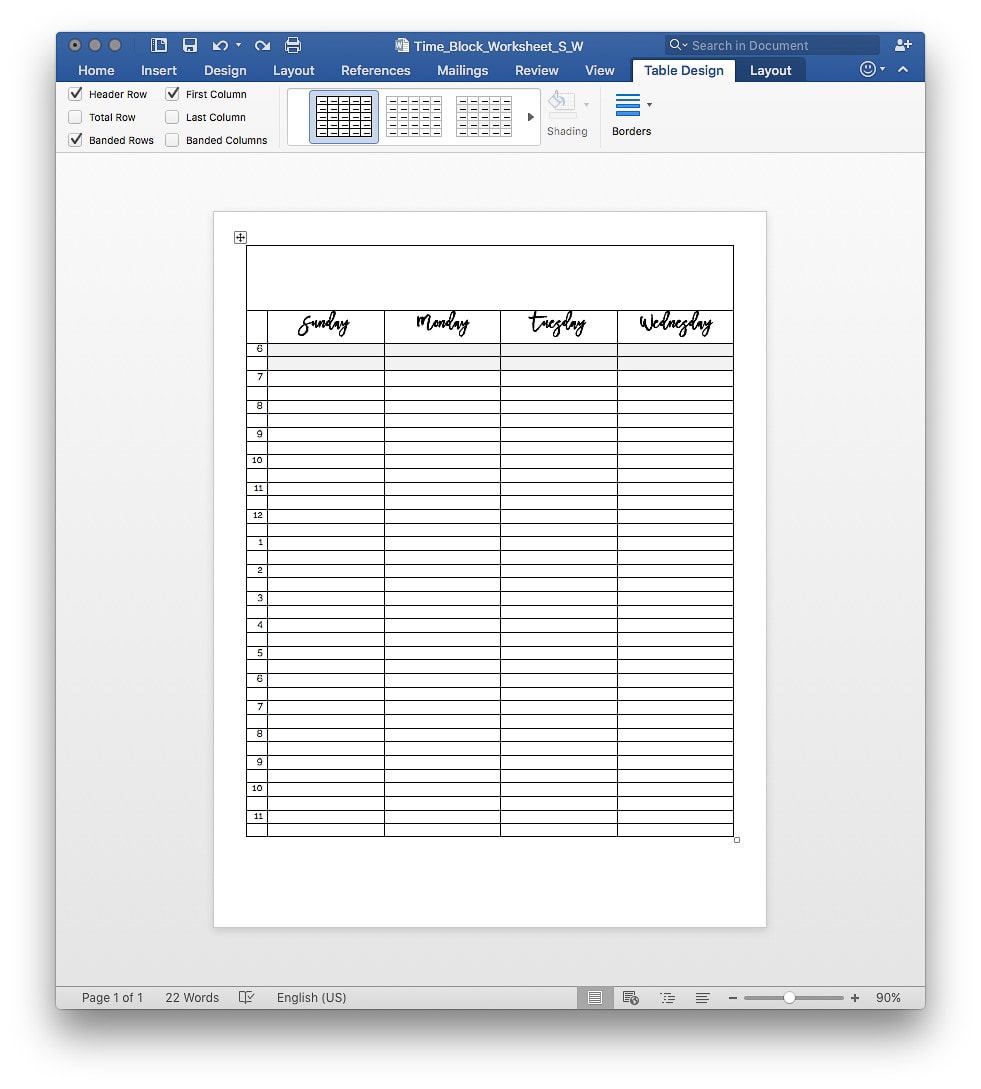
Next, do the same thing in rows 7 and 8 (the third hour block in your worksheet). Continue alternating this coloring scheme until you get to the bottom of your worksheet.

Now that the formatting is complete, you can remove the design guidelines. At the upper left of the table, click on the cursor that appears to select the entire table.

In the “Table Design” tab, select the “Borders” drop-down and click on “No Border.”

Now the worksheet has no lines and looks a lot cleaner.
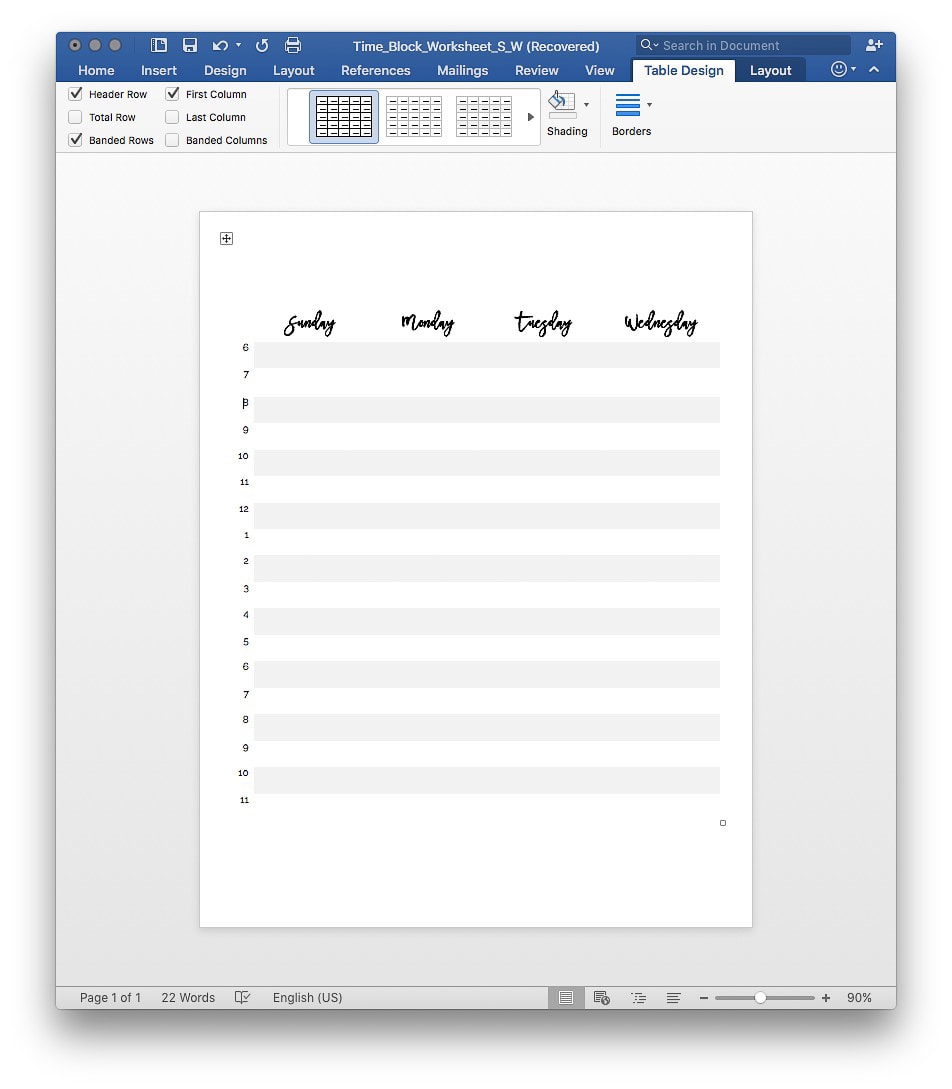
You do want to include a few lines in the design to help separate the days of the week but they should fit in with your design. Select the entire table again and right click. Then click on “Borders and Shading.”

In the “Color” drop-down, select a color that fits in with your design. I chose two shades darker than pure white for my line color. Next click “ok” to close the menu.


Click on the first cell underneath the word “Sunday” and highlight all of the rows until you get to the bottom of the table. In the “Table Design” tab, click on “Borders” and select “Right Border.”
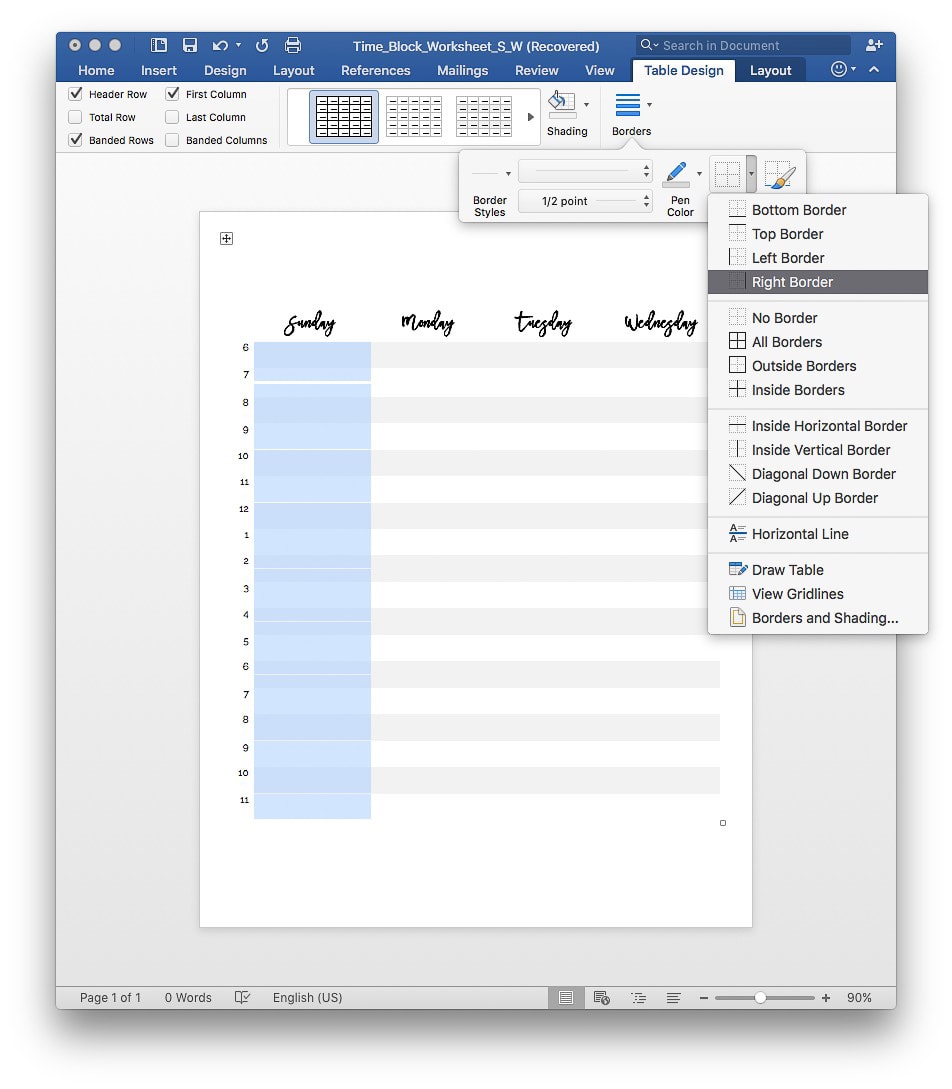

Continue doing this for each column including the last column for Wednesday.

To make the worksheet a little prettier you can change the text colors of the weekdays and also add some decorative graphics.
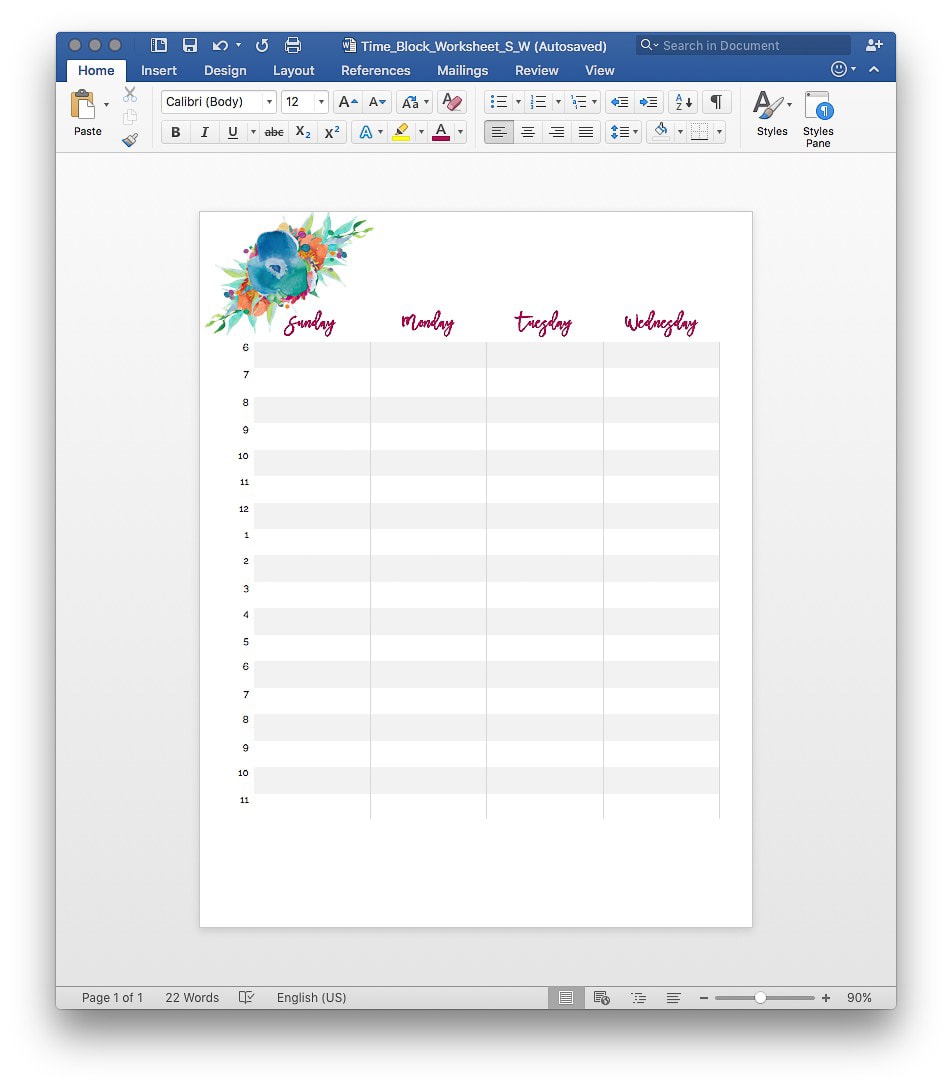
Save your worksheet and create a separate copy so you can make the worksheet for the other half of the week. In the new copy, change the days of the week at the top of the copied worksheet to Thursday, Friday, and Saturday.
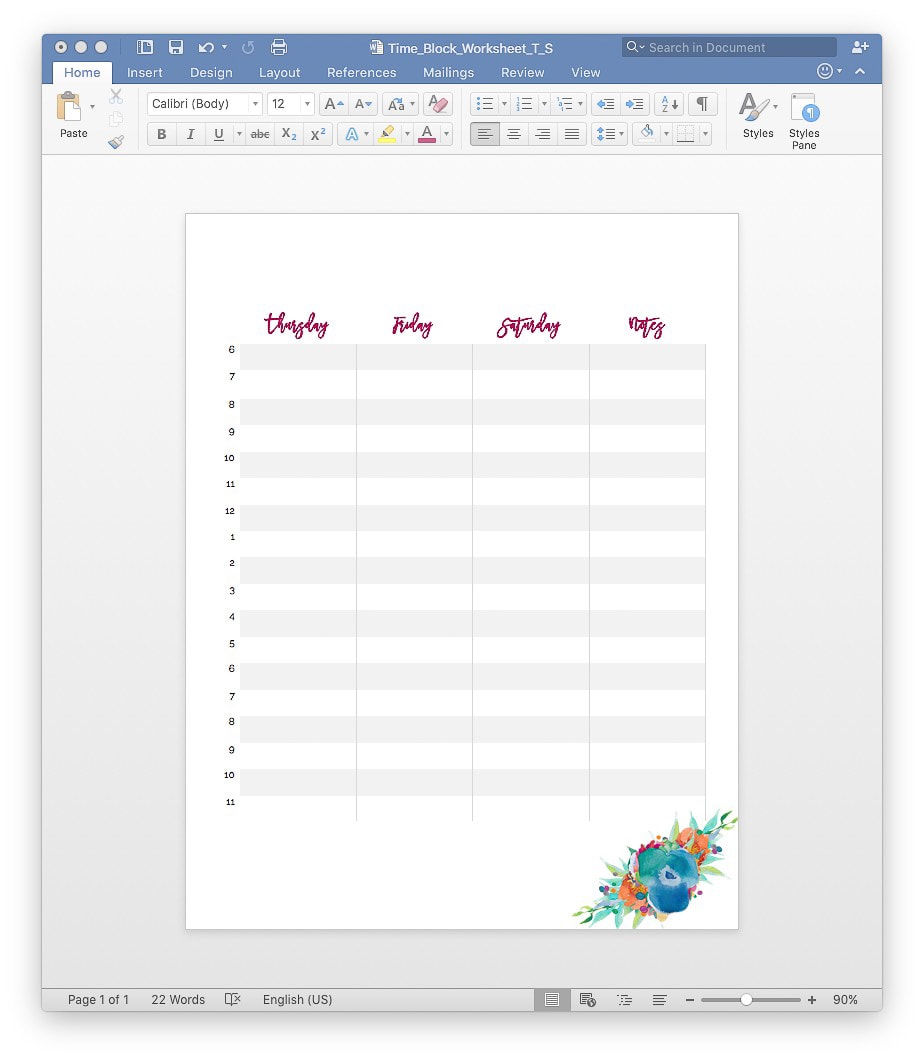
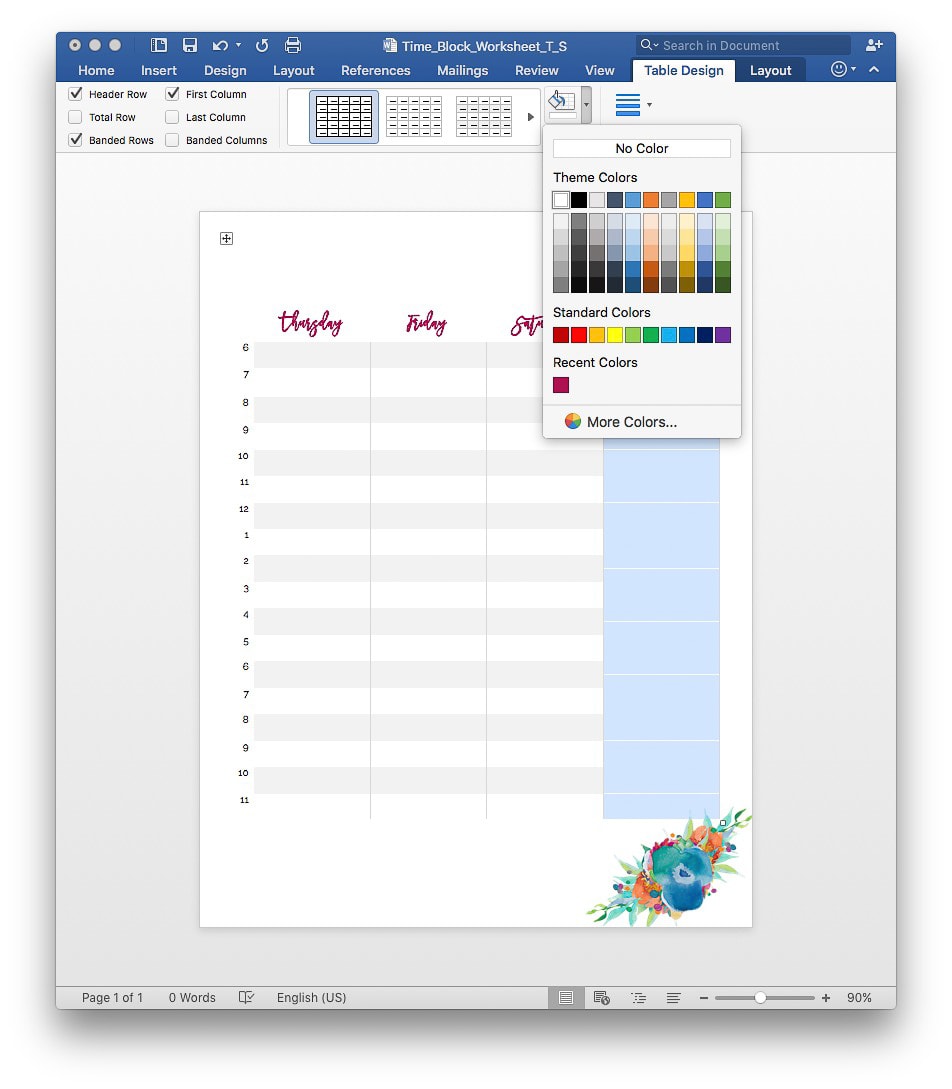

In the last column, change the title to Notes. You can move or change the graphics around if you want. Highlight the rows underneath Notes. In the “Table Design” tab, change the shading to white.
Then you’re done! You’ve created your very own time blocking worksheets.
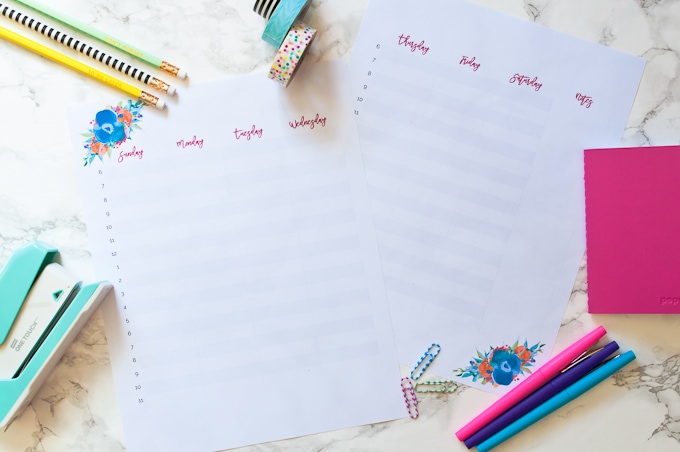
Print out a new set of these worksheets each week and use them to stay on track and make the most of your time.

As an extra bonus, you can download this set of time blocking worksheet for free!
Get the Free Printable Time Blocking Worksheets

I hope you enjoyed this tutorial and give time blocking a try. Let me know in the comments if you would like to see more tutorials like this.




Love this idea. I used this method all though 8 years of college (before computers on school paper you know post civil war days ????). It really does reduce anxiety and show you you have more time than you think
This is a great tutorial.. You are so right, we have so much to do that we can let it get overwhelming.
Thanks for sharing on Peace, Love, Link Up! Looking forward to seeing you next time! : )
Wow, that was a wonderful detailed Printable. It is extremely helpful in setting up Printables. Thank you so very much for your expertise.